Chinese Boiled Peanuts- The Gateway to Becoming a True Southener

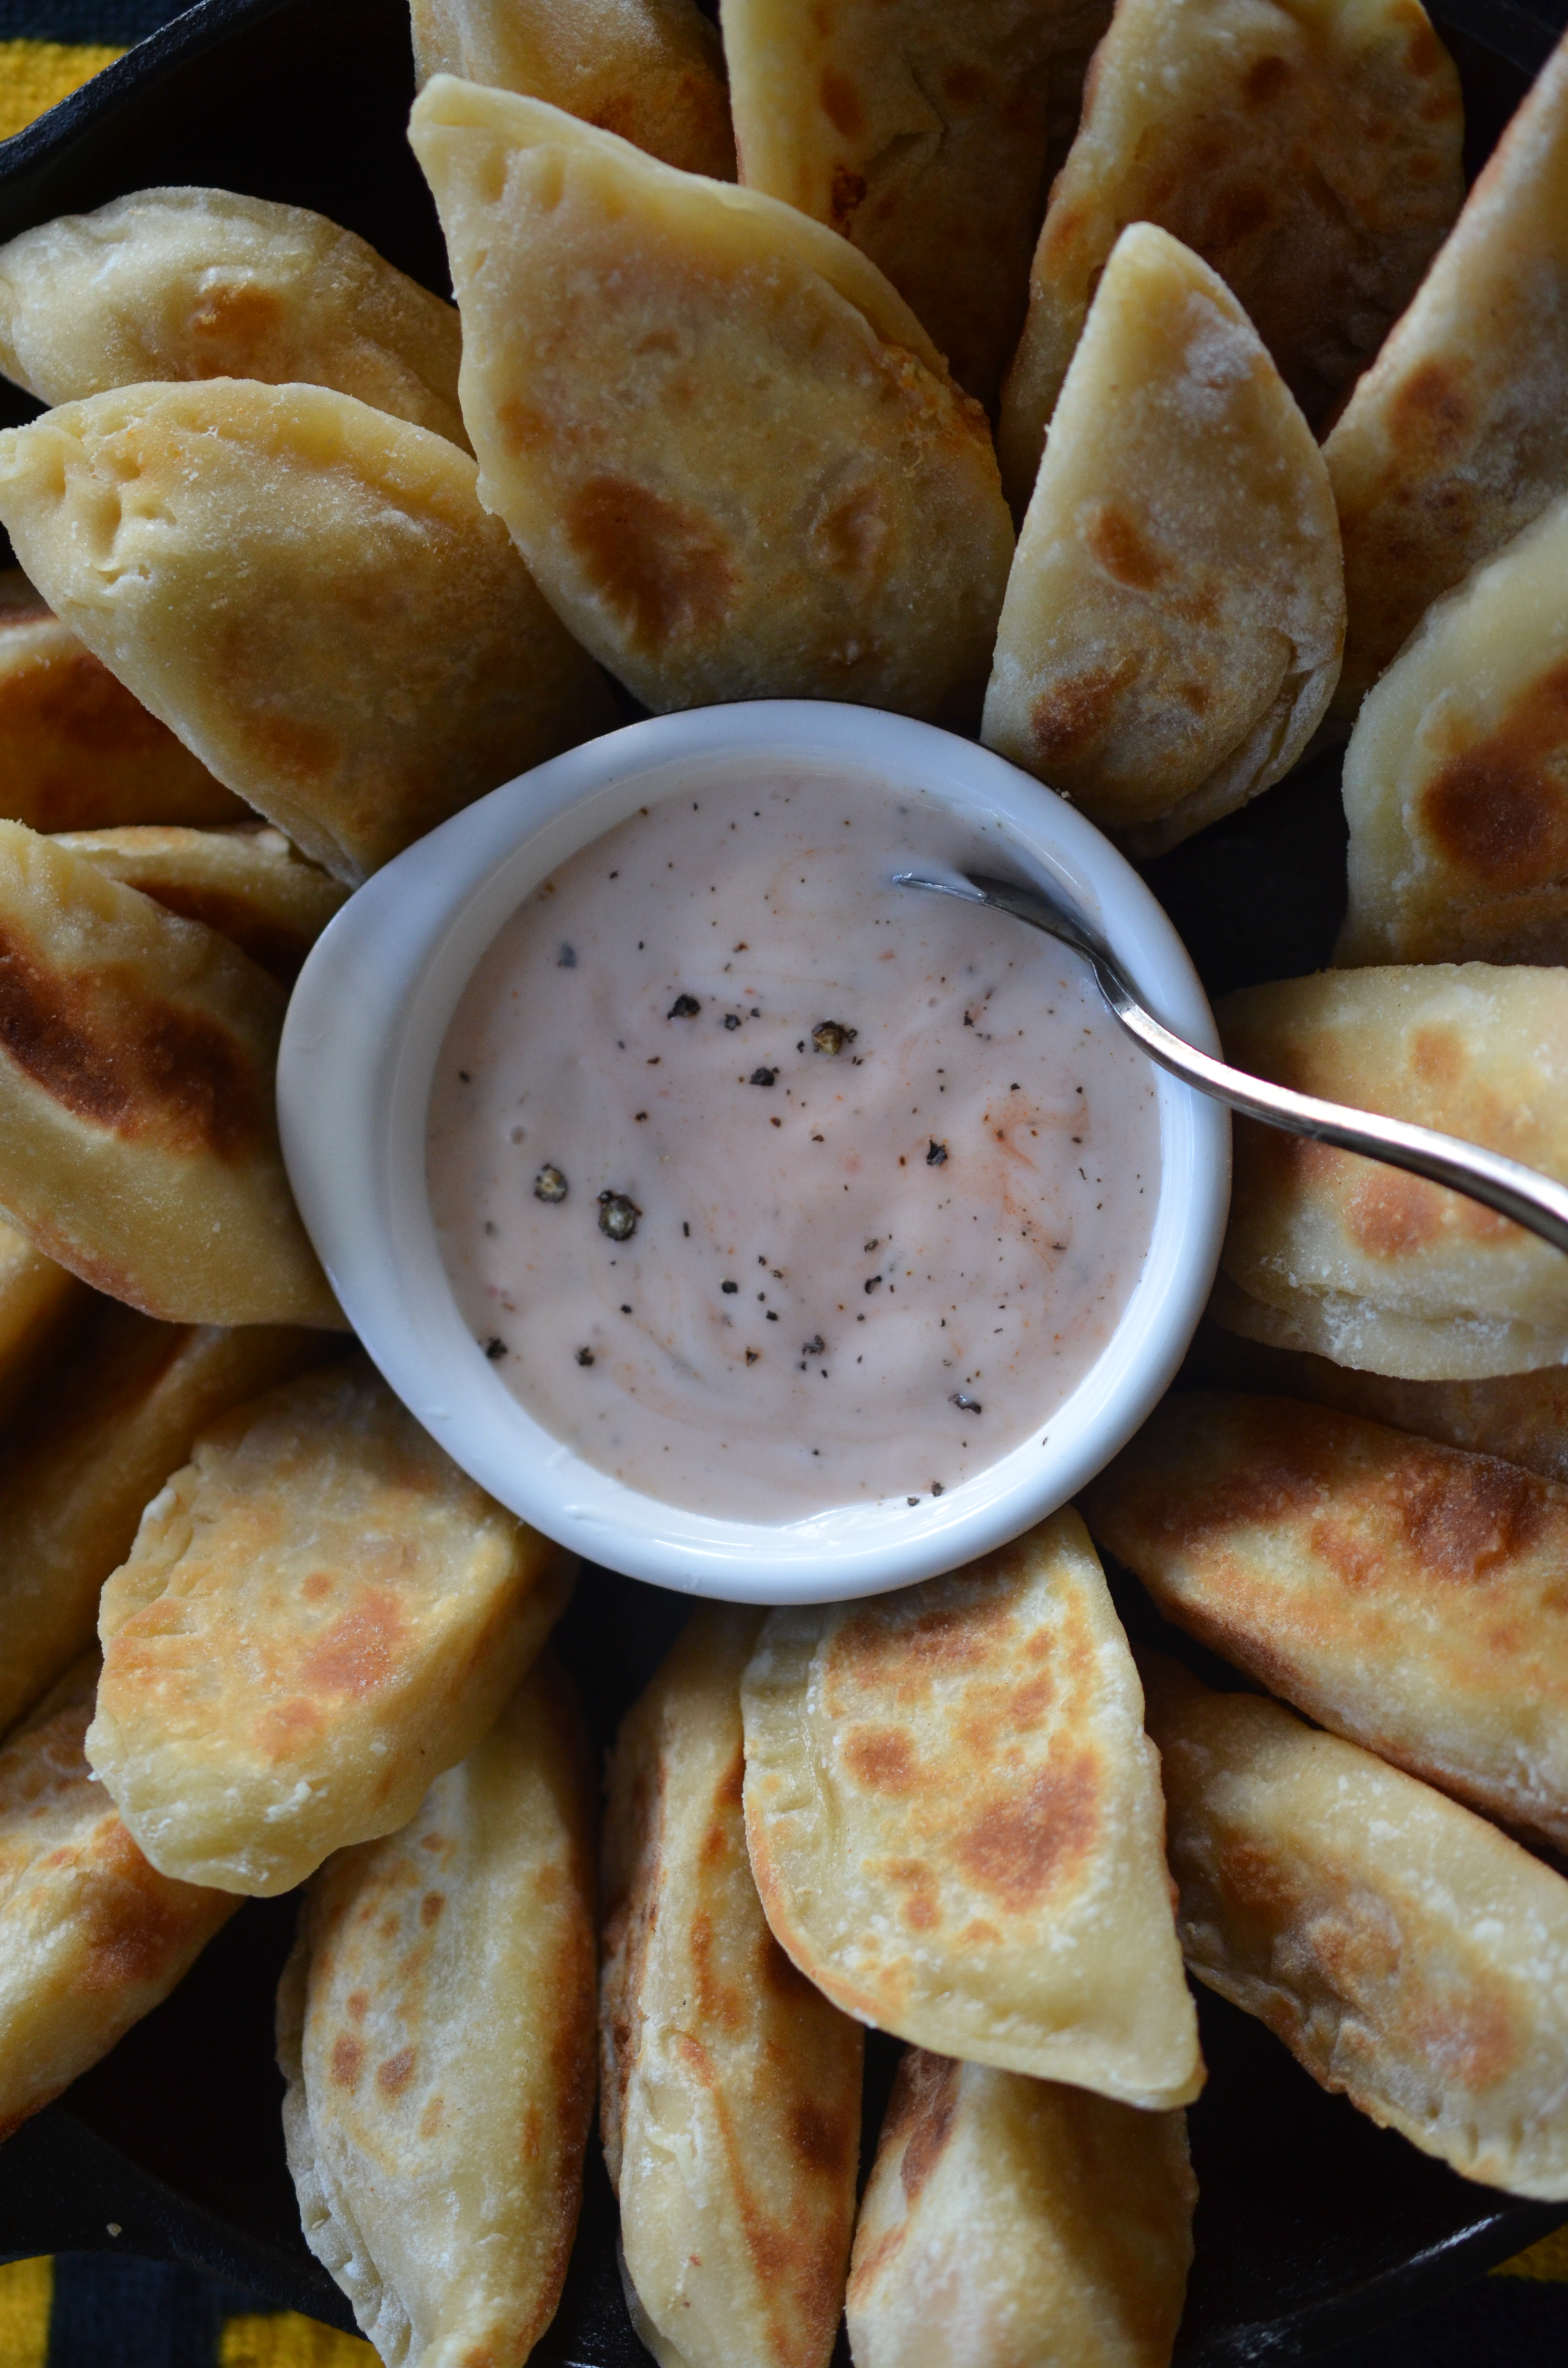
I was born just outside of Philadelphia, in Phoenixville, Pennsylvania. I spent a wonderful 12 years playing in the creek in the backyard, going to the pool every summer day and growing into a young girl fond of the King of Prussia Mall before moving south to Virginia Beach. More fun filled years followed in the southern beach town thru high school before I moved and got swept away and truly “southernized” by the charm of Charleston, South Carolina. I fell in love with the South, the tradition and grace, from the willowing giant oaks filled with Spanish moss to the hospitality of strangers on the uneven cobblestone streets. There were only a few southern ways that I could not adapt- one being those giant mushy goober peas, a southern delicacy – Boiled Peanuts.

DSC_0944

I just could not get passed the soft, gross texture, or that a perfectly good peanut was wasted- how can you possibly beat the innate peanut flavor? However, my husband, who came from even deeper south, Fairhope, Alabama, loves the little boogers and convinced me to make some. I bought a one pound bag and made two different flavors- Cajun and Chinese. The raw green peanuts are harvested late summer but you can still get raw dried peanuts thru the year in most groceries. I immediately had a change of heart when I tasted one of the Chinese boiled boogers.

DSC_0865

Ingredients
1/2 pound raw unshelled peanuts
1/4 cup dark soy sauce
2 tablespoons sugar
1 ½ teaspoons salt
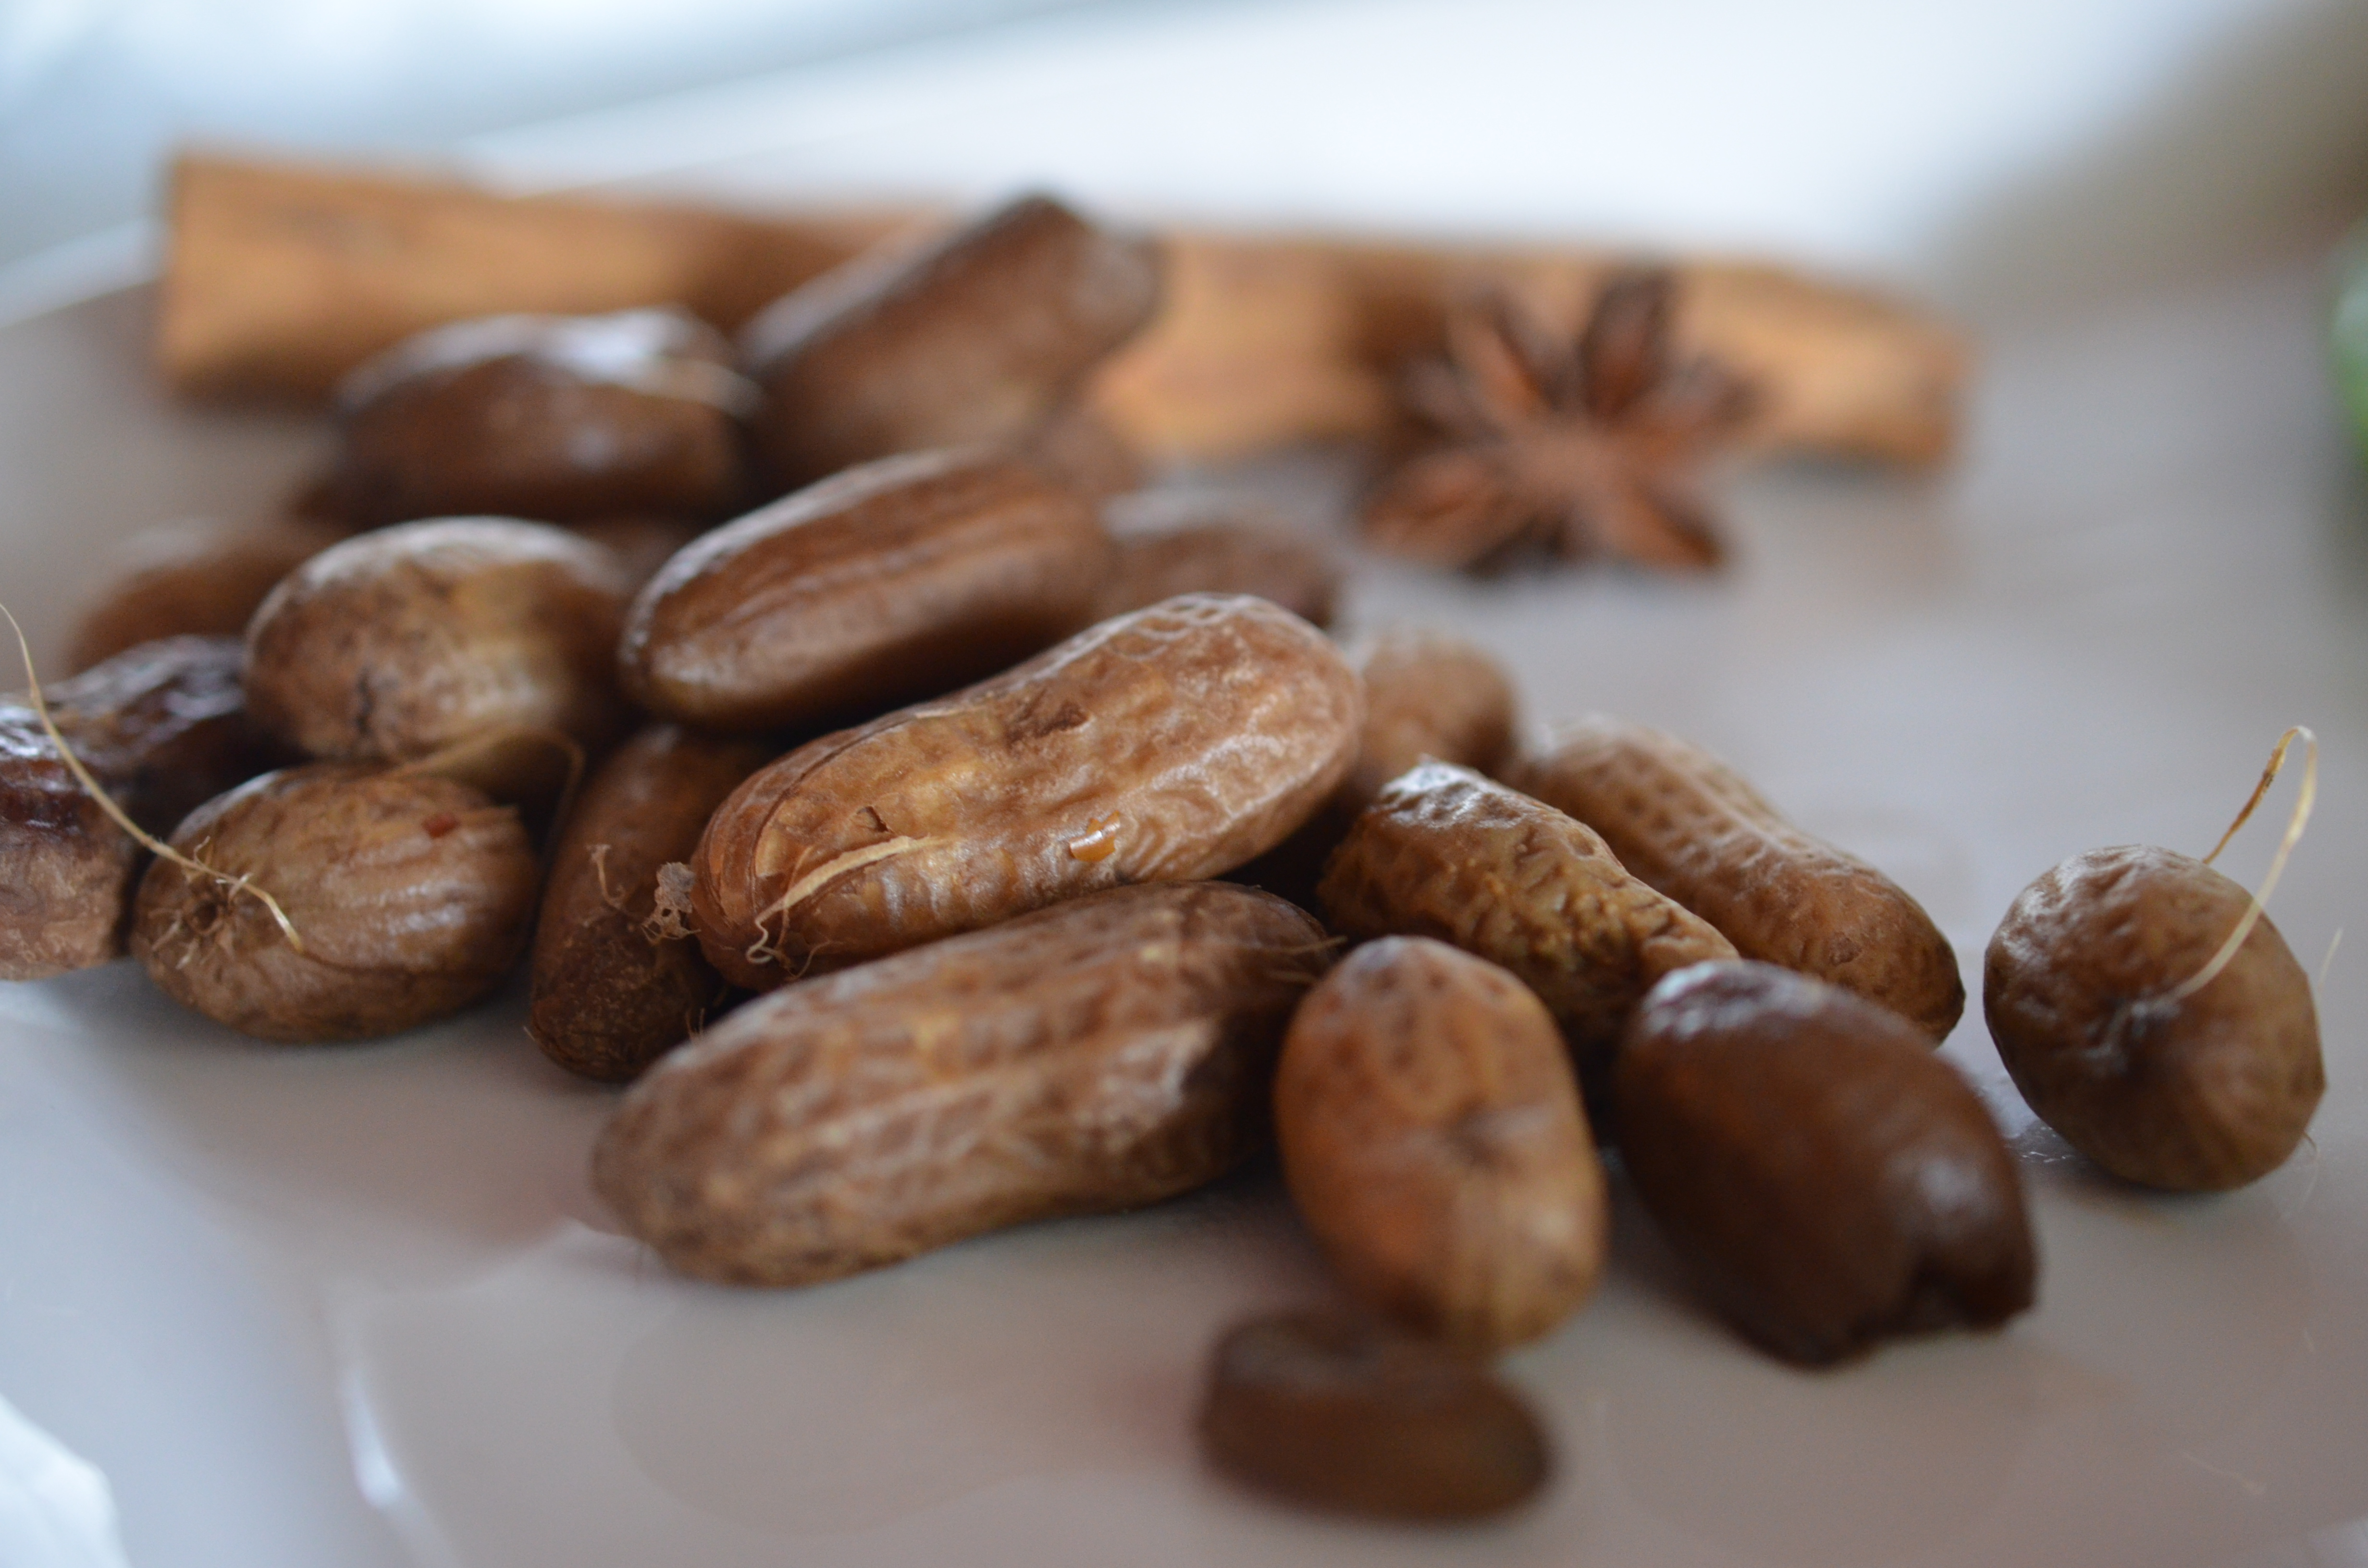
1 stick cinnamon, about 3 inches in length
1 star anise
1 clove
1 dried chili, optional

Directions
Place the peanuts into a large pot and fill with water, stirring to remove the excess dirt. Drain into a colander, rinse and repeat 3 times. In a heavy bottom pot add the peanuts and pour just enough water to cover. Stir in the soy sauce, sugar, salt, cinnamon, star anise, clove, and dried chili.

Bring the mixture to a boil over high heat and then lower temperature to a slow moving boil. Cook for 4-5 hours, checking occasionally that liquid is still covering the peanuts. Add water as needed and cook until desired tenderness. Another method is to use a slow cooker on low for 12 hours.

Serve the peanuts warm; reserving the liquid to store the peanuts in, if you have any leftover. Reheat on a stove with the braising liquid to serve later.

DSC_0873

Like any good southerner, I can accept fault with grace- I was wrong about the celebrated boiled peanut. I fell in love with these suckers. The Chinese flavor profile enhanced the traditional peanut flavor that I could not part with, absolutely addictive.

DSC_0934

With a pile in front of us, Sir Wes and I did not stop eating them until they were gone; barely even a face wipe or a sip of beer. I knew at this point of indulgence that although I have a birth certificate from Pennsylvania, I was truly a Southern girl.

Advertisement

Buffalo Chicken Pierogies

Sheez- fall has come and is almost gone.  We just finished up with the Epcot Food and Wine Festival and our big event of the year, the Walt Disney World Service Celebration, which is a crazy busy time of year and has made time fly by.  Sir Wes was such a champ to take on most of the house chores and help me out so much thru the last few months so I wanted to do something special for him.  Which naturally translates to cooking him something.

DSC_0822

I saw this recipe at Soph n’ Stuff and could not resist another buffalo chicken adventure.  I have mentioned Sir Wes can’t go without wings for more then 2 weeks, so I try to find ways to switch it up.

DSC_0814

Pierogie Dough
Ingredients

•3 cups all-purpose flour
•1 teaspoon salt
•1 egg
•3/4 cup water
•2 tablespoon vegetable oil

Preparation

Using a food processor, add all ingredients and pulse, slowly adding water until a solid dough forms.  Move the dough out onto a floured countertop and knead a few times until smooth.  Top with plastic wrap and allow it to rest for 30 minutes before rolling and cutting it into rounds.

DSC_0741

Buffalo Chicken Pierogie Ingredients

•1 batch pierogie dough, cut into 36 rounds
•2 cups unsalted mashed potatoes
•1/4 cup frank’s red hot sauce
•1 skinless boneless chicken breast, cut into 1 inch cubes
•1/2 cup all-purpose flour
•1 teaspoon chili powder
1 teaspoon cayenne
1 teaspoon garlic powder
•1/2 teaspoon kosher salt
1 teaspoon fresh ground black pepper
•1 egg
•1 cup vegetable oil, for frying
•1/4 cup blue cheese, crumbled into small nuggets
•carrots and celery sticks, for garnish

Preparation

In a bowl, add frank’s red hot sauce to potatoes and combine with a fork. Set aside.

Blend flour, spices, salt and pepper in a medium bowl. In a small bowl, whisk egg. Take chicken pieces and coat each in egg mixture, then dredge through flour mixture, coating well.

Heat oil in a medium saucepan over medium-high heat. The oil will reach temperature when you drop a pinch of flour into the oil and it sizzles. Working in small amounts at a time, fry the breaded chicken pieces for 2-3 minutes on each side, until the breading is golden brown. Set the pieces aside to drain on a paper towel.

DSC_0747

To assemble the pierogie, place a small amount of the potato mixture in the middle of a dough round. Place a chicken piece and a nugget of blue cheese in the center and fold dough over, sealing the edges with a little water, pressing firmly.

Once they are assembled you can either freeze for later or cook the pierogie right away. Frying them, rather than boiling, will retain the crispiness.

DSC_0807

Pierogies are such a fun, easy thing to make, the kids will love getting their hands dirty with them!

DSC_0826

And more importantly our supportive, wonderful husbands will devour them!  Watch out Mrs. T!!

Here We Go! Here We Go! Steeler’s Peach Salsa

Sir Wes is lighting up the grill this weekend to get his wings on.  As you must know it is the long awaited NFL Kick-Off Weekend.  With coals already burning, I thought I would cut line and grill some peaches before the wings hit the grill for a quick salsa.

DSC_0216

I do enjoy watching football, but tend to get distracted easily.  I sometimes find that  can watch all four quarters and not be able to tell you what happened.  Not all games, but some…

DSC_0190DSC_0184

Steeler’s Grilled Peach Salsa

  • 1 1/4 pounds ripe peaches, (3-4 medium), pitted and sliced in wedges
  • 1 teaspoon canola oil
  • 2 tablespoons finely chopped onion
  • 2 tablespoons red bell pepper
  • 1 small jalapeño pepper, seeded and finely chopped
  • Zest and juice of 1 lime
  • 1/4 cup chopped fresh cilantro

Prepare grill, charcoal or gas, to medium heat. Brush the peaches sections lightly with oil.  Place the peaches directly on the grill and cook until charred and softened, 3 to 5 minutes per side. Remove from the grill and cool in refrigerator.  Meanwhile mix the onions, peppers, lime juice, cilantro and a touch of salt.  When cooled, chop the peaches into 1/4-inch pieces and add to the mixture, tossing delicately.

This salsa works will with chips as well as grilled fish, chicken, pork and anything else that might be on your game day table!

DSC_0214

About half way thru the football season I will start to focus more about what is on the table then what is on the TV.   By 3/4 thru the season the only thing that keeps me tuning in is the Steelers and my fantasy teams.  I am a tough competitor (I like to think anyway) in 2 Pigskinner Pick ‘Em Leagues, the owner of one fantasy football team, and assistant coach to another.  By this late into the season I have started planning the Superbowl Menu and tuning into Real Housewives in lieu of the 8:00 game.

DSC_0209

That’s pretty much my football season, but for this weekend I am all in!

By the way- did you notice how shiny and pretty the Notre Dame Gold helmets are?  Here we go! Here we go!!

The Art of the Pizza Roll, Tailgate Chefs- Game On!

Game Day, Game Day, Game Day!!  College Football is Kicking Off!!  I believe in the Football/Tailgate Cuisine Movement, support it 100%!  I love the playfulness of the food, the comradery it inspires between guys and their grills, the artisanal care that nonchefs are putting towards the pop up tailgate table.  The craft direction is strong within this mouthwatering cuisine.  It is downright hard to find someone that does not have fond memories of tailgate food.

DSC_0713

Thank you Emily for the deliciousness, for the loving tenderness you put towards this football food recipe.

DSC_0671

Perfect Pizza Crust (if you’re in a jam, buy the premade dough in your grocery store)

  • 2 cups bread flour
  • 1 1/2 tsp. instant yeast
  • 1 tbsp. extra-virgin olive oil
  • 3/4 tsp. salt
  • 1 cup hot tap water

In a stand mixer with a dough hook attachment place the flour, yeast, and salt. Quickly mix together the dry ingredients.  Pour in the oil and hot tap water and stir for about 10 seconds. The dough should be wet enough to leave a little residue on the side of the bowl at this point but not so wet that it’s gooey. Adjust if needed with a little flour or tiny bit warm water. Knead for about 5 minutes until the dough is smooth and elastic. Dough should be tacky to the touch. Do not add any flour or water after the dough is done mixing.

In a deep oiled mixing bowl, place the dough ball and place plastic wrap or damp towel directly over the dough.  Allow to rise until doubled in size, I set mine outside in the warm air, but near a window, or even a warm oven will do. Once risen, punch dough to deflate it.

  • 1 cup Pizza Sauce
  • 1 ½ cup mozzarella cheese
  • 4 Tbsp. melted butter
  • 3/4 Tbsp. garlic bread seasoning

Make pizza crust according to directions and let raise once. After it has risen, turn it onto a counter sprayed with cooking spray and roll it out thin, in the shape of a rectangle. Spread sauce; you may only need 1/2-3/4 cup but you can use the rest for dipping after the rolls are cooked. Add cheese and start rolling the dough tightly in a neat line. When there’s about an inch of dough left, stop rolling and pull the edge up and over, pinching it closed.

DSC_0632

With a serrated knife, gently slice about 1-inch thick. Lay the rolls in a 13×9-inch baking pan, sprayed with cooking spray. You should get about 12 rolls out of the dough. Cover lightly and let the dough rise again until about doubled.

DSC_0652

Preheat oven to 375 degrees. Combine melted butter and garlic bread seasoning and brush over the tops of the rolls. Bake for about 17-20 minutes.

DSC_0680

Serve warm either plain or with extra pizza sauce for dipping.  Reheat any leftovers in the same fashion you would with leftover pizzas. Or if you are taking to the tailgate party, wrap them in a sheet of foil and warm them on a low heat grill.

DSC_0702

We are heading out to the Alabama and Virginia Tech game today and can’t wait to see what we find at the lot full of tailgate parties!! Roll Tide!

Cilantro Jalapeño Corn Cakes

Maybe you can tell I like Southwest/Mexican food- Mexican Shrimp Ceviche, Mexican Corn and Poblano Chowder, Texas Caviar, Spanish Turkey Meatball Stew or even Peanut Butter Stuffed Jalapeños.  Pretty much, if it has cilantro I am guaranteed to love it.  My husband knows that after a bad day for me, chips and salsa are the best Band-Aid.  The good kind of salsa, fresh loaded with cilantro with warm thin salted corn tortilla chips.   So admittedly, I am a sucker when I see dishes with cilantro or Mexican/Latin flavor profiles.  Enter these irresistible southwest spiced corn cakes.

DSC_0331

We were smoking a few chickens and needed a side, both of us agreed that a corn cake would be perfect side for the summer cookout.  And absolutely, lets add cilantro.

DSC_0347

Ingredients

  • ¾ cup flour
  • ¾ cup cornmeal
  • 2 teaspoon sugar
  • ½ teaspoon baking soda
  • ½ teaspoon kosher salt
  • 4 ears or 2 cups fresh corn kernels, separated
  • 1 egg
  • 1 jalapeño pepper, seeds removed
  • 1 clove garlic
  • ½ cup cilantro
  • ½ small red onion
  • ½ cup low fat buttermilk
  • 2 tablespoon butter
  • 1 ½ teaspoon fresh lime juice

DSC_0321

Instructions

1. Mix the flour, cornmeal, sugar, baking soda, and salt in a medium mixing bowl.

2. Using a food processor, combine only 1 cup corn, egg, onion, jalapeño pepper, garlic, cilantro, buttermilk, and butter and pulse until finely chopped but not smooth.

3. Fold the pulsed corn mixture into the flour mixing bowl and mix in the remaining cup of corn kernels and lime juice.

4. Heat a heavy bottom skillet over medium high heat. Spray with pan spray or use a touch of olive oil and scoop ½ cup cakes into the pan.  Brown on first side and flip to other, each should take about 3 minutes.

This will make about 8 small pancakes.

DSC_0370

Garnish with a simple avocado salad, fresh tomatoes and sour cream, smoked pork or chicken, even a seafood ceviche.  Try making them with a ¼ cup measure and use as a canapé.

DSC_0316

If you happen to have leftovers, they freeze great- just wrap them tightly to avoid freezer burn.  Reheat the thawed cakes in an oven set at 350, for 10-15 minutes.

DSC_0319

These are perfect for the end of summer, into fall get together.  Even reheating on a tailgate grill on a piece of aluminum foil, anyone ready for football?

Buffalo Chicken Balls

March Madness is screaming for its own version of tailgate food.  What a better answer then some balls!  Let’s face it; wings go with sports, all sports, they’re almost a food group.  It’s a rite of passage, watch a game and eat wings (and of course drink beer).  As with all superior food groups, chefs strive for reinterpretations and tributes to the pedestaled dish.

DSC_0106

These are surely a way to a man’s heart, and completely loved by the fussy woman that dislikes gnawing on bones.  I do have a few girl friends that hate wings because of the tiny veins found in bones and detest the dirty finger result of eating wings.  My answer- Buffalo Chicken Meatballs.

DSC_0084

Ingredients

  • 1 pound ground chicken
  • 2 ½ teaspoon buffalo wing seasoning
  • ½ teaspoon kosher salt
  • 1 egg
  • 2 tablespoon breadcrumbs
  • ¼ cup blue cheese crumbles

 Seasoned Flour

  • ¼ cup all-purpose flour
  • ¼ teaspoon buffalo wing seasoning
  • ¼ teaspoon kosher salt
  • ¼ teaspoon onion powder
  •  ¼ cup favorite buffalo sauce

*Beer

Directions

Open a beer.

Combine ground chicken, seasoning, salt, egg and breadcrumbs thoroughly.  Place the mixture in the freezer for a few minutes so the mix becomes easier to work with.  Use a small scoop to make between 14- 16 balls, the size of a ping pong ball and place on a cookie sheet.  With the back of the scoop or a tip of a spoon form a well in each ball.   Fill the wells with roughly a ¼ teaspoon of blue cheese.  Drink your beer. Gently reform the chicken into a rounded sphere, focusing on keeping the blue cheese in the center.   Return the balls to the freezer for about 15 minutes to set the shape.

wells

Preheat the oven to 350.  Combine the seasoned flour ingredients in a small bowl and place a sauté pan on the stove over medium high heat.  If you have an Aebleskiver pan use this- I love using mine for meatballs as it gives a beautiful sear all around the meatball. Take a sip of beer.  Add a tablespoon of oil to the sauté pan, or a few drops of oil to the Aebleskiver wells, while oil heats roll the meatballs in the seasoned flour coating them completely.  Place the balls in a hot pan and sear the meatballs evenly until the outside is well browned.

DSC_0069DSC_0071

Swig your beer.  In another small bowl put 2 tablespoons of buffalo sauce.  Remove the meatballs from the sauté pan and place into the buffalo sauce, rolling them around to coat evenly.  Place the balls on a baking sheet and pop into the oven for 10-12 minutes until the internal temperature reaches 165 degrees.  Remove from oven and serve.   This makes enough for 2-5 friends, depending upon the size of the appetite and the other dishes on the table!

DSC_0097

Serve with blue cheese dressing, ranch, celery, carrots or whatever you love with wings (beer).

DSC_0087

March Madness, Buffalo Chicken Balls, Clean Fingers, Happy Wife and Beer- Husbands delight!!

DSC_0128

Happy St. Patricks Day, and Happy Selection Sunday- GO ACC & SEC!!!!!!

South Carolina Deep Dish Pizza

This is a dish from my brother, Sir Ryan’s South Carolina kitchen that has been talked about for a few years.  Over time he has worked on convincing me to give it a try, and though it sounded fabulous and I wanted to make it, it just never happened.  While Ryan and his family were visiting over the Christmas holiday he put one together and proved that this pie was all that.  We couldn’t resist giving it another try ourselves a few weeks later and for once the tables turned and I found myself calling the novice chef brother of mine for advice.

DSC_0188

Make this as simple or complicated as you like, buy premade dough or make it fresh yourself, buy pizza sauce or create your own.  For me this is a fast, decadent meal, and I prefer to keep it that way.  Maybe if I had some Jersey tomatoes available I would make my own sauce.

DSC_0085

  • 3 tablespoons olive oil
  • 1 ½ ounce grated parmesan cheese
  • 1# Pizza Dough, make it fresh or buy premade from the market
  • 10 ounces pizza sauce
  • 2 cups shredded mozzarella
  • 2 ¼ ounces turkey pepperoni
  • 4 ½ ounces (1 cup) cooked turkey sausage crumbles
  • 1 green pepper, small diced
  • 1 medium yellow onion, small diced
  • 1 tablespoon chopped garlic
  • 2 tablespoons julienned basil

DSC_0098DSC_0104

Preheat oven to 350.  Sauté the garlic, peppers, onions and basil until fragrant and set aside. Gather the remaining mise en place and 9” spring form pan, or another deep round pan you have in your kitchen arsenal.  Coat the pan with olive oil and dust the parmesan cheese evenly around the surface.  Place the dough ball in the pan and push the bulk of the dough towards the edges.  Start the layering process with a sprinkling of shredded mozzarella, followed by the pizza sauce and then the meat and vegetable toppings.  Apply pressure to the toppings, causing the dough to move towards the edge and grow up the pan.  Top with cheese and layer in the same order, each time pushing down to move the dough up the sides of the pan.  End the layering with a healthy amount of cheese and a dusting of parmesan.  Bake for 60- 70 minutes, getting the top to be bubbly, golden, mouthwatering perfect.

DSC_0134

This is a pretty massive deep dish, certainly enough for 4 filling servings.  After removing it from the pan (the spring form pan makes the removal so easy), the pie just looks sinfully irresistible.

DSC_0207

Easy for a big game, a Friday family night or even a hump-day perk.

Just a reminder that you can learn from anyone- Thanks Sir Ryan for treating us to this amazing pie!

Barbeque Chicken Cornbread Ebelskivers

Ever had an Ebelskiver?  They are basically a stuffed pancake ball, think of a flapjack with your favorite topping turned into a popper.  The Danish are credited for this traditional sweet breakfast treat, originally stuffing them with sweet cinnamon apples.  While the original apple flavor is hard to beat the versatility is seemingly endless. 

In honor of professional football starting this weekend (Go Steelers), I thought I would try a tailgate friendly Ebelskiver.  BBQ chicken and cornbread are two common dishes found at these football celebrations, and both would be perfect for an Ebelskiver.  

BBQ Chicken Cornbread Ebelskiver

Toss the chicken, barbeque sauce and scallions together in small mixing bowl.  Place your Ebelskiver pan on medium low heat.  When it is warm, add a tablespoon of batter into a well.   Add a tablespoon of the chicken mix into the center of the batter filled well.  Allow to cook for a few minutes and carefully rotate with 2 wood skewers.  Allow to cook another 2-3 minutes.   Repeat with remaining batter and filling.  This recipe makes about 16 Ebelskivers.

Does anyone else have to throw out the first pancake they make?  The first Ebelskiver you make, might not be the prettiest, but by the end you fill find your “juju”.    You can make the Ebelskivers the day before and reheat them in the oven the next day, great for a busy Sunday. 

These little guys can be made sweet or savory, how about chocolate peanut butter or maple walnut?  Turn them into savory with ham and gruyere or even turkey and brie.  Use pancake batter for sweet and lesson the sugar for savory. 

These are a great answer to the tired slider.  The poor slider is getting a bad rap for overuse, but we just can’t let it go-

You can buy a pan here– I recommend this one as opposed to others – the nonstick is durable and I have had a lot of luck with mine over the last 3 years-

They are simple enough to get the kiddoes involved as well.   The one thing I would warn everyone is….never put them on menu for 100’s of people.  It is just not a good scene- Ebelskiver for 800 people anyone?  Never again!!! 

Here’s to an injury free and exciting football season!  And Go Steelers!!

Clay Roasted Herb Chicken

With the Fall season fast approaching, evident in all the magazines that have apples or pumpkins on the covers, the football fever that is spreading like wild fire, and the mad race to get the first Pumpkin Latte from Starbucks- who wouldn’t be ready to break out the jeans and the indulge in the comforting fall food! 

One of my favorite dishes to cook thru these months is herb roasted chicken- I just love the way the scents fill the house.   Over the last winter holiday, I picked up a Roasting Clay Kit from William-Sonoma and decided to finally use it to kick off the first College Football Weekend with a roasted chicken.  Unfortunately- William-Sonoma no longer sells the kit, however, one of these will be a little easier and equally tasty, I am sure.  Just perhaps not as fun. 

We have a jungle of basil and rosemary growing in our back yard, which filled the bird quite well.   Add an onion, cracked black pepper, a few tablespoons of butter smeared over the chicken, a healthy dose of kosher salt and the bird is ready. 

Just wrap it with some butcher twine so it cooks evenly and you’re set.

We covered the chicken with parchment paper to protect it from the clay before we rolled the clay out.  The clay was treated like pie dough- stretching it out to cover and secure the chicken.   We clinched the edges tightly to prevent any tiny air pockets.  Now into a 425 oven for an hour and 20 minutes.

We pulled the chicken out and allowed it to rest 15 minutes before taking the mallet to it (clearly, this is the best part). 

Our clay roasted chicken came out very flavorful and tender.  The clay trapped the juices and heat into the bird, giving us the most succulent chicken I have had.  Hands down.

I quickly added a Clay Pot to my wish list, I recommend you follow suit! 

Happy Football Weekend!

Grilled Fruit Tailgate Sangria (aka- Steelers Sangria or Crimson Tide Sangria)

I can smell the pigskin in the air…Football season is approaching swiftly and we are ready!   Tailgate food may possibly be my favorite cuisine.   In an effort to keep it light and not ruin a week of dieting, I’ll be mixing up some light sangria.  And to keep in theme of tailgate grilling, I will throw the fruit on the hot grill too!

Tailgate Sangria

I loved grilling the fruit for sangria, it really brought out the earthy flavors of the wine and cinnamon.   The char on the fruit pushed the drink into fall with its smokiness.  It also softens the booziness of the liquor, making it very drinkable…. Beware 🙂

  • 2 Granny Smith Apples, sliced in eighths
  • 1 Navel Orange, sliced in eighths
  • 2 Limes, sliced in eighths
  • 2 bottles red wine
  • 1 cup orange juice
  • 1 cup diet cranberry juice
  • ½ cup cherry brandy
  • ½ cup orange curacao
  • ¾ cup simple syrup
  • 1 cinnamon stick
  • 36 ounces diet ginger ale, 3 cans

Over a hot grill, arrange the wedges on the racks and cook until fruit is just beginning to char, about 3-4 minutes per side. 

In a large gallon pitcher, combine the wine, juices, liquors, simple syrup and cinnamon stick.  Add the sliced fruit and chill overnight, (or at least a couple hours). 

When ready to serve, add the diet ginger ale to the sangria and pour over ice.

Makes about 1 gallon

Grilled Fruit Sangria

When I am at the grocery and see deep sales on red wine that I am unfamiliar with; I grab it up knowing that it will be perfect for sangria, if nothing else.   Some wine connoisseurs may disagree, but I see no reason to spend a lot of money on sangria. 

Red Wine is soaking up the grill flavor!

Grilled fruit would work great with white sangria as well; charred stone fruit with white wine would draw out the oak flavors of the white wine.   I am not a big chardonnay fan, so this would be a perfect answer to the bottles sitting on my shelf collecting dust. 

Any fruit will work if it is in season!

Cheers to football season, may the best teams win! Here we go Steelers and Roll Tide!