Scratch Made Jumbo Oreos- Love in a Cookie Form!

“If you really want to make a friend, go to someone’s house and eat with him…the people who give you their food give you their heart.” —Cesar Chavez

Food creates memories, transports you to places of past or far way.  How many arguments have you defended your moms meatloaf or your dad’s BBQ as being the best?  What Little Debbie takes you back to the lunch room where life was all about talking your parents into letting you go to your friends house after school?  When you walk down the cookie aisle, what package jumps into your cart because you haven’t had it in years?  Whether food instills memories, remembrance of a mothers love or a cherished tradition, we all have those go to items that take you to another place.

DSC_0114

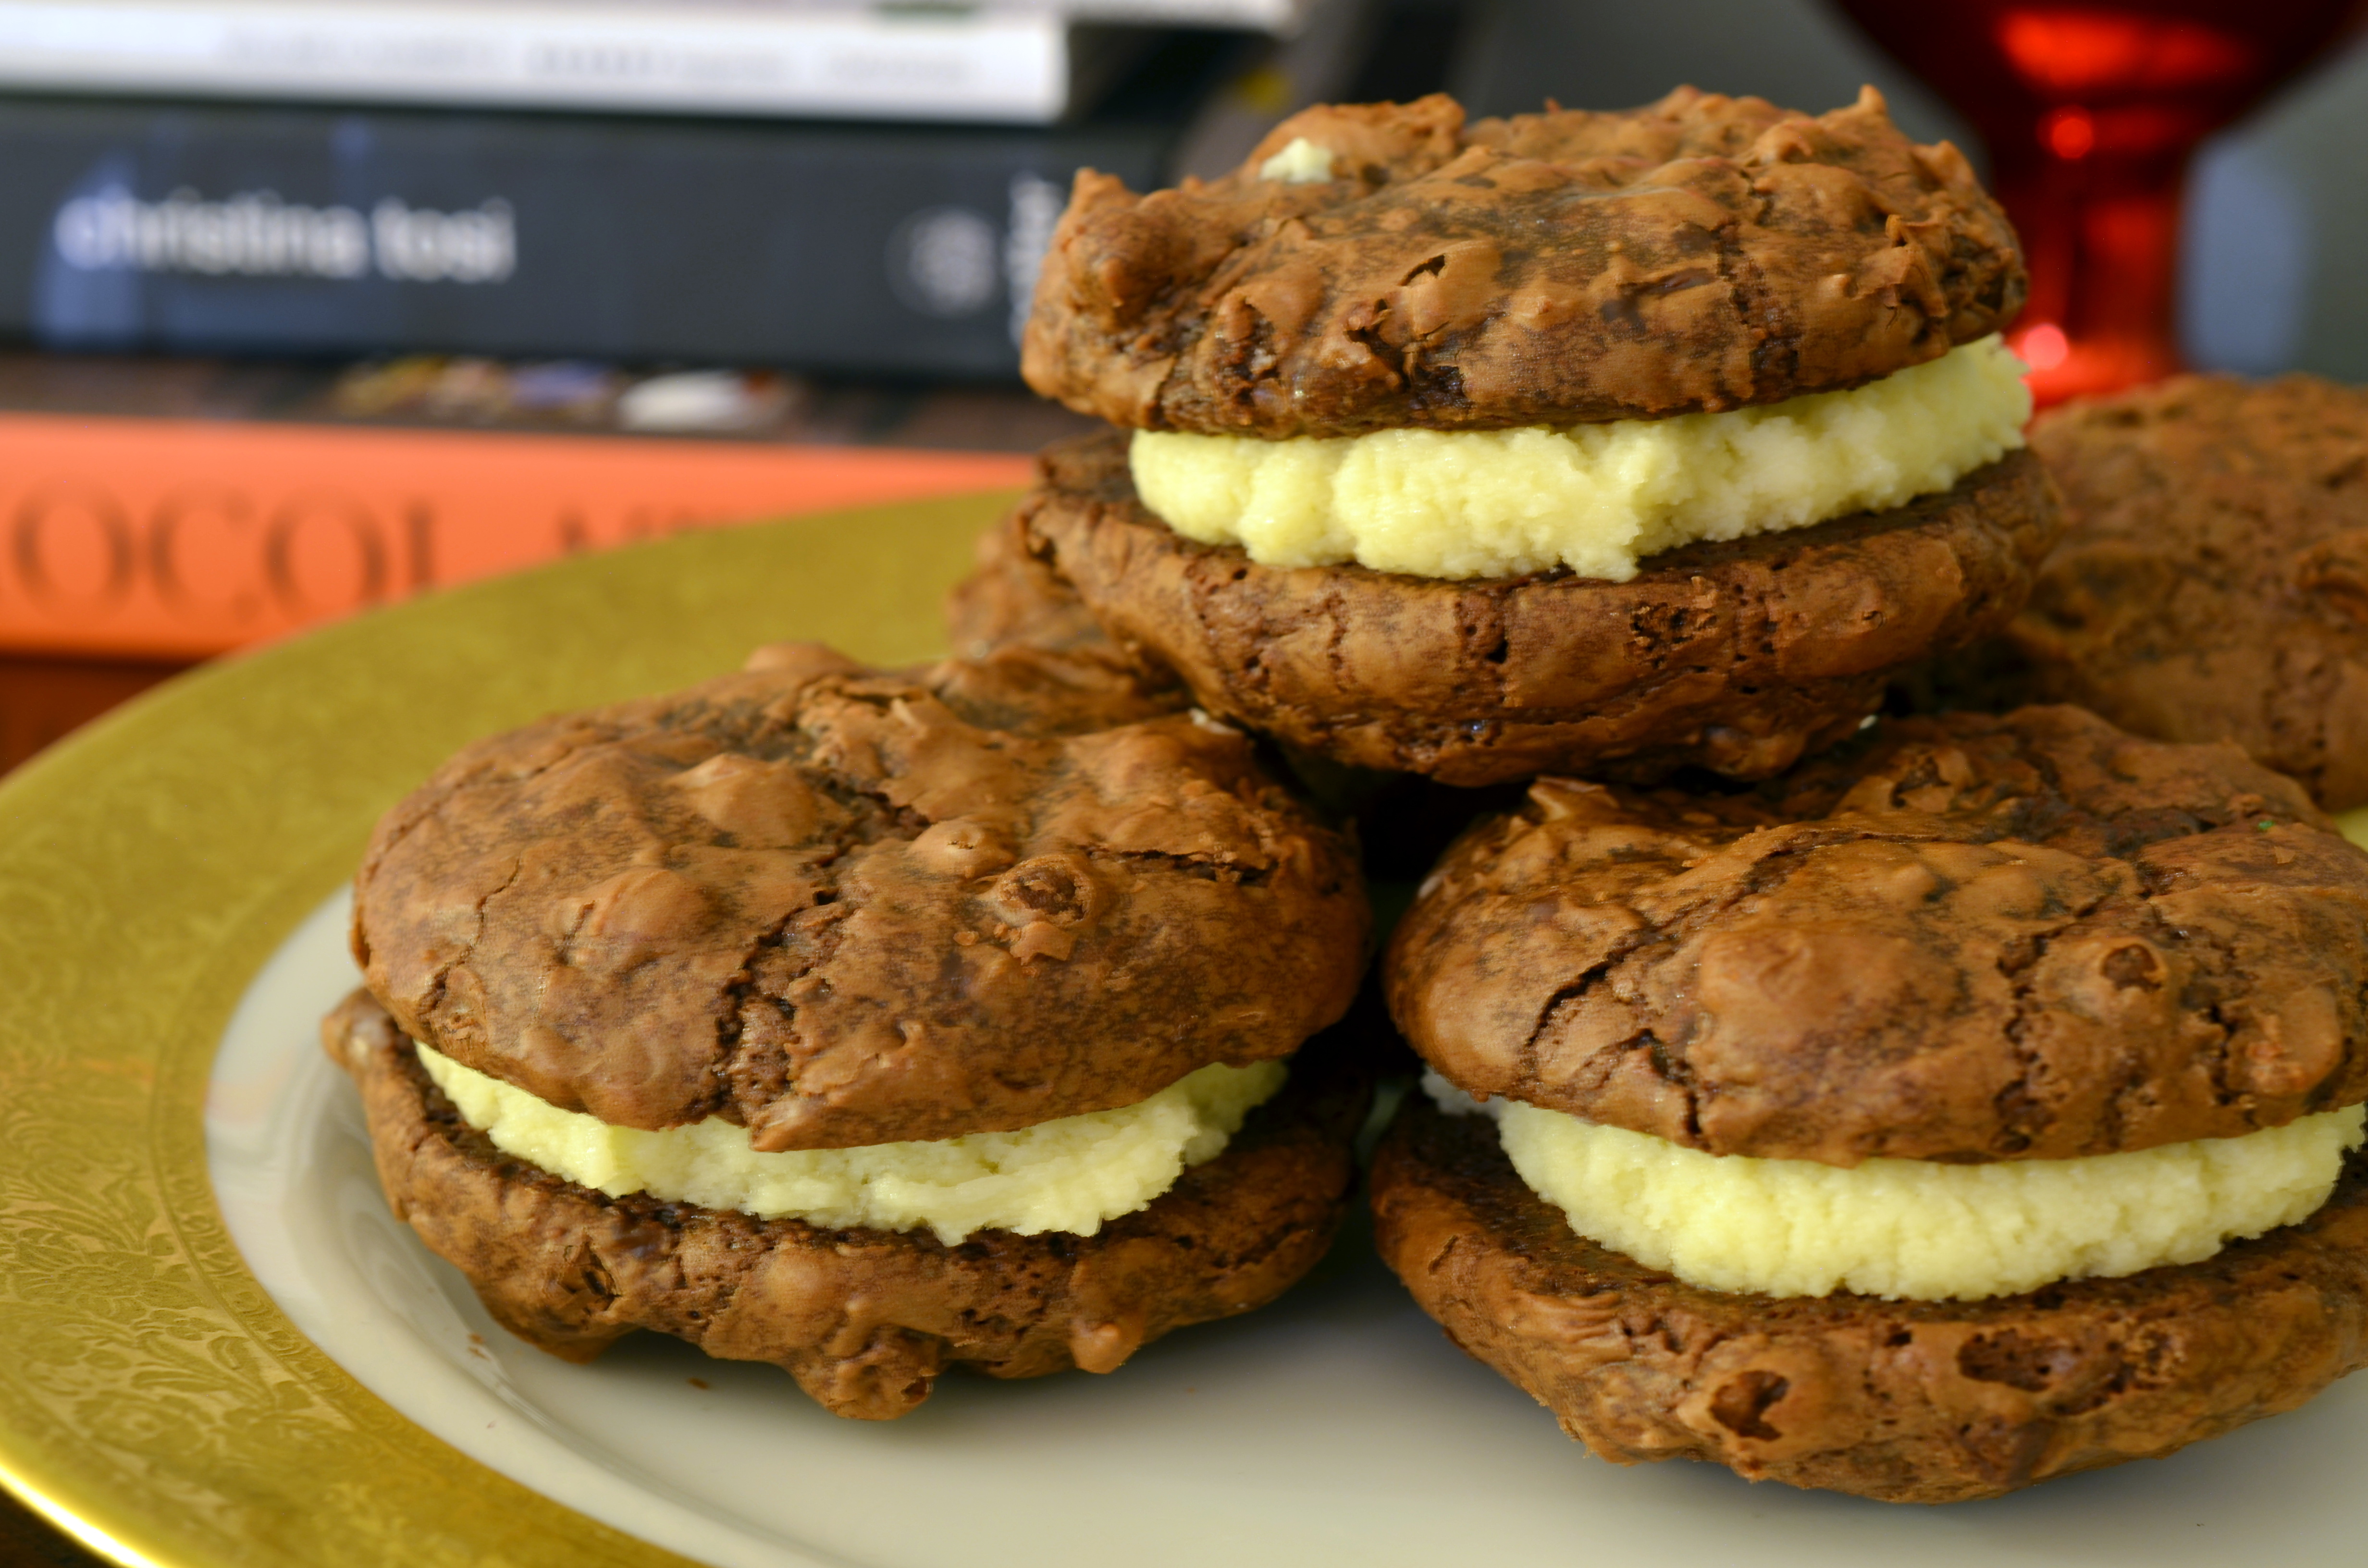
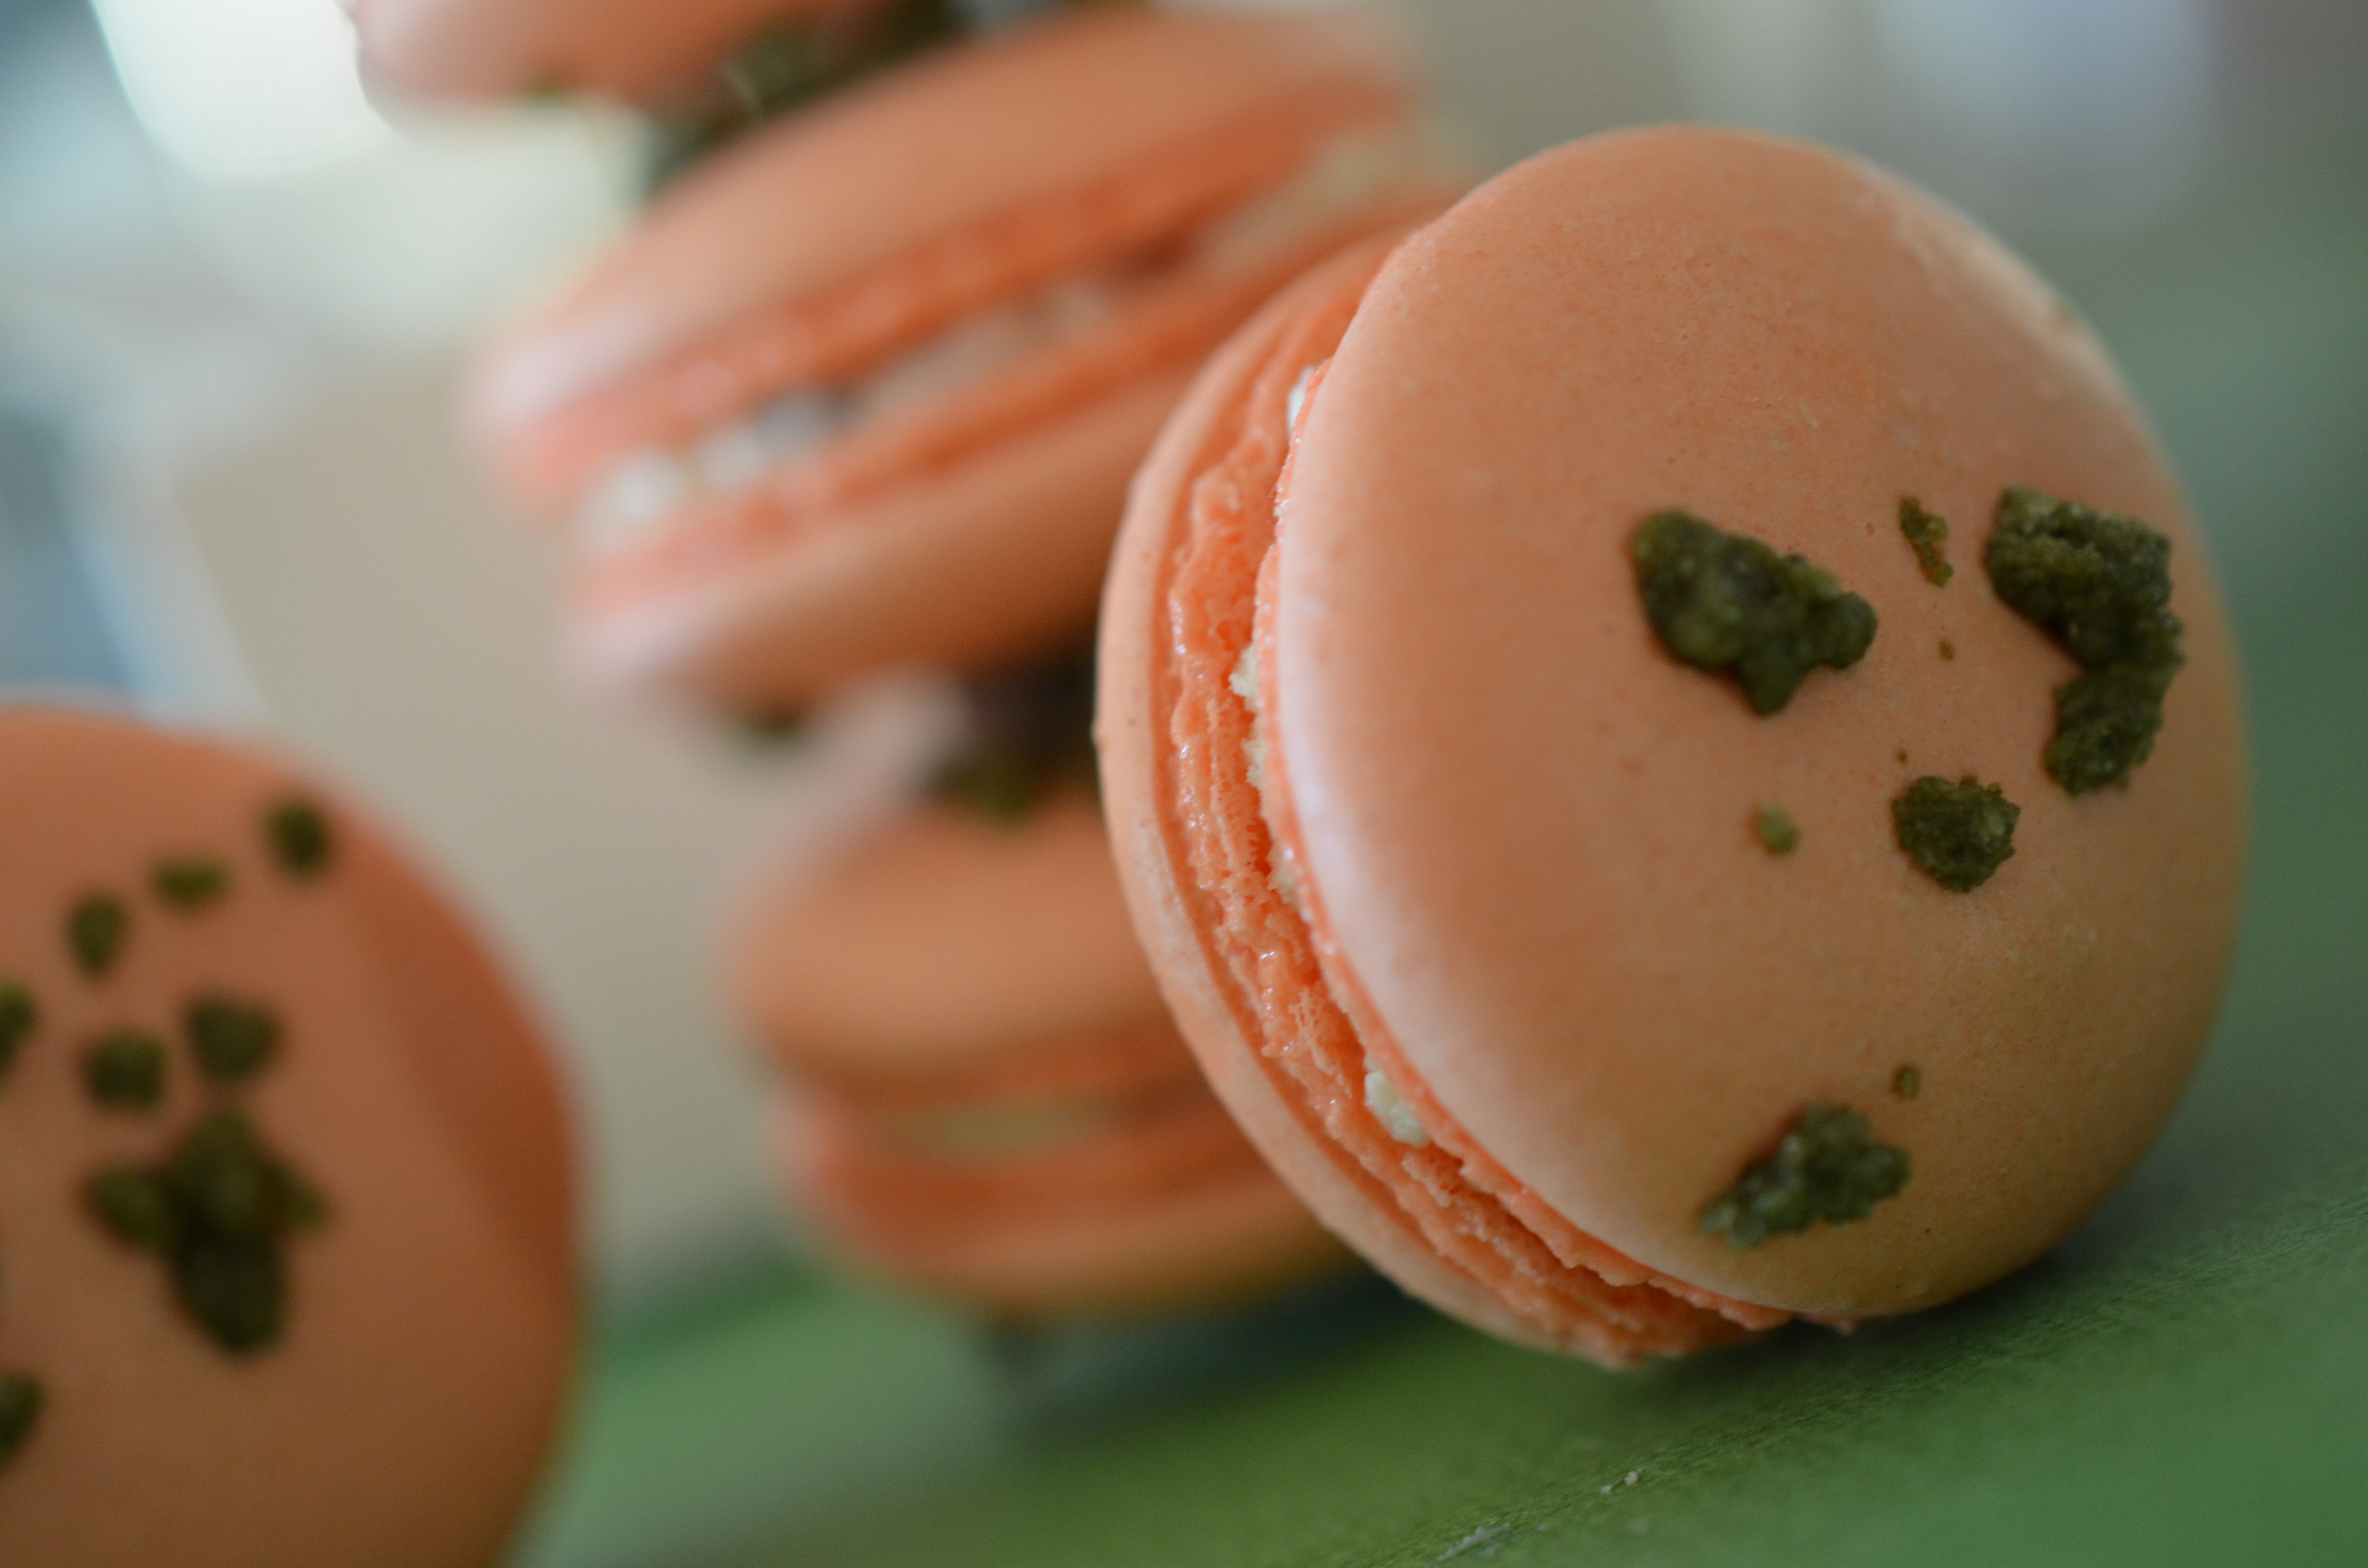
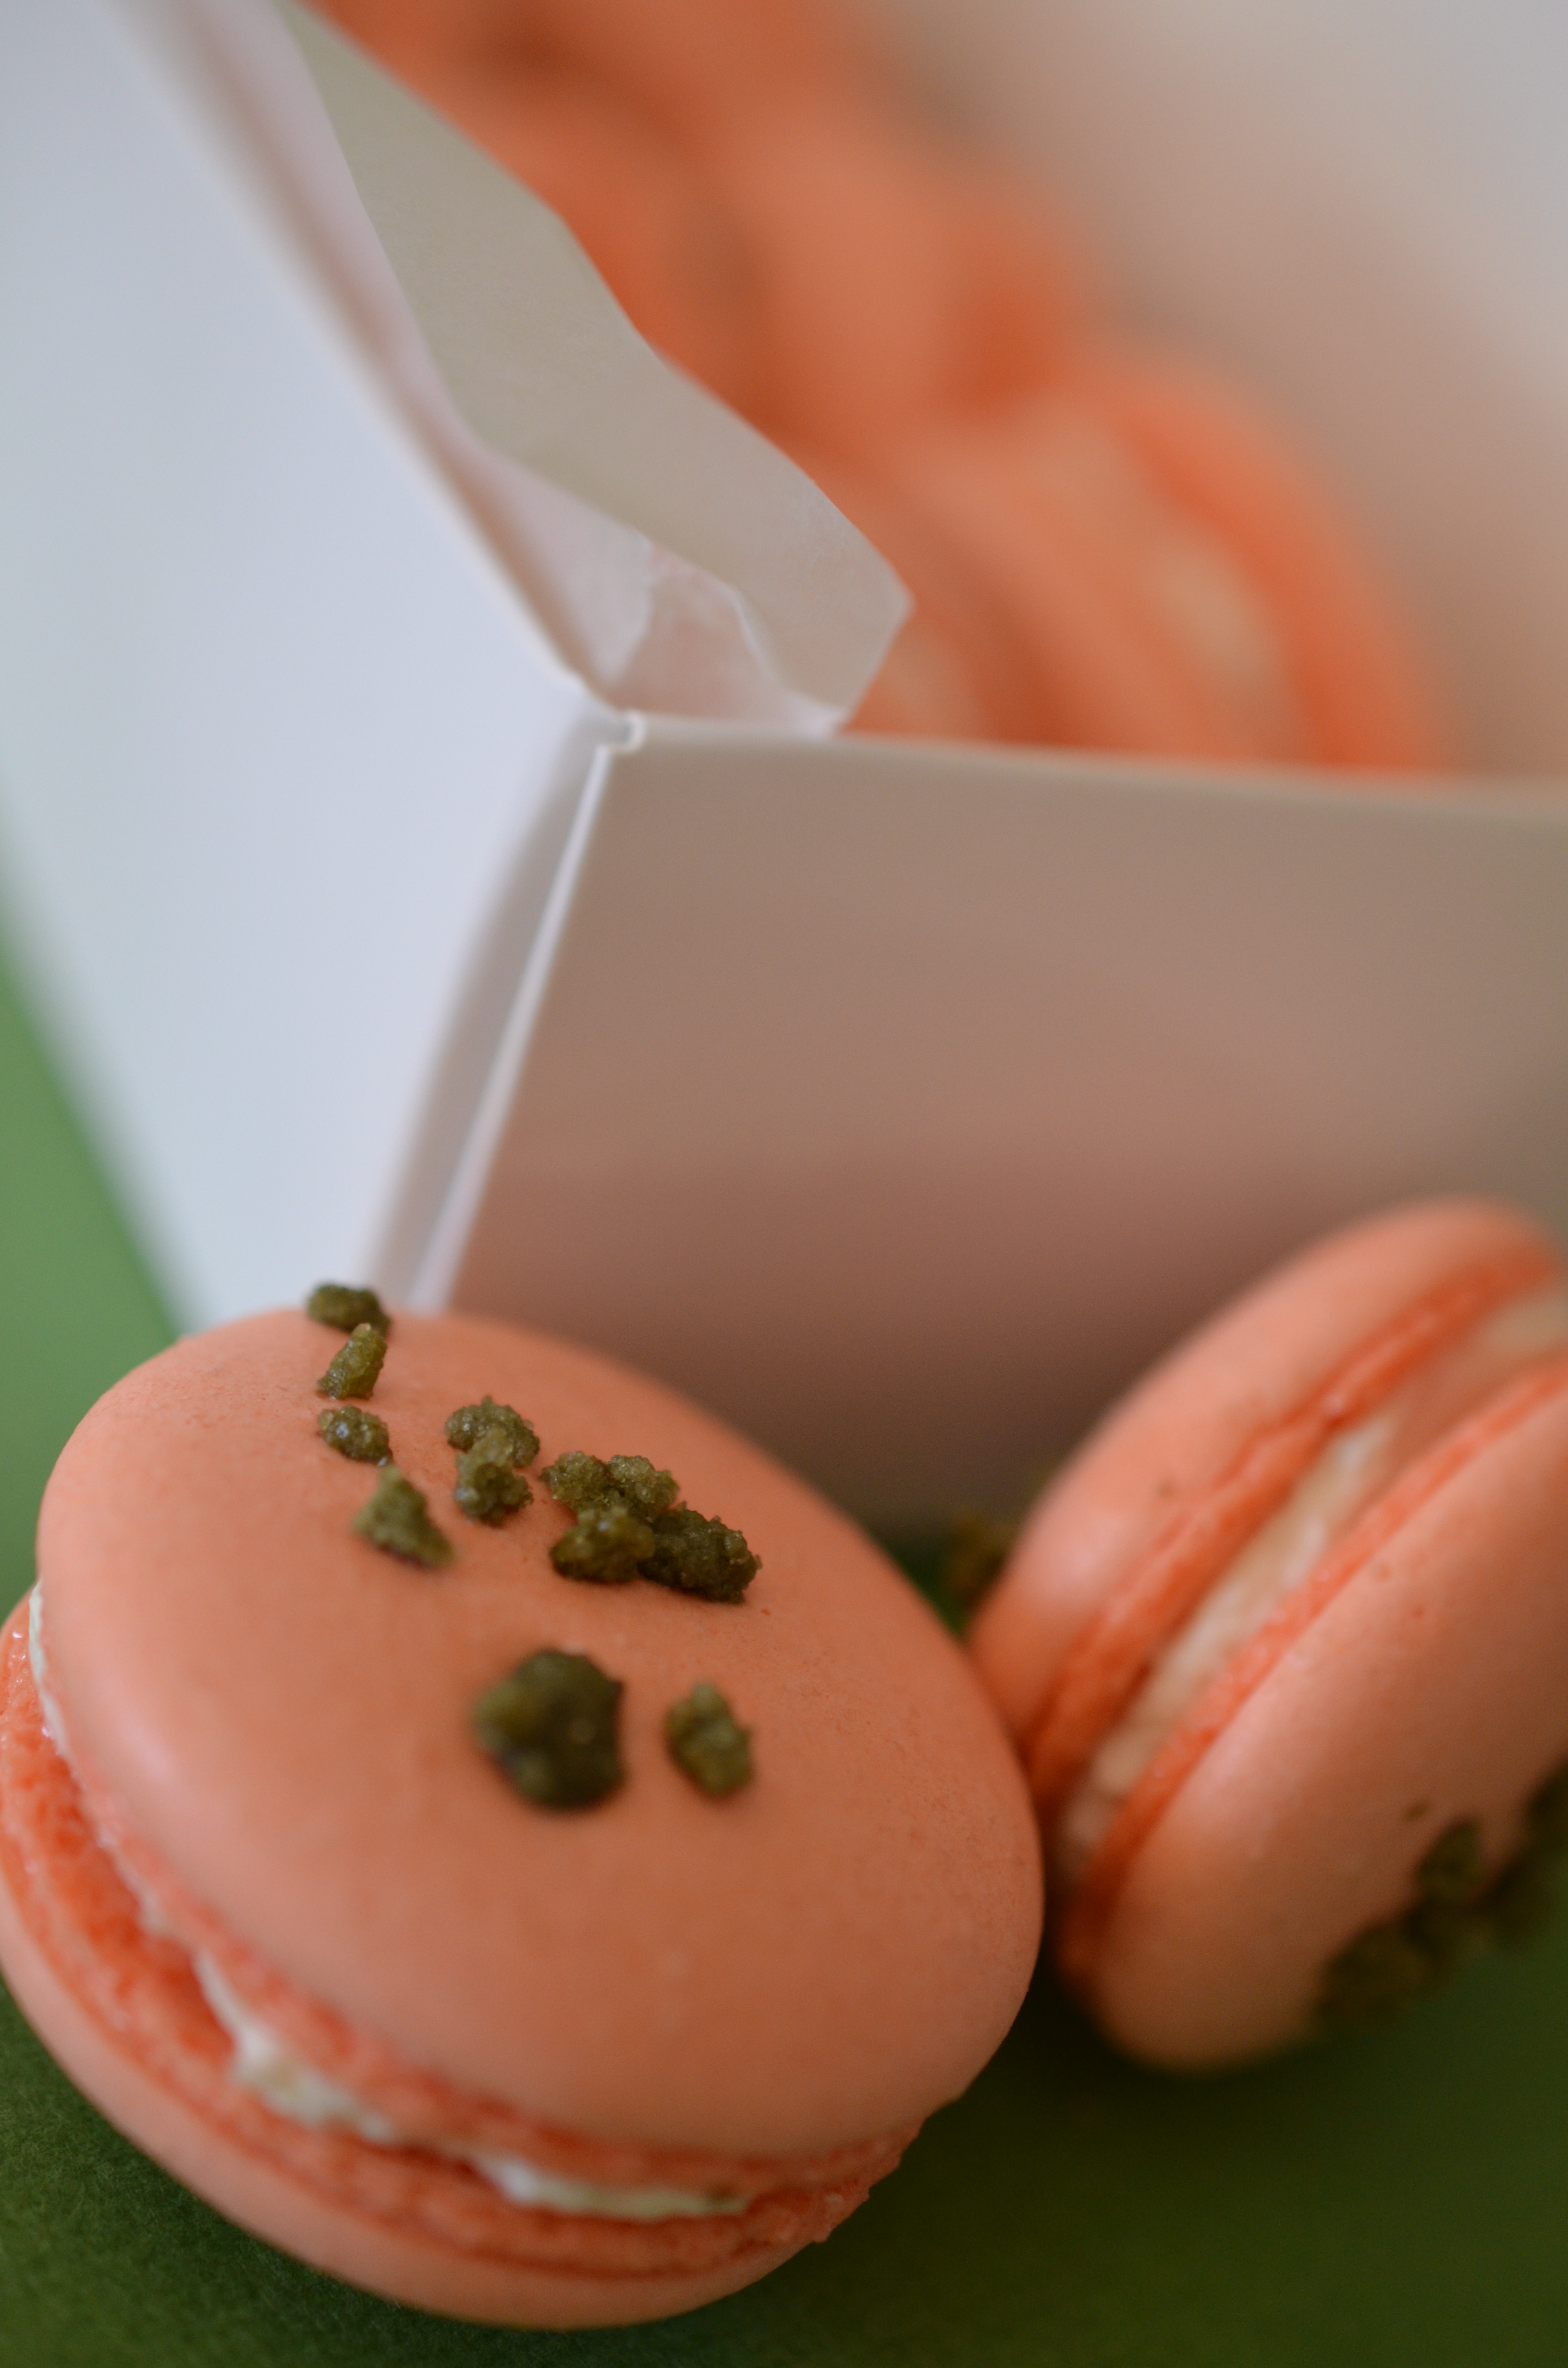
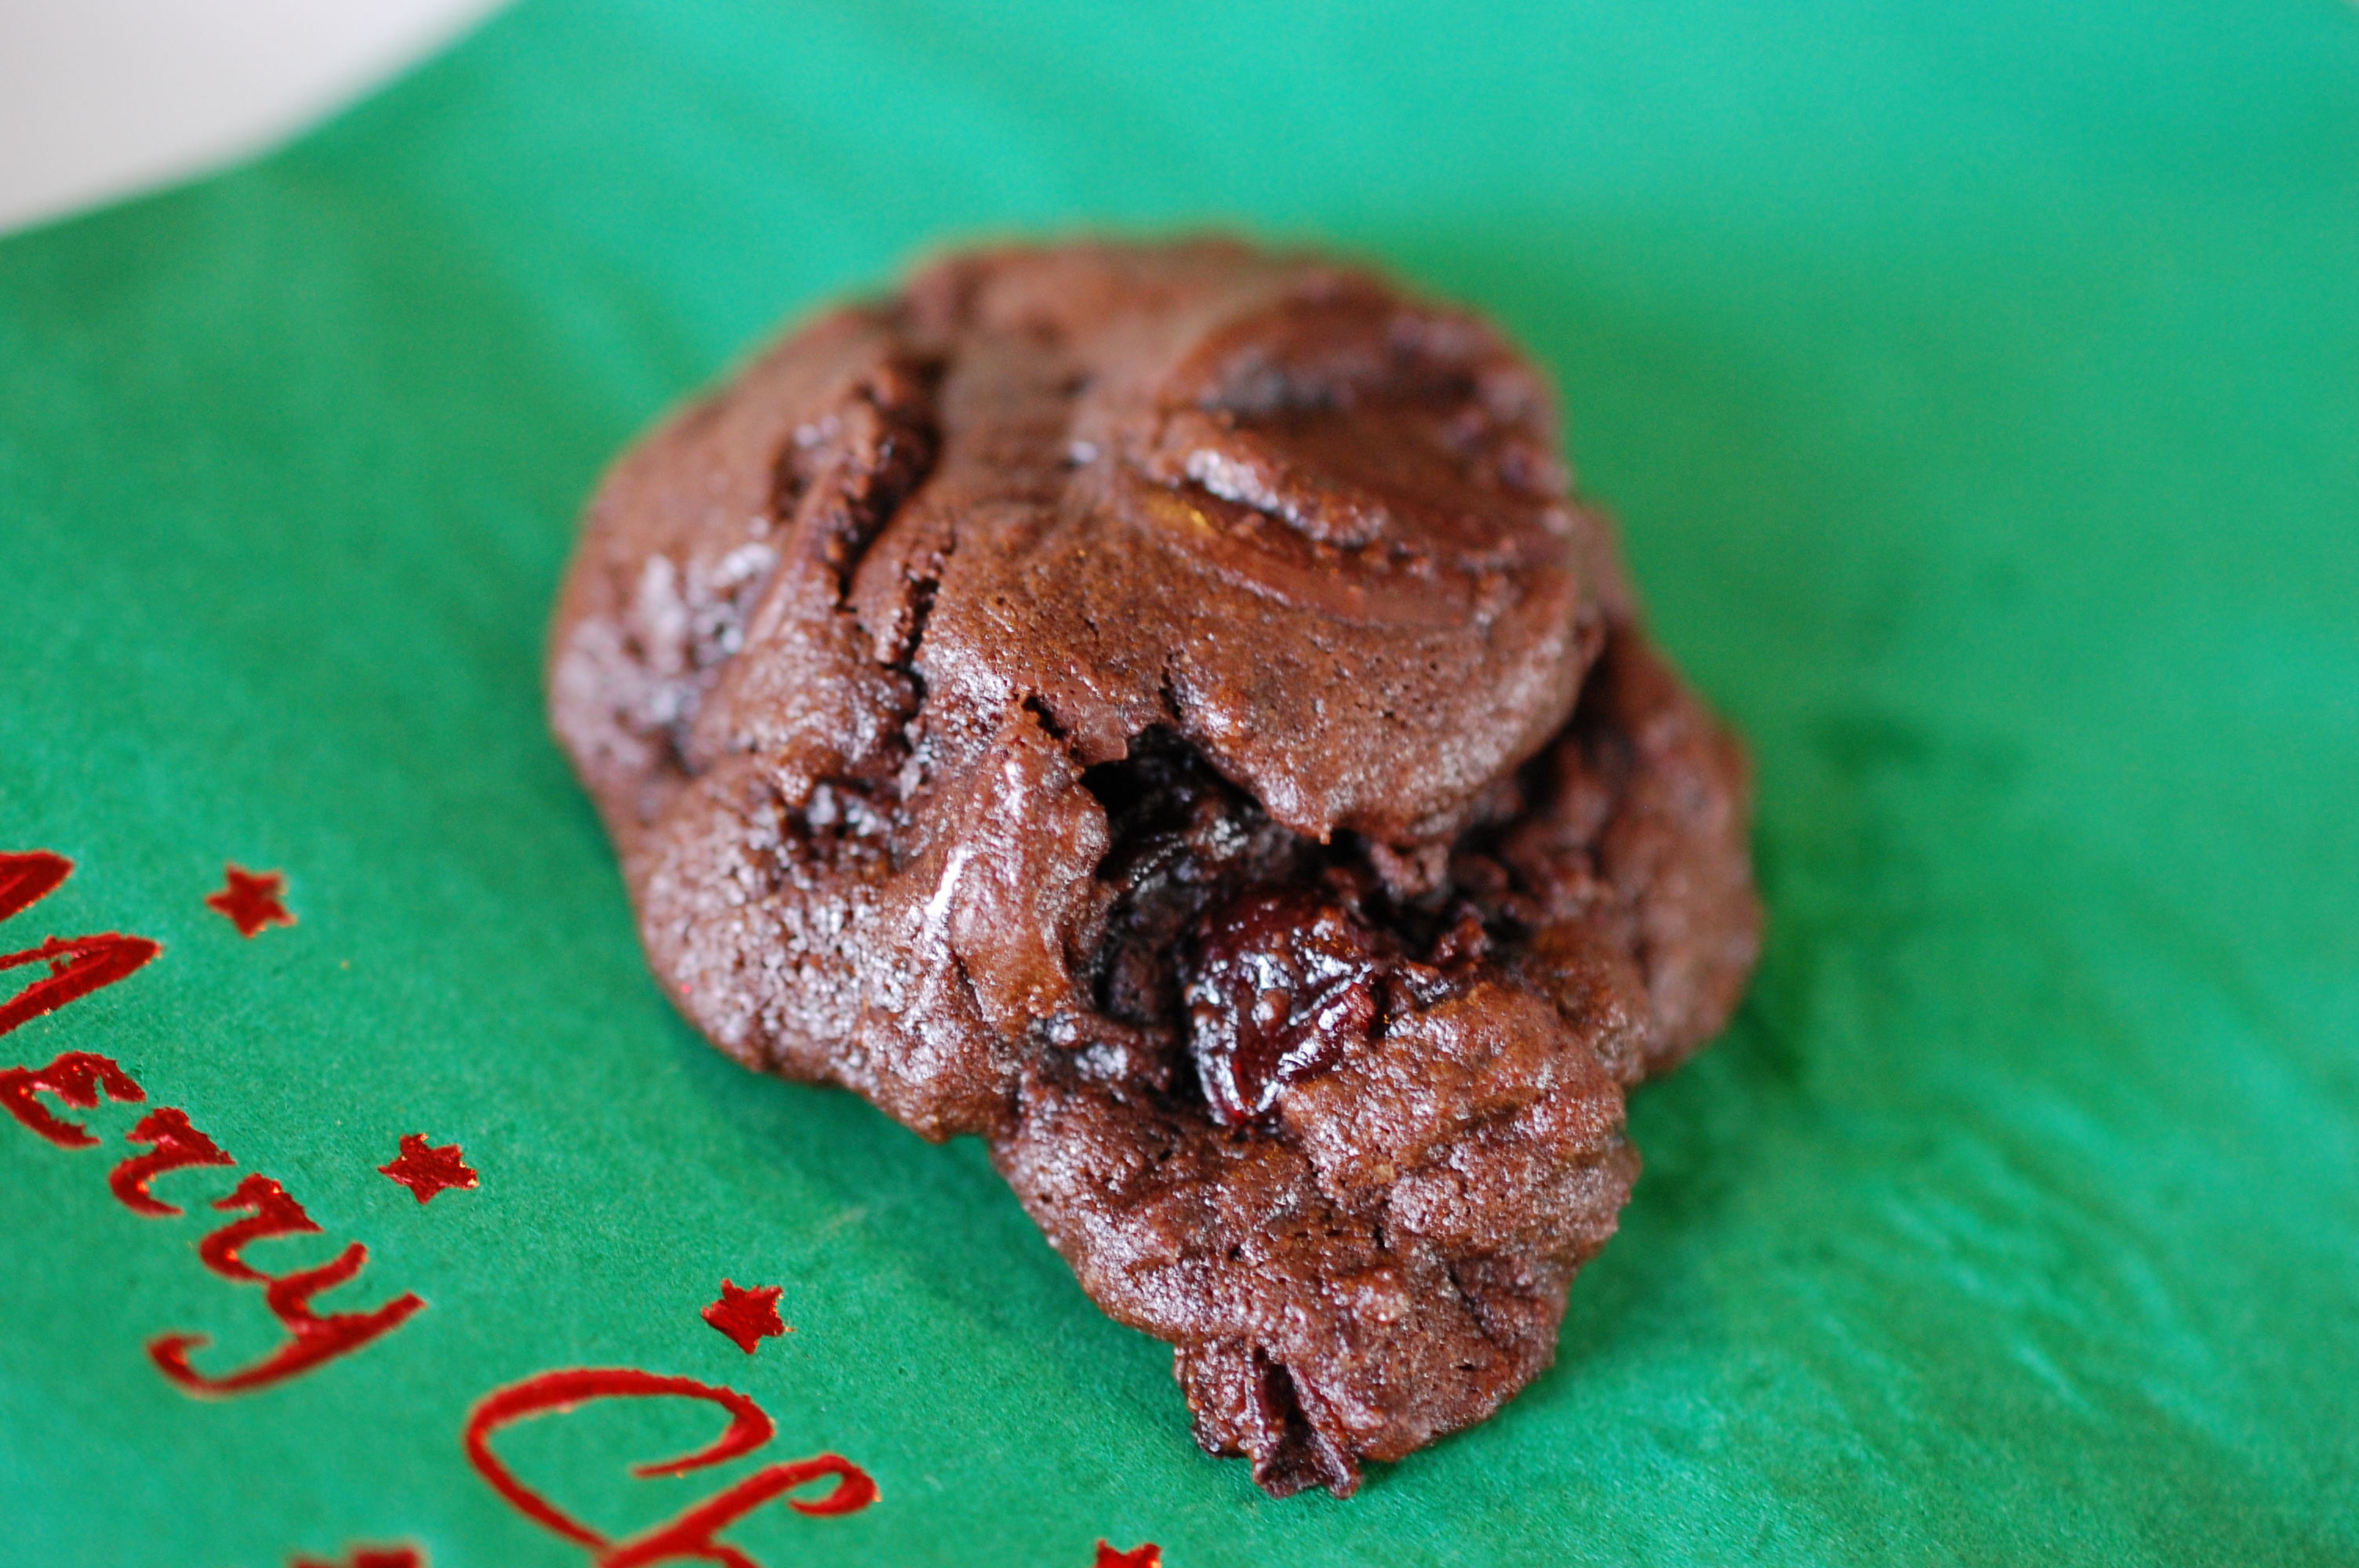
The many ways to eat the Oreo- often the discussion at the school lunch room table when someone’s mom packed them into a metal lunch box.  Quite the debate, twist and lick, double milk dip, prefer double stuff or straight up, plenty of heated conversation to fill up a lunch period.  I can remember strategically planting myself next to the “boy of the moment” when I had the occasional Oreos packed in my lunch- surely he could not resist me or my Oreos that day and would become my forever boyfriend.

DSC_0115

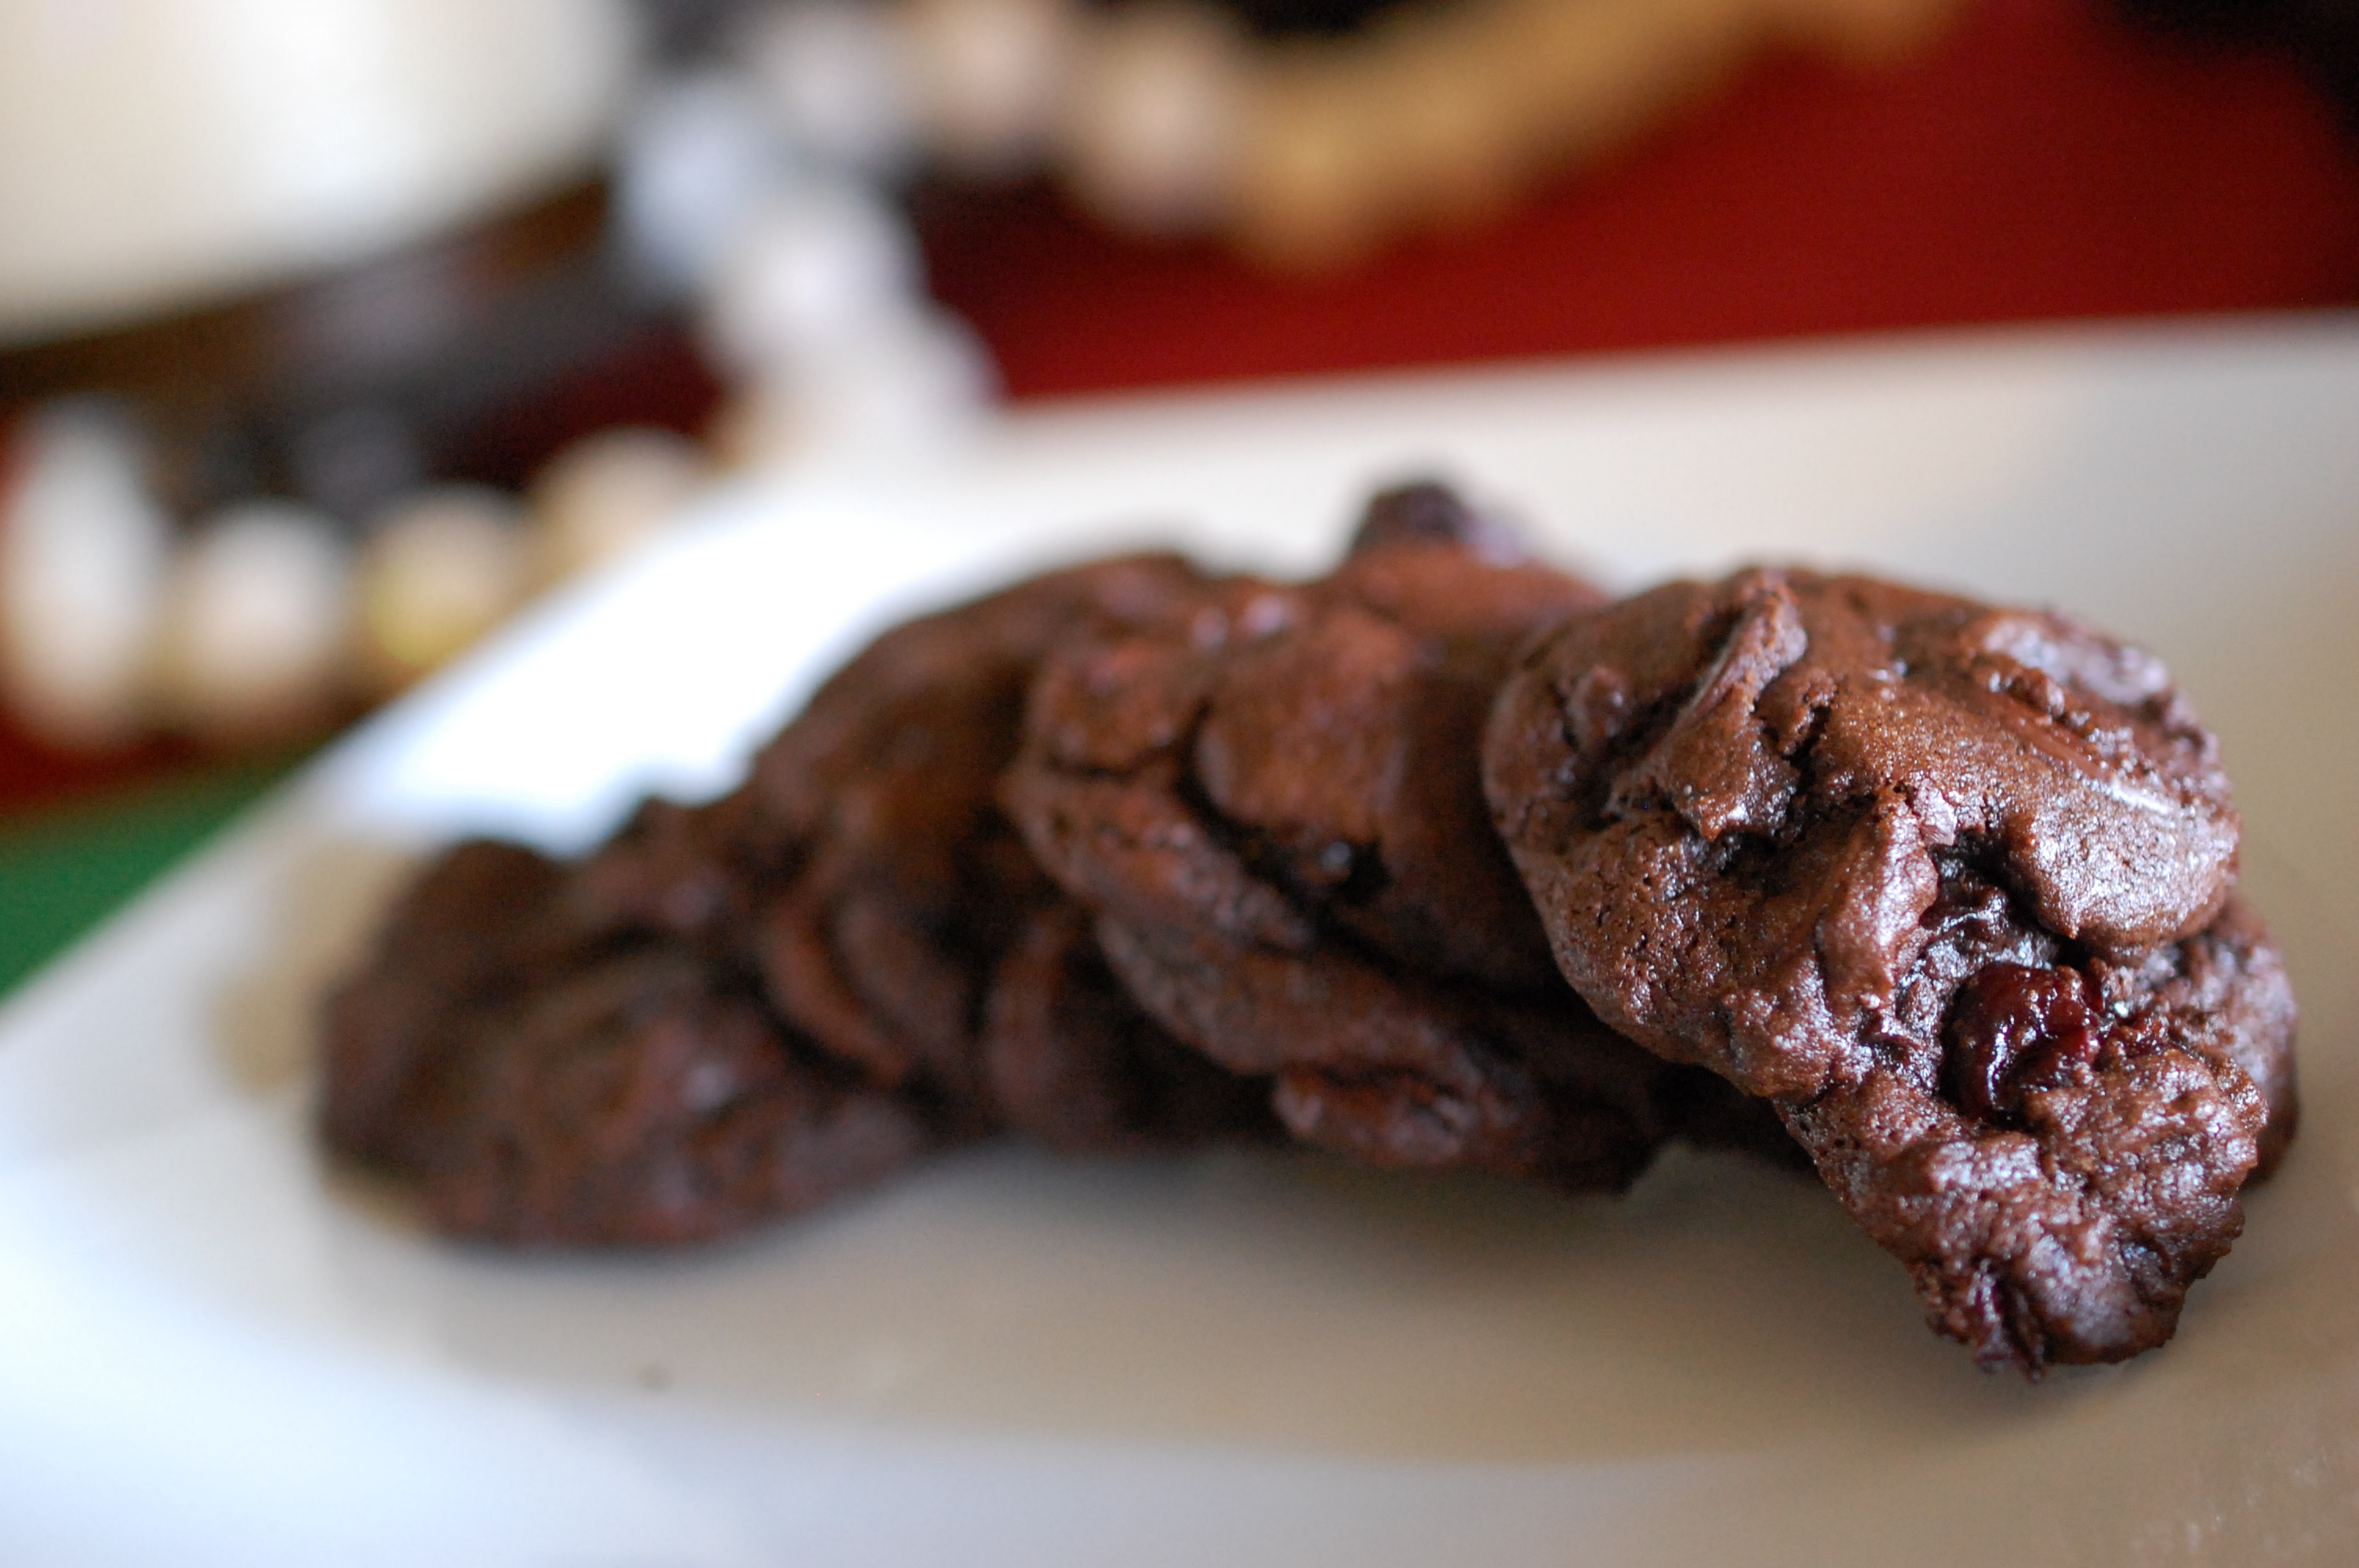
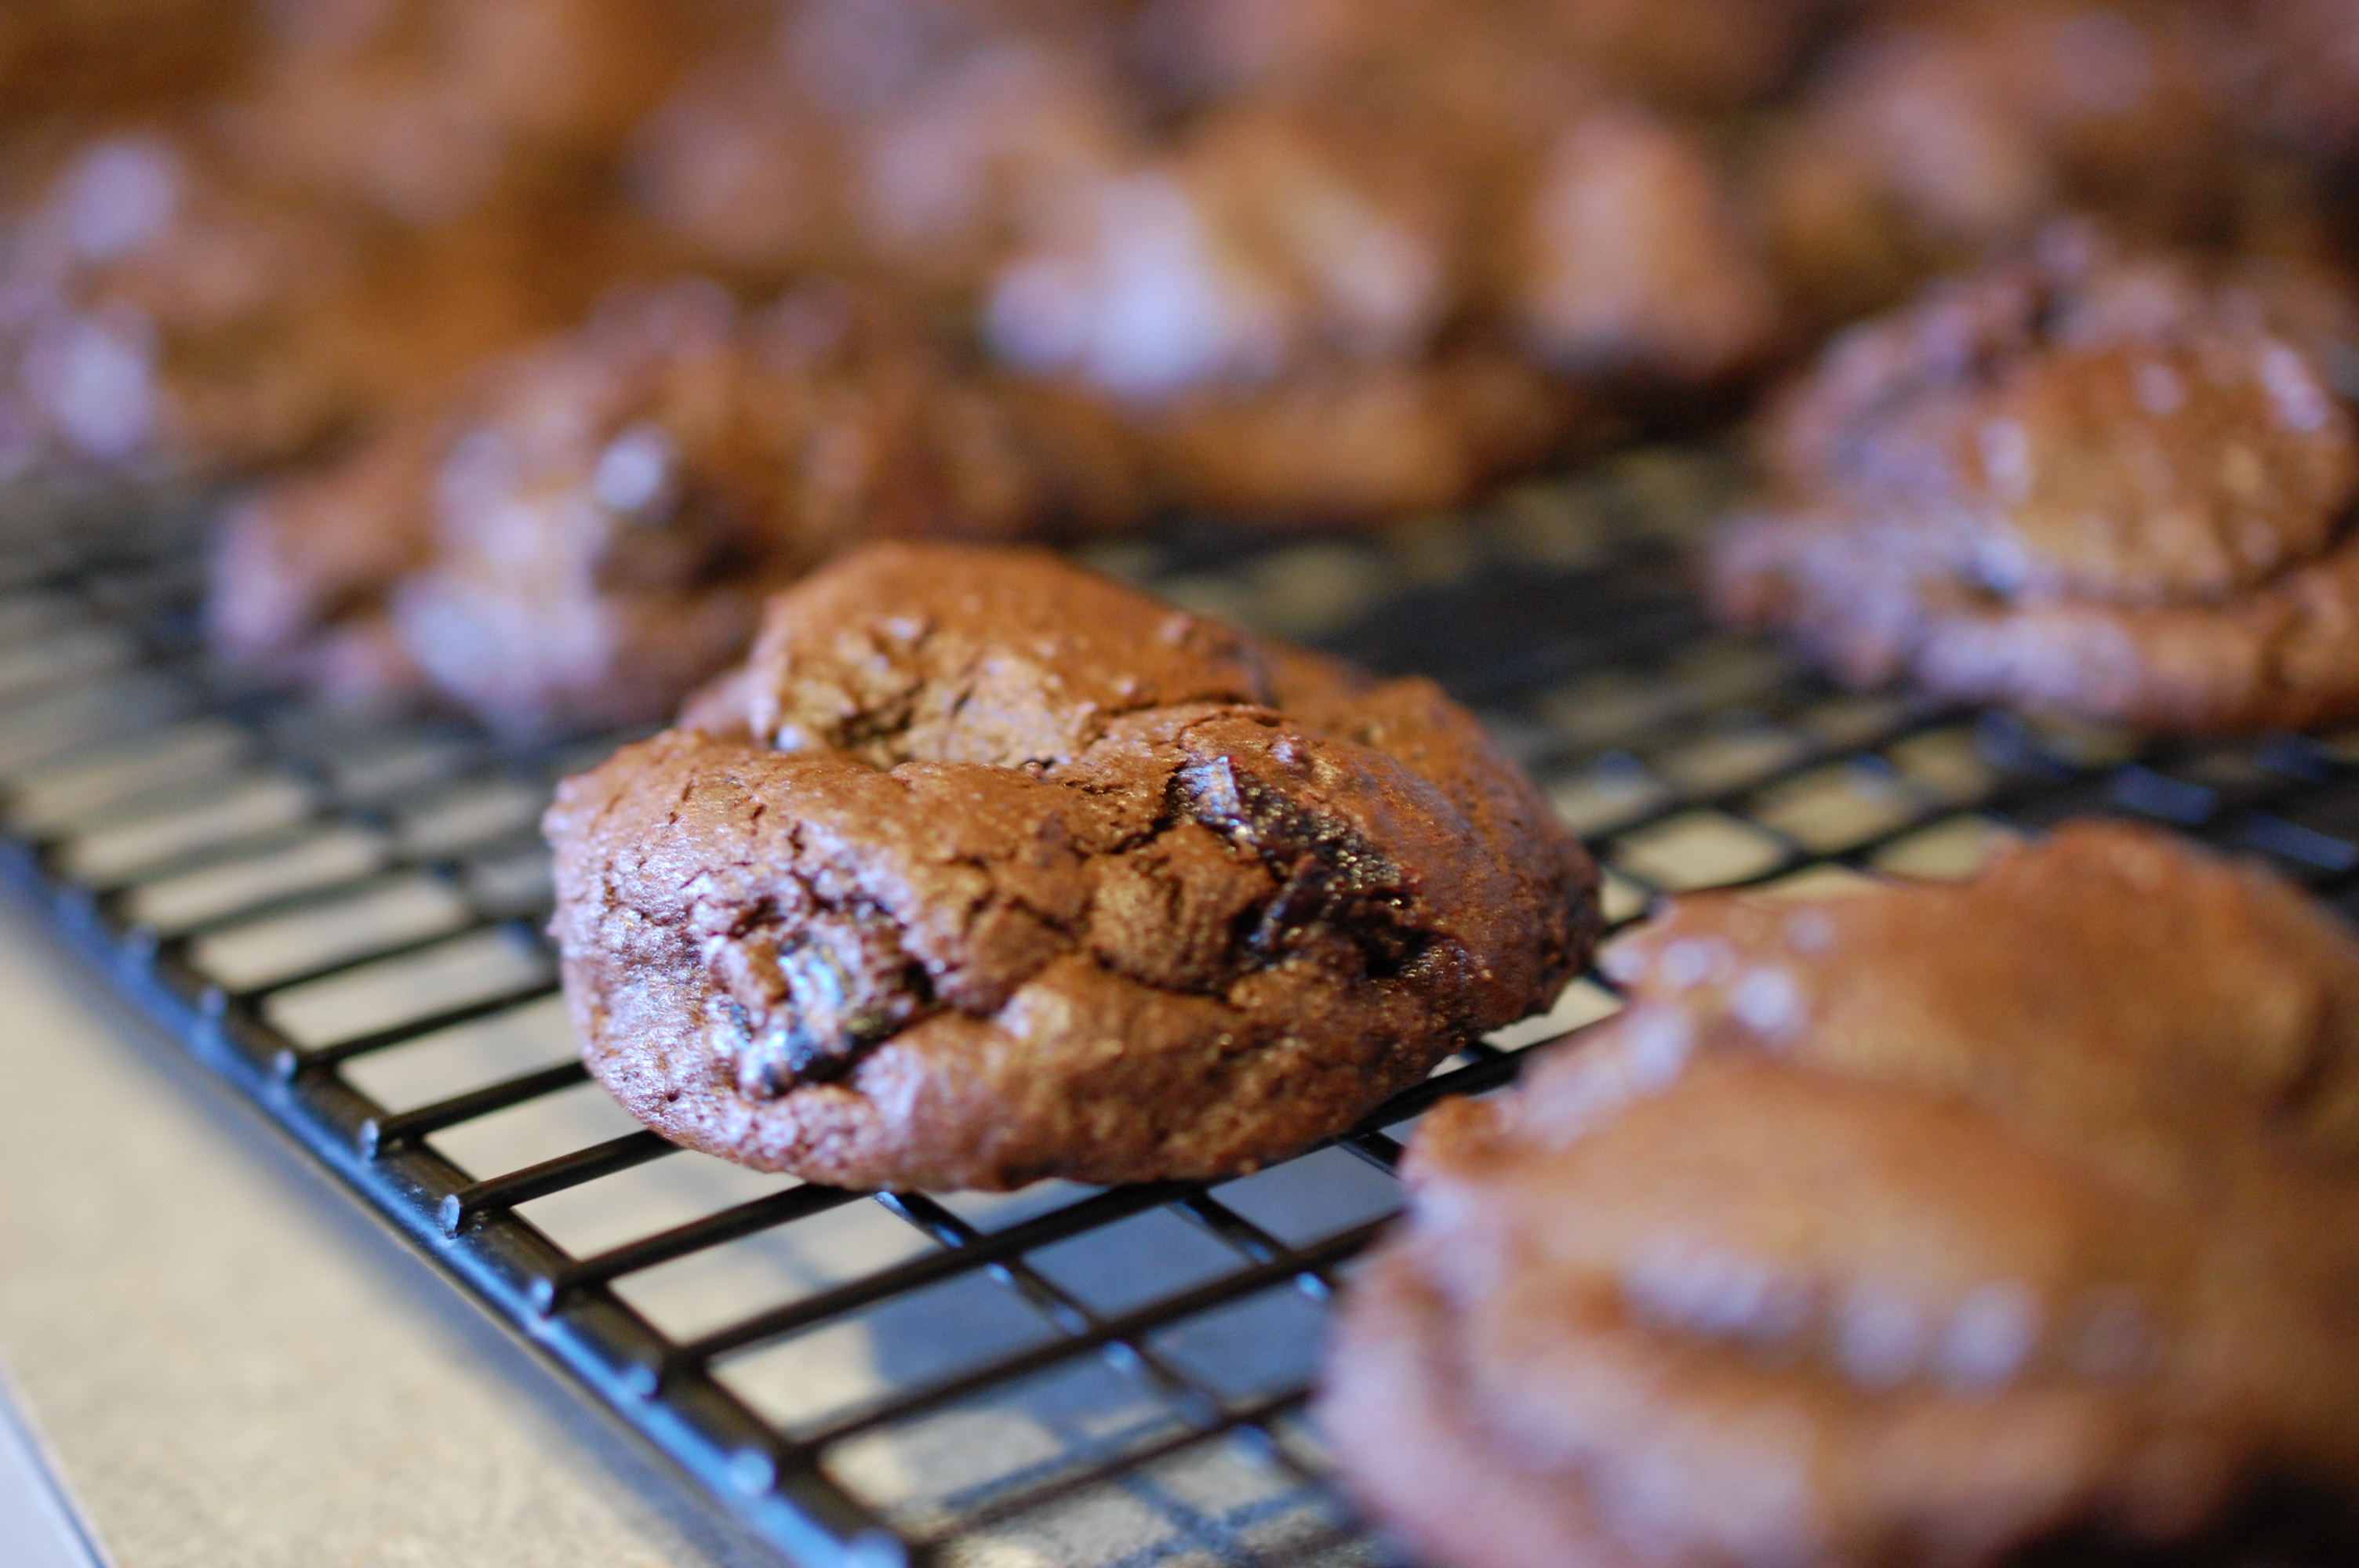
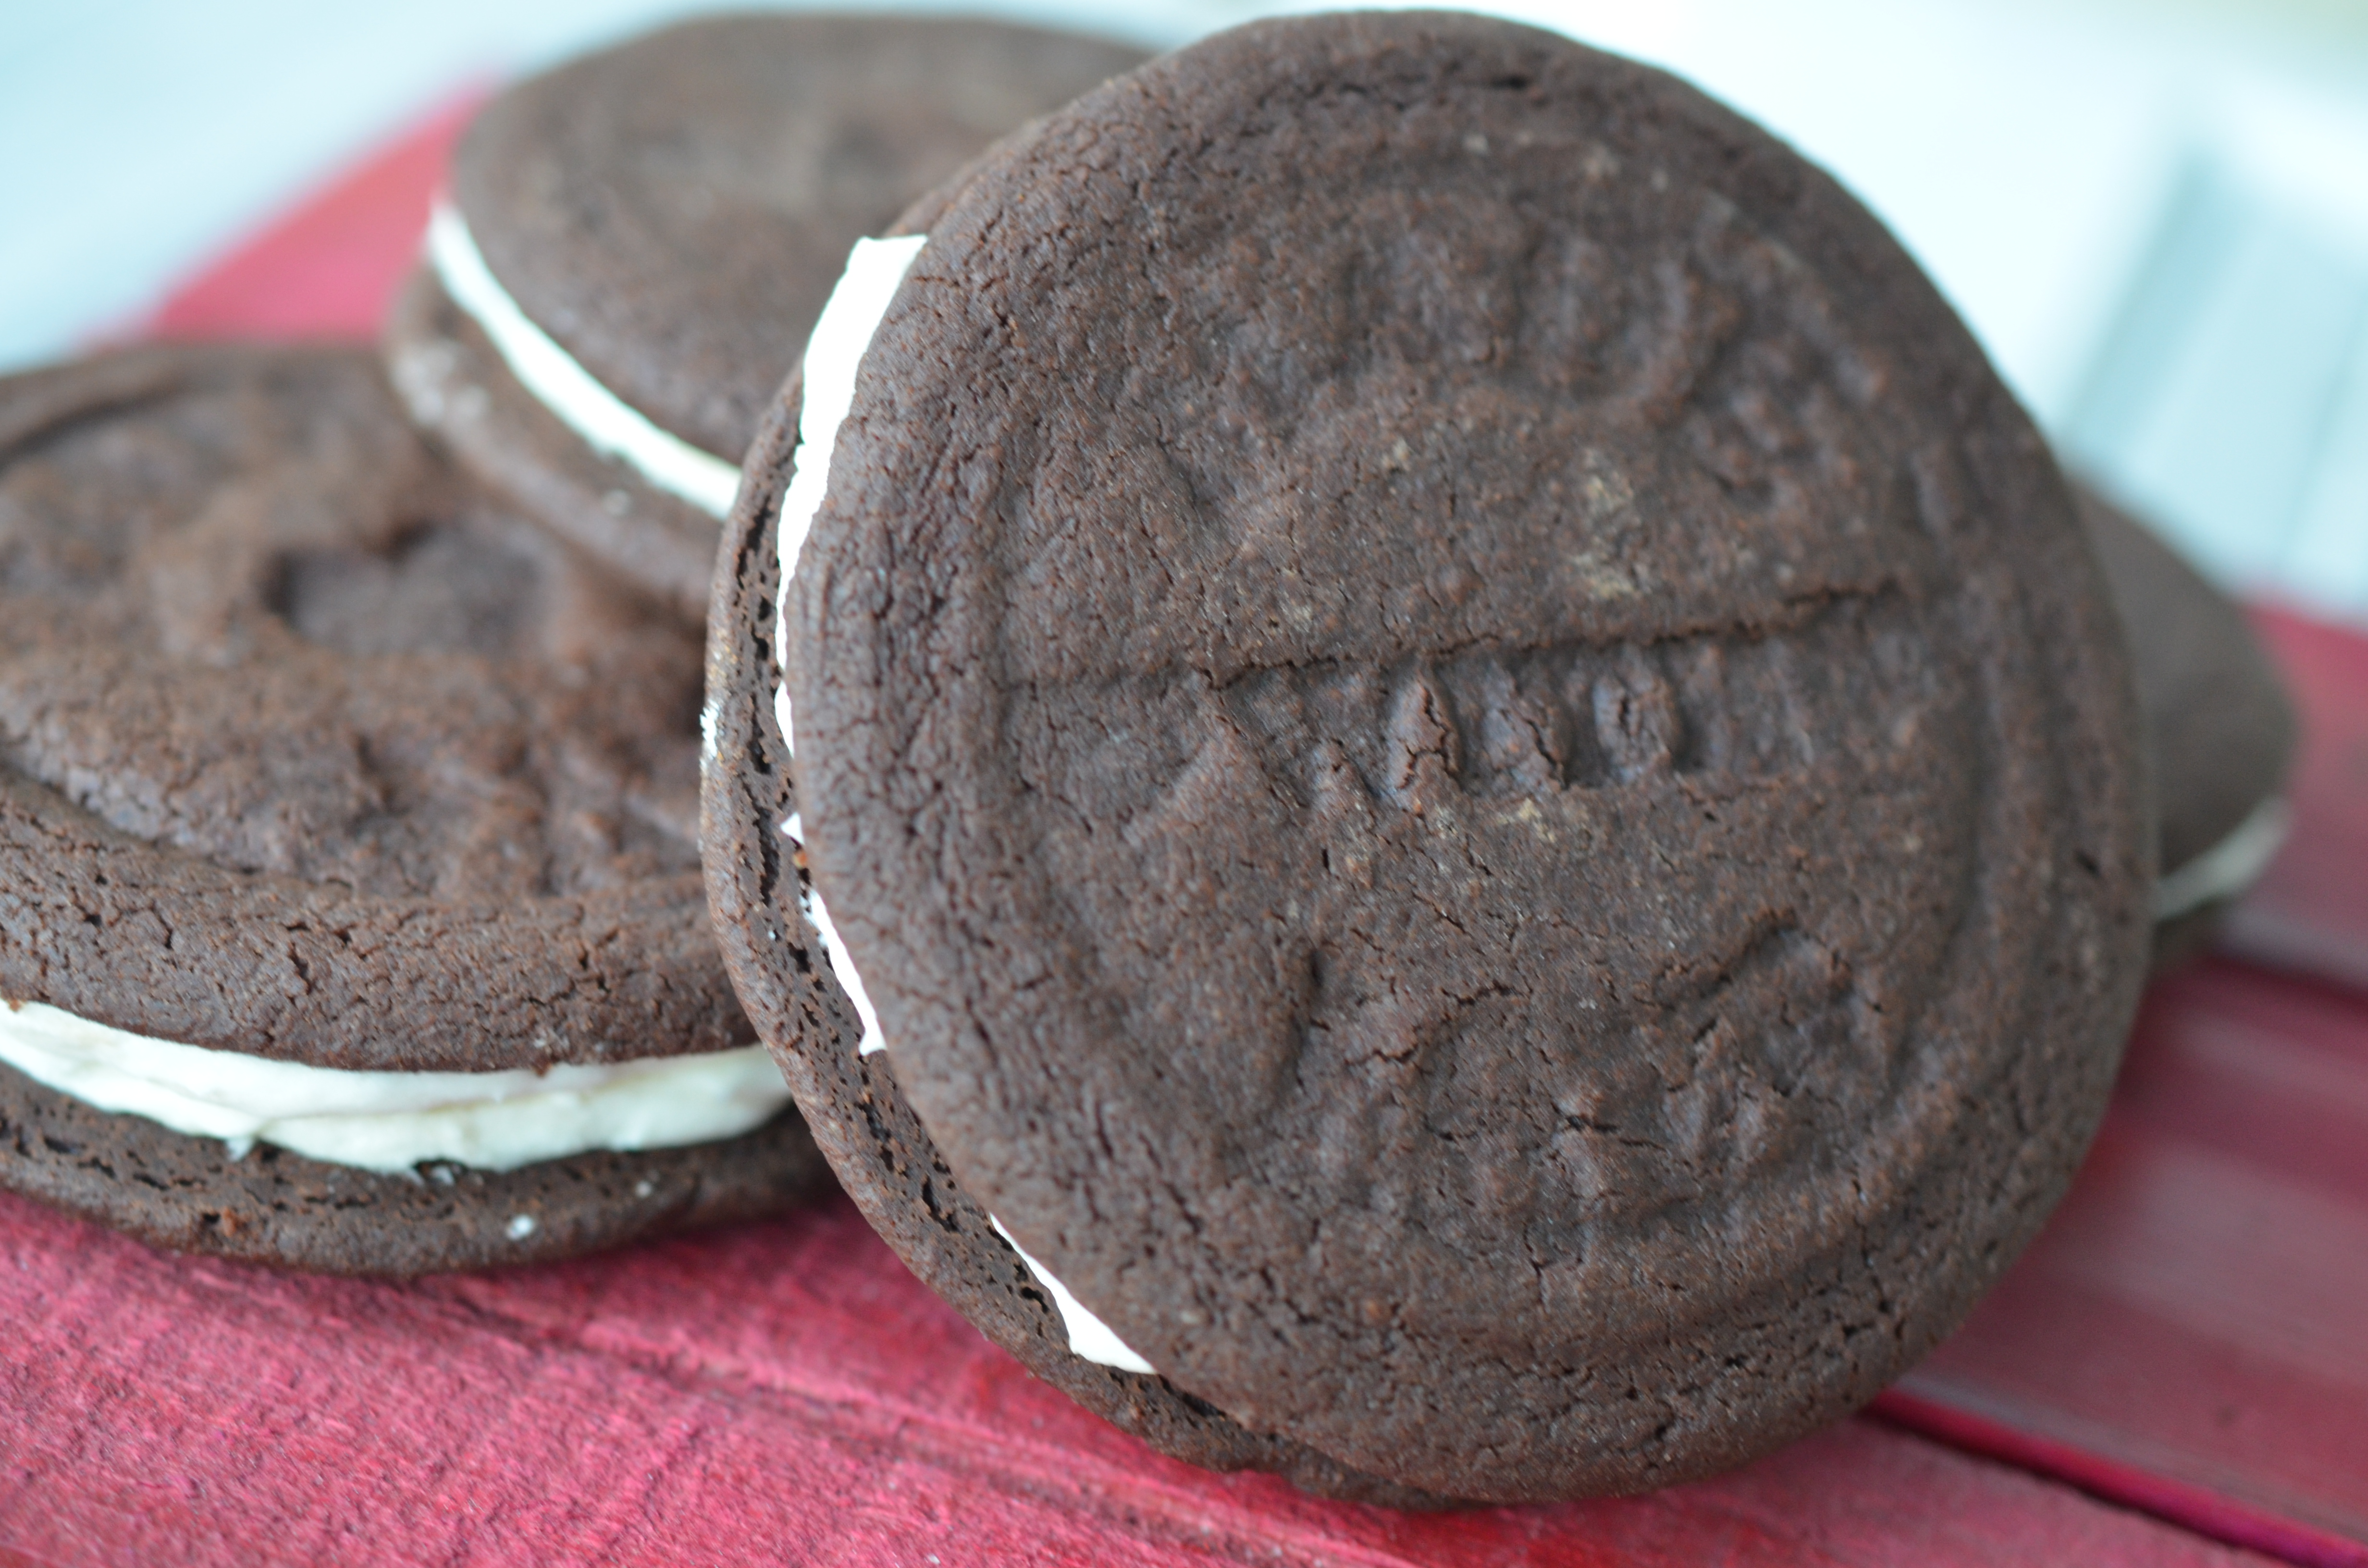
30 years later I tried again, this time successfully but I went with a homemade version of the iconic cookie- Wes agreed, if cookies kept making there way into his lunchbag, he would assume the role of my forever boyfriend, on top of being my husband.

I used the recipe from Flour Bakery and Café

Ingredients

Cookies

  • 1 cup unsalted butter, melted
  • 3/4 cup sugar
  • 1 teaspoon vanilla extract
  • 1 cup semi-sweet chocolate chips, melted
  • 1 egg
  • 1 1/2 cups flour
  • 3/4 cup unsweetened cocoa powder
  • 1/2 teaspoon baking soda
  • 1 teaspoon salt

Filling

  • 1/2 cup unsalted butter, at room temperature
  • 1 teaspoon vanilla extract
  • 1 2/3 cups confectioners’ sugar, sifted
  • 1 tablespoon milk
  • 1 pinch salt

DSC_0105

Directions

Cookies:

  • In a medium bowl, whisk the butter and the sugar until combined. Whisk in the vanilla and melted chocolate. Add the egg and stir until well blended.
  • In another bowl, combine flour, cocoa powder, baking soda, and salt. Stir to blend them. Using a wooden spoon, stir the flour mixture into the chocolate mixture. The finished dough should feel like Play-Doh. Cover the dough with plastic, and set aside for 1 hour or until firm.
  • Place the dough on a long sheet of parchment paper. Use your hands to shape it into a rough log, about 10 inches long and 2 1/2 inches in diameter. Place the log at the edge of the parchment. Roll the parchment around the log. With your hands on the paper, roll the dough into a tighter log, keeping the diameter the same.
  • Refrigerate the dough for at least 2 hours, or until it is firm enough to slice without crumbling.
  • Set the oven at 325 degrees. Line 2 baking sheets with parchment paper.
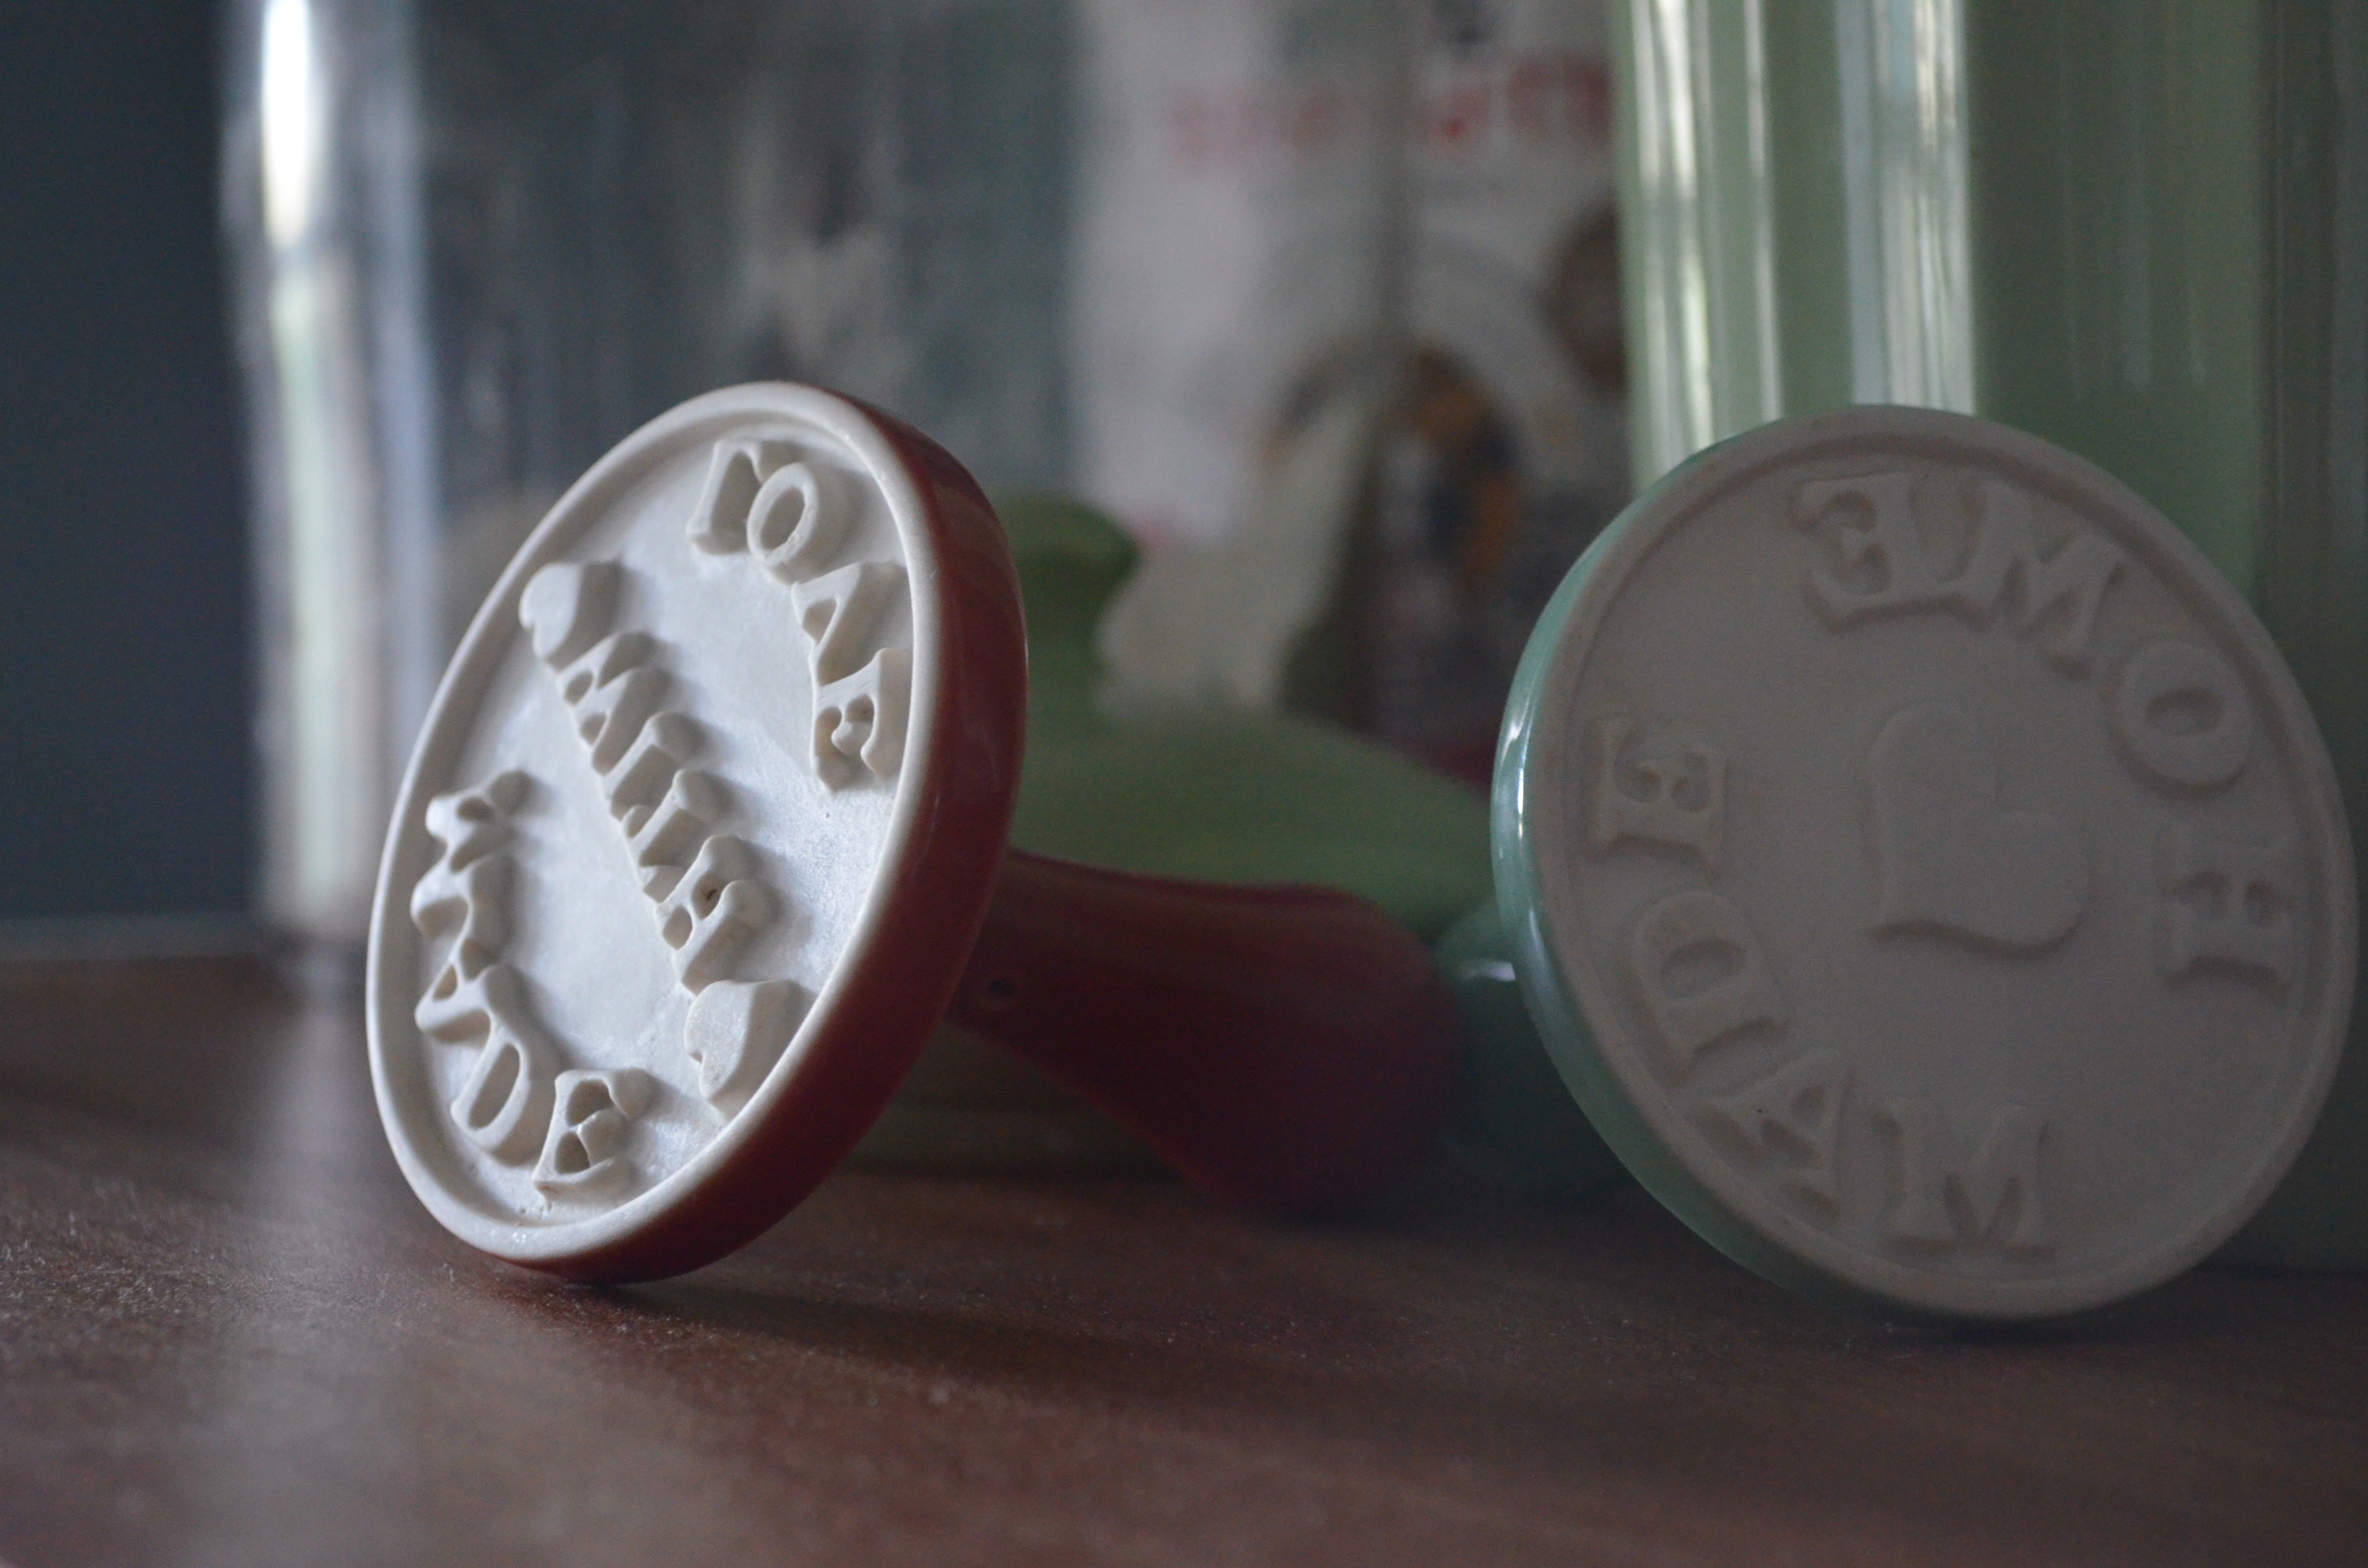
  • Remove the dough from the paper. Cut the log into 32 slices, each a quarter-inch. Set them on the baking sheets 1 inch apart.  **I cookie used stamps somewhat unsuccessfully as the cookies rose a bit and lost their pattern.  Going to have to retry the stamp on more of a shortbread cookie.
  • Bake the cookies for 20 to 25 minutes, checking them often after 15 minutes, or until they are firm when touched in the center.
  • Cool completely on the sheets.

DSC_0168

Filling:

  • In the bowl of an electric mixer, beat the butter on low speed for half a minute. Add the vanilla and confectioners sugar and beat until smooth.
  • Beat in the milk and salt. The filling will look and feel like spackle.
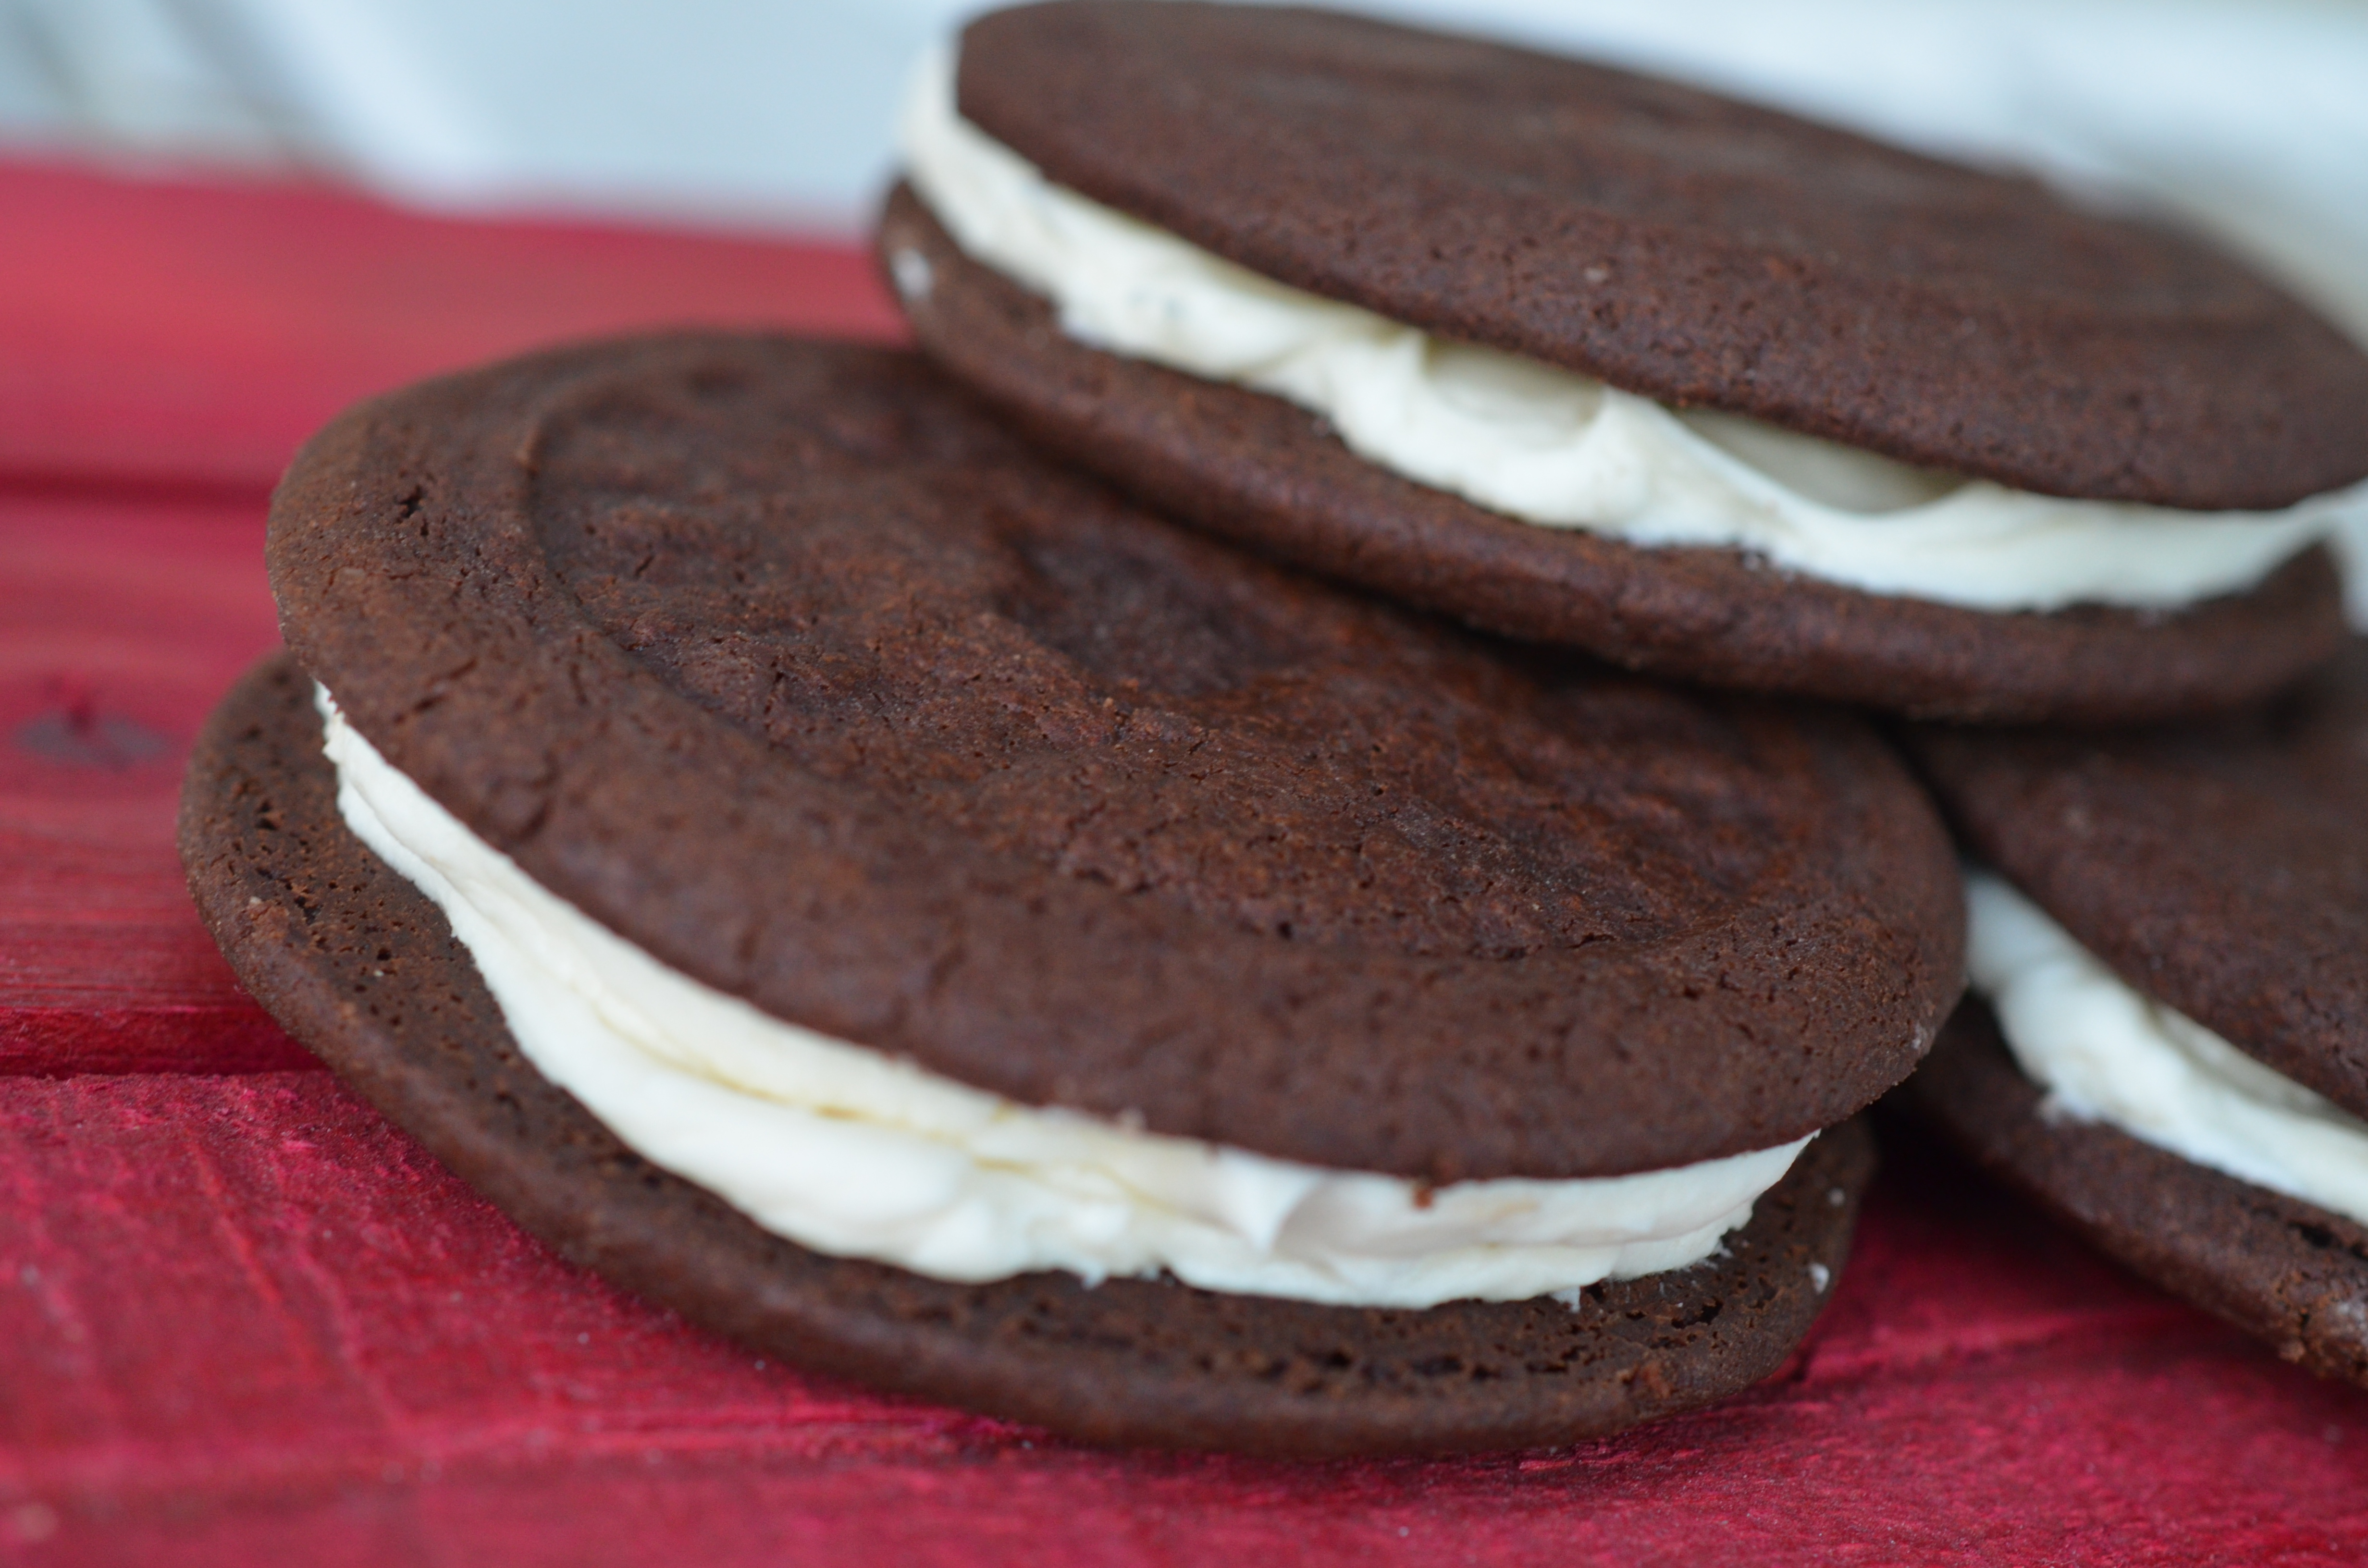
  • Place 1 tablespoon of filling on the flat side of 16 cookies. Press the remaining 16 cookies on the filling, flat sides against the cream, to evenly distribute the filling.

Store in an airtight container for up to 3 days.

DSC_0106

Food has power to connect people to loved ones, to memories and even future goals.  The are experiences and artistry within food, dishes and meals that tell stories from both sides of the plate.  As the chef creates moments and emotions that the diners are left to interpret and enjoy.

A small moment in my life with the boy at the lunch room table and an Oreo, captured the heart of my husband all over again.

Advertisement

Marscapone Filled Brownie Sandwiches

I wanted to tag everyone in this post, to get your attention and suggest you stop what you’re doing today and make these instead. By far these are absolutely my favorite cookie made to date. Rich, creamy, and decadent, the kind you would travel across town for. This is the cookie in which one is enough, at least for one seating.

aDSC_1250
If you have to share with more than 5 friends I highly suggest doubling the recipe as it doesn’t make too many. Or hide the last one, not that I did that!

aDSC_1294
From Better Homes and Garden Holidays– They got this one right on the money!

Ingredients
5 ounces semisweet chocolate, chopped
2 ounces unsweetened chocolate, chopped
2 tablespoons butter
¼ cup all-purpose flour
¼ teaspoon baking powder
¼ teaspoon salt
¼ teaspoon instant espresso coffee powder
2 eggs
2/3 cup granulated sugar
1 teaspoon vanilla
¾ cup miniature semisweet chocolate pieces
1 8 ounce container mascarpone cheese
2 tablespoons powdered sugar
1 tablespoon whipping cream
½ teaspoon vanilla

Directions

In a small heavy saucepan heat and stir chopped semisweet chocolate, unsweetened chocolate, and butter over low heat until melted and smooth; set aside to cool slightly. In a small bowl stir together the flour, baking powder, salt, and espresso powder; set aside.

In a medium mixing bowl beat eggs, granulated sugar, and 1 teaspoon vanilla with an electric mixer on high speed for 4 minutes or until thick and light yellow in color. Fold in melted chocolate mixture. Fold in flour mixture until combined. Fold in semisweet chocolate pieces. Let batter stand for 10 minutes (batter will thicken as it stands).

Preheat oven to 375 degrees F. Line two cookie sheets with parchment paper. Drop batter by slightly rounded tablespoons 2 inches apart onto the prepared cookie sheets. Bake about 8 minutes or until set and tops are crackled. Cool on cookie sheets for 1 minute. Transfer to a wire rack and let cool.

For filling, in a small bowl stir together the mascarpone cheese, powdered sugar, whipping cream, and 1/2 teaspoon vanilla until smooth. Spread about 1 tablespoon filling each on the flat sides (bottoms) of half of the cookies. Press the flat sides of the remaining cookies against the filling.

From the Test Kitchen
To Store:  Layer filled cookies between sheets of waxed paper in an airtight container; cover. Store the cookies in the refrigerator for up to 3 days or freeze for up to 1 month.

aDSC_1274

Enjoy the first day of Winter- 85 and sunny here in Florida! Looking forward to waking up in the 40s on Christmas morning!!

No Bake Lemon Drop Cookies

The kiddos are about done with school before the holiday and will soon be looking for something to do!  Put them to work with these fun candy cookies- no ovens required and plenty of hands on time!  Hard to beat the classic flavor of a lemon drop candy!!

DSC_0827

These kid friendly treats came from Better Homes and Gardens.  They offer a ray of sunlight on a cold winter day (unless you are in Florida with me where we pray for temperatures under 65).

DSC_0860

Ingredients

2 cups finely crushed shortbread cookies
1 cup powdered sugar
½ cup almonds, toasted and finely chopped
½ cup finely crushed lemon drop candies
2 tablespoons light-colored corn syrup
2 tablespoons milk
2 tablespoons butter, melted
1/3 cup powdered sugar
1 tablespoon finely crushed lemon drop candies

Directions
In a large bowl, stir together the crushed cookies, the 1 cup powdered sugar, the almonds, and the 1/2 cup crushed candies. In a small bowl, stir together corn syrup, milk, and melted butter. Stir the corn syrup mixture into the cookie mixture until well combined.

Shape cookie mixture into 1-inch balls. In a small bowl, combine the 1/3 cup powdered sugar and the 1 tablespoon crushed candies. Roll balls in powdered sugar mixture. Place on a large baking sheet or tray.

Cover and chill for at least 2 hours before serving. Roll balls again in powdered sugar mixture just before serving.

Makes about 36 cookies.

DSC_0850

And of course the best part is…your little helpers are the ones able to make them!!

Wild Flower Honey- Hazelnut Lace Cookies

Lace cookies should be a part of every cookie buffet, they add the perfect option for the “I’ll have a small one” line of thinking.  These are crisp, rich and light all at the same time, the perfect answer to that sweet tooth.

DSC_1003

These scrumptious cookies came from Southern Living.  Truly cannot go wrong!

DSC_0955

Ingredients

¾ cup powdered sugar
½ cup butter, softened
1 tablespoon wild flower honey
¼ teaspoon vanilla extract
1/8 teaspoon kosher salt
½ cup finely chopped hazelnuts
6 tablespoons all-purpose flour
3 tablespoons whole wheat flour

Parchment paper

Direction

1. Preheat oven to 325°. Beat first 5 ingredients at medium speed with an electric mixer 4 to 5 minutes or until creamy. Add hazelnuts and next 2 ingredients; beat just until blended. Drop by level teaspoonfuls 3 inches apart onto 2 parchment paper-lined baking sheets.

2. Bake at 325° for 12 to 14 minutes or until edges are golden brown. Cool on baking sheets 5 minutes; transfer to wire racks, and cool.

Makes about 2 dozen.

DSC_0963

These are a perfect hostess gift, and last up to a week.  Unless the elves in the house get to them first!!


Triple Chocolate Mint Sandwich Cookies

Chocolate and Mint- what more do you need in a holiday cookie?  Sir Wes believes all items with ingredients of mint and chocolate reign supreme, I have to agree with him mostly!  This combination certainly needs to grace every holiday cookie list.

DSC_1086

When I saw these bad boys in Better Homes and Gardens 100 Best Cookie Issue I knew they were daring me to put them on the must make list.  They were just about perfect, I just added a touch extra mint.

DSC_1070

Ingrediants

½ cup granulated sugar
3 tablespoons canola oil
2 ounces white baking chocolate, melted
2 egg whites
1 teaspoon mint flavoring
½ teaspoon butter flavoring
1 1/3 cups all-purpose flour
½ teaspoon baking powder
¼ teaspoon salt
1 tablespoon unsweetened cocoa powder
½ cup powdered sugar
2 ounces bittersweet chocolate, melted
1 -2 tablespoons water
1 ounce white baking chocolate, melted (optional)
Very small fresh mint leaves (optional)

Directions
In a medium bowl combine the granulated sugar, the oil, the 2 ounces melted white chocolate, the egg whites, mint flavoring, and butter flavoring, stirring until well mixed. In a small bowl stir together flour, baking powder, and salt. Add the flour mixture to the egg white mixture; stir just until combined. Cover and chill dough for at least 1 hour or up to 24 hours or until firm enough to roll into balls.

Preheat oven to 350 degrees F. Shape dough into 3/4-inch balls (1 teaspoon dough each). Place cocoa powder in a small bowl. Roll balls in cocoa powder to coat. Place balls 1-1/2 inches apart on ungreased cookie sheets. Flatten balls with the bottom of a glass to about 1-1/4-inch-diameter circles.

Bake for 6 to 7 minutes or just until edges are firm. Transfer to a wire rack; cool.

For chocolate filling, in a small bowl whisk together the powdered sugar, the melted bittersweet chocolate, and enough of the 1 to 2 tablespoons water to make a smooth spreadable filling. (If mixture seems too thin, allow it to stand a few minutes before using.)

Spread the bottoms of half of the cookies with the chocolate filling, using about 1 teaspoon filling on each. Top with the remaining cookies, bottom sides down, to make sandwich cookies.
If desired, place the 1 ounce melted white chocolate in a small resealable plastic bag. Seal bag. Using scissors, snip off a very small corner from bag. Drizzle white chocolate over tops of cookies; place mint leaves on top.

Makes about 16 sandwiches.

Storage
Layer undrizzled sandwich cookies between sheets of waxed paper in an airtight container; cover. Store at room temperature for up to 3 days or freeze for up to 3 months. To serve, thaw cookies if frozen. If desired, drizzle with white chocolate as directed in Step 6.

DSC_1056

These will be a crowd favorite- consider making a double batch!

Glistening Lemon Sandwich Cookies

These are one of my favorite cookies from the beginning of my baking journey.  They are so delicate and festive, that they scream perfect for a season filled with love and care.  They taste like shortbread but with a much lighter and flaky consistency.

DSC_0914

I thought they were just gorgeous when they made the cover of the 2008 Gourmet December issue, and thought they deserved a reappearance!

DSC_0909

Ingredients 

For cookies:

  • 1 1/3 cups all-purpose flour
  • 2/3 cup cornstarch
  • 1/4 teaspoon salt
  • 2 sticks unsalted butter, softened
  • 1/2 cup confectioners sugar
  • 1 tablespoon grated lemon zest
  • 1 teaspoon vanilla
  • White or colored sanding sugars

For filling:

  • 1 cup confectioners’ sugar
  • 1 tablespoon grated lemon zest
  • 1 tablespoon fresh lemon juice
  • 2 tablespoons light corn syrup
  • 1/2 stick unsalted butter, softened

Equipment:  a heavy-duty sealable bag

DSC_0929

Preparation

Preheat oven to 350°F with rack in middle. Line  2 large baking sheets with parchment paper.

Whisk together flour, cornstarch, and salt.

Beat together butter and confectioners sugar with an electric mixer until pale and fluffy, then beat in zest and vanilla. At low speed, mix in flour mixture just until a soft dough forms.

Put sanding sugars in different bowls. Roll a scant teaspoon of dough into a ball and drop into sugar, turning to coat. Reshape if necessary and transfer to a baking sheet. Repeat, spacing balls  3/4 inch apart, until baking sheet is filled.

Bake until tops are slightly cracked but still pale (bottoms will be pale golden), 12 to 15 minutes. Transfer cookies on parchment to a rack to cool completely.

Form and bake more cookies on second baking sheet.

Make filling and sandwich cookies:

Beat together all filling ingredients in a large bowl with an electric mixer at medium speed until combined well. Transfer to sealable bag and snip off a corner.

Turn over half of cookies and pipe about 1/2 teaspoon filling on flat side of each. Sandwich with remaining cookies, pressing gently.

Makes about 50 sandwich cookies.

DSC_0888

Cheers to a weeks worth of holiday cookies- Turn your ovens on!!!


Double Chocolate Coconut Cookies- The Great Food Blogger Cookie Swap

Confession- there has not been a trip to the grocery store in the last two months that I have not bought a cooking magazine, mostly from the cookie category. Every year the same thing- that one to five minutes spent waiting in the darn check out line is just too long to resist. Holiday baking- I love it, the search for that perfect gem of a cookie. This year I participated again in the Great Food Blogger Cookie Swap along with over hundreds of other participants (search #FBCookieSwap to find mouth-watering cookies to bake or torture yourself with). The cookie swap was all to raise money for Cookies for Kids’ Cancer, over $13,778.40 was raised!

The Great Food Blogger Cookie Swap 2013

Martha Stewart contributed to the cookies I sent- after an evening of heated debate and taste testing these were the winners that I was going to ship and bake.

DSC_1030

Ingredients

  • 1 cup unsalted butter, softened
  • ½ cup granulated sugar
  • ¾ cup packed light-brown sugar
  • 2 large eggs
  • 1 teaspoon pure vanilla extract
  • 1 ¾ cups all-purpose flour
  • ¼ cup unsweetened Dutch-process cocoa powder
  • 1 teaspoon baking soda
  • ½ teaspoon baking powder
  • ½ teaspoon coarse salt
  • 2 cups white-chocolate chunks (about 9 ounces)
  • 1 ¾ cups sweetened flaked coconut
  • 1 ¾ cups coarsely chopped walnuts (about 6 ounces)

Method

Preheat oven to 350 degrees. Put butter and sugars in the bowl of an electric mixer fitted with the paddle attachment; mix on medium speed until smooth, about 2 minutes. Mix in eggs, 1 at a time. Stir in vanilla.

Sift flour, cocoa powder, baking soda, baking powder, and salt into a medium bowl. Mix into butter mixture on low speed until well combined. Stir in chocolate, coconut, and walnuts.

Using a 1 1/2-inch ice cream scoop, drop batter onto baking sheets lined with parchment paper, spacing 2 inches apart. Flatten slightly. Bake until set, 10 to 12 minutes. Let cool on sheets on wire racks 2 minutes. Transfer cookies on parchment to racks to cool completely. Cookies can be stored in airtight containers at room temperature up to 1 week.

DSC_1027

We totally lucked out this year with our cookie swaps- all three of the cookies received were out of this world- so ummm, umm good!   Cranberry Orange White Chocolate Cookies from Stephanie at 52 Kitchen Adventures were Sir Wes’s favorite- he “allowed” me to have a couple.  Kate at Fleur-De-Licious sent Ginger Crinkle Cookies, which I am wondering if she knew about my ginger devotion- so yum!  And lucky for me, Sommer, of A Spicy Perspective, could not decide what cookie to send so we got both Sour Cream Whoopie Pies with Chocolate Hazelnut Filling and Tangerine Shortbread with Chocolate Drizzle.  Love that I found another indecisive lady in the kitchen!

Thanks to Lindsey and Julie for organizing such a fun way to “Bake-Back” to a great cause! If you want more mouth watering temptation follow their blogs!  Also to the sponsors of The Great Food Blogger Cookie Swap, OXO, Dixie Crystals, Gold Medal Flour, and Grandma’s Molasses!

Raspberry Rose Macarons- A Thank You for Breast Cancer Supporters

October is National Breast Cancer month and it seems like everyone wants to join in on the crusade, from the NFL, Social Media Sites, and shopping proceeds to research.  As well as into our work places and own homes with things like Pink Shirt Day, Pink Ribbons and into the privacy of a woman’s bathroom with self-exams.   With both mine and my Mom’s fight with #BreastCancer, I like to take the time to do what I can and bring awareness to women, in particular young women each year at this time.

DSC_0868

I remember the amount of roses that got delivered to me after surgeries and how that support and love felt.  I know that support is what gets many cancer patients thru, even though it seems like so little to those friends and family.  The medicines, treatments and developments in surgery are the technical parts that heal but it is the personal part, the support from loved ones that lasts a life time.

DSC_0813

Last week I thought about my experience and where I am now with it.  What it means to me, and how I wanted to honor it.  The friends and families support is what I held on to and I wanted to honor that.  Macarons seemed like the best way to do that.  Making macarons truly is a dedication of time and patience for me, not giving up and although the process may not be easy for me, in the end the learning’s and results are very fulfilling.  Rose flavor for the love I received during my experience. XOXO

DSC_0936

Rose Macaron Shells, slightly modified from Martha Stewart

  • 1 ¼ cups almond meal
  • 1 ¾ cups confectioner’s sugar
  • ¼ teaspoon salt
  • 4 large egg whites
  • ½ cup granulated sugar
  • ¼ teaspoon rose extract
  • Red Food Coloring Drops

Raspberry Rose Ganache, slight modified from Les Petits Macarons by Kathryn Gordon and Anne E. Martin

  • 11 ounces white chocolate, chopped
  • 2 tablespoons light corn syrup
  • ¾ cup sour cream
  • 1 cup frozen raspberries, pureed and strained
  • 2 teaspoon rose extract
  • 1 tablespoon unsalted butter, very soft

To make rose macaron shells:

  • With a fork blend together almond meal and confectioner’s sugar and sift into a large mixing bowl.
  • Beat egg whites until frothy, about 1 to 2 minutes. Slowly add granulated sugar and rose extract, and beat until barley stiff, shiny peaks, another 3 to 5 minutes, adding red food coloring drops until the desired color is achieved.
  • Add egg whites into almond mixture and fold until combined. Continue to mix vigorously with spatula until the batter sinks easily into a smooth mass and has the consistency of honey. Transfer mixture to a pastry bag, cut off 1/2 inch off tip. Pipe 1-inch rounds about 1 inch apart on parchment-lined sheets.
  • Let dry 30 minutes to an hour and a half until tops are firm and dry.
  • Preheat oven to 350. Bake one sheet at a time for about 14 minutes, rotating once. Let cool completely on wire racks before piping ganache and sandwiching cookies together.

To make the ganache filling:

  • Put the chocolate in the bowl of a food processor and pulse several times until it is chopped into small pieces.  Leave the chocolate in the processor.
  • Bring the corn syrup, sour cream and raspberry puree to a boil in a small saucepan over medium high heat. Immediately pour it over the chocolate in the food processor.  Wait one minute for the chocolate to melt completely, then pulse until the mixture is completely smooth.  With the food processor running, add the butter, then the rose extract, and pulse until all is incorporated and the ganache is homogeneous and shiny.
  • Pour the ganache into a shallow pan, and let it cool at room temperature until it becomes pipeable, about 15 minutes, stirring occasionally.   This ganache can be kept covered and refrigerated for up to 2 weeks.

DSC_0855

These French macarons came out perfect, I was so happy with the lightness of the cookie and the subtle rose flavor.  They have perfect balance and are a perfect tribute to all of those that support breast cancer patients.

All you ladies, take care of yourself, do your exams, and remember to show your supporters how much their efforts matter.

Tomato Basil Macarons #BrunchWeek

Today is the start of #BrunchWeek, which leads straight up to Mother’s Day.  There are bloggers across the country participating, so there is bound to be some great ideas for the coming Sunday’s feast.  Check out the end of the post for a list of recipes and posts to be inspired by as well as list of incredible sponsors.  Click on the Rafflecopter link to get a chance to win amazing prizes from the sponsors!!! Super easy!

8655385121_01eb457200

I have to admit- I’ve been gotten.  A little monster snuck into my head, and flipped a switch to make me believe that all the hype about macarons being “difficult” would not be true for me.   I was convinced that I, an amateur, yet successful baker would not have any issues with this simple cookie.  So when I was thinking about creative brunch ideas, savory macarons popped into my head and I signed on the dotted line- #BrunchWeek Day 1, Savory Macarons.

DSC_0160

Of course there was plenty of time to get started, just needed to get past that busy work week, and then Sir Wes’ birthday celebration #WEStival, my brother’s family visit, a catching up at work week, a weekend to relax, and then a crazy town week at work.  Soon I was left with just two weeks to tackle these “simple” cookies.  It turns out that the hype was real- macarons are as temperamental as they get, they are not simple at all, more like a monster in fact.  Touch them wrong and its over for you.

DSC_0157

It was helpful having to try and retry baking macarons nightly due to deadline, as I am certain I have actually learned about the anatomy of the French monsters.

With the help of Les Petits Macarons written by Kathryn Gordon and Anne E. McBride, I spotted my troubles and made plans for the next batch.  I strayed a few times over to good old Martha, but became sold on Kathryn and Anne’s methods and advice.

DSC_0119

My problems laid mostly with the feet, they had all types of problems- flat feet, no feet, wide-load feet, and most commonly,  “why don’t I have model feet”.  The monsters also had some intestinal problems, not much of a fan of this topic, but I’ll just say that there were runs and explosions.

With enough nights to work on them and the help of some friends at work, along with this monster bible, I managed to be satisfied with the macarons.  All had not been lost, I won the war against the savory macaron monster- as I would say at work- “Kiss it B*^@ches….”

This recipe and method came from Les Petits Macarons with some very slight modifications to adding the savory-

  • 1 ¼ cup almond flour (Bob’s Red Mill is in my pantry)
  • ¾ cup confectioner sugar
  • 2 tablespoons tomato powder
  • ¼ teaspoon kosher salt
  • 1 tablespoon powdered egg whites
  • ¾ cup granulated sugar
  • ½ teaspoon cream of tartar
  • ½ cup aged egg whites (from 4 eggs, aged covered in the fridge for 1-2 days) – Room Temperature
  • 2 drops red gel food color (optional)
  • 2 tablespoon crystalized basil
  • 10 tablespoons garlic herb cream, goat, brie or preferred cheese spread

DSC_0165

Makes about 40 macaron sandwiches

1. Preheat the oven to 200ºF. Pulse almond flour, confectioners’ sugar salt and tomato powder in the bowl of a food processor 4 times for 4 seconds each time. Sift dry ingredients over a piece of parchment paper.

2. Hand whip the powdered egg whites and the granulated sugar in an electric mixer bowl, add in the egg whites and cream of tartar until the mixture is homogenous.  Whisk on medium-high speed, when the egg whites reach soft peaks add the food coloring if you choose to use.  Continue whipping until glossy stiff peaks form (about 8-11 minutes).  The meringue should look like marshmallow fluff when ready or when you are able to hold the bowl upside-down without it falling out.

3. Sift the dry ingredients into the meringue and J-fold until you reach the, almost impossible to know, macaronner stage. It is important to fold the different components just enough,(sadly I think this only comes after you’ve learned what doesn’t work), but not too much or the macarons will crack. To make sure that you have reached the right point, once the ingredients appear combined, lift some of the mixture about 1 inch above the bowl with the spatula. If it retains a three dimensional shape, fold it again. When folded just enough, the mixture should fall right back into the bowl, with no stiffness, in one continuous drip.   Fill your piping bag halfway, allowing the maximum piping control.

4. Pipe the macarons 1 ½ inches apart on silicon baking sheet lined sheetpan. (again, more of the practice makes perfect saying).  Slam the baking sheet down to remove excess air (slam 6 times, from 6 inches above the table). Sprinkle the crystalized basil on top of each macaron.  Bake for 15 minutes and then turn the oven to 350 and cook for another 6-9 minutes depending on size.

5.  Fill with your preferred garlic herb spread, creamed brie, goat cheese, ect.  Refrigerate until an hour prior to serving.

DSC_0141

***With any failures there are learning’s.  Pay attention to what didn’t work so you know what to try or avoid in the future.

I have to admit, there is no way I am done with these monsters.  I feel like they might have won this round, but now that I’ve cut my teeth, I am ready for round 2.

DSC_0207

I secretly love getting stumped in the kitchen, as it makes successes so much sweeter.

Take a look below to see this great list of #BrunchWeek  Posts!!

Today’s Brunch Recipes From Participating BrunchWeekers Beverages

Blood Orange Mimosas by Love and Confections

Strawberry Mimosa by Jane’s Adventures in Dinner

Margarita for Mama by poet in the pantry

Candied Bacon Bloody Mary by Sarcastic Cooking

Eggs

Breakfast Won Ton Cups by Small Wallet Big Appetite

Meat Lover’s Quiche by Savory Sweet Eats

Chorizo and Garlic Frittata by {i love} my disorganized life

Cherry Tomato and Chorizo Omelet by Katie’s Cucina

Meat, Poultry and Fish

Candied Bacon by Cravings of a Lunatic

Shrimp-Grapefruit Orchid Stirfry by Culinary Adventures with Camilla

Savory Treats

Hollandaise Sauce by Kokocooks

Breads, Grains, Cereals and Pancake-type Yums

Apple Cinnamon Crepes by Sweet Remedy

Grain-free Apple Walnut Pancakes by Seasonal and Savory

Desserts

Biscoff Coffee Cake Muffins by White Lights on Wednesday

Bob’s Scottish Oat n’ Walnut Sticky Scones by The Vintage Cook

A big thanks to all the sponsors, California WalnutsLodge Cast Iron, Vidalia Onions-The Flavors of Summer, Black Gold Farms, the Food and Wine Conference and Sunday Supper, Bob’s Red Mill, Whole Foods Market -Orlando, and Stonyfield Organic,

Click below on the link and see all the generous and incredible prizes the #BrunchWeek sponsors have donated!

a Rafflecopter giveaway

Port Wine Cherry Cordial Cookies- #FBCookieSwap

Coffee and/ or cereal for breakfast, on your own for lunch and cookies for dinner.  This was our household meal plan for the last few weeks.  What outstanding timing for The Great Food Blogger Cookie Swap to happen, it was the same time Sir Wes and I were both barreling thru our busiest weeks of the year.  Three deliveries of cookies landed on our doorstep, perfectly synched to provide our nourishment thru Crazytown.

fbcookieswap_white

Cookies for dinner, for two weeks, and I am not even embarrassed.  These gems were fantastic.  Rachel from Kvell in the Kitchen made us Iced Whiskey Ginger Cookies (great week for whiskey), we got a batch of Chai Snickerdoodles that I loved (a couple made it into my morning coffee) and Traci from Burnt Apple’s cookies landed last- melt in your mouth butterscotch delights.

I recruited a few chefs that I work with to help me brainstorm what kind of cookie to make, the idea list got pretty long and I have a few of them planned in the future- but we finally landed on the perfect cookie to sip a glass of wine with.  Chocolate Cherry Cordial Cookies, made with port wine, 70% dark chocolate chunks and sun dried cherries. 

DSC_0101

Inspired by a couple of great chefs and slightly modified from the Food Network

Ingredients

  • 1 1/2 cups all-purpose flour
  • 3/4 cup good quality cocoa powder
  • 1 teaspoon salt
  • 1 teaspoon baking soda
  • 1 stick butter, softened
  • 3/4 cup granulated sugar
  • 3/4 cup packed brown sugar
  • 1 large egg
  • 1 teaspoon vanilla extract
  • 1/2 cup port wine
  • 6 ounces dark chocolate, broken into chunks
  • 1/2 cup dried tart cherries

 Directions

 Preheat oven to 375 degrees F.

 Combine flour, cocoa powder, salt and baking soda in a bowl. In a bowl of an electric mixer, or with a handheld mixer, combine butter and sugars until fluffy. Add egg, vanilla, and wine and combine. Slowly in batches add the flour mixture until just combined. Fold in the chocolate and cherries. On a nonstick cookie sheet, place a heaping tablespoon of dough for each cookie about 2 inches apart from each other. Bake 8 to 10 minutes, or until tops are still soft looking but edges look firm. 

DSC_0050

The cookie swap this year was a ton of fun- I can’t wait to see all the posts and get my cookie baking on!!  Thanks to Lindsay from Love and Olive Oil and Julie from The Little Kitchen for organizing such an enormous event.  And a huge shout out to the participants that all supported a great cause- Cookies for Cancer.  I can’t wait to see how much The Great Food Blogger Cookie Swap collected for such an important cause! 

DSC_0074

Cheers to all the cookie monsters out there- and though it isn’t a diet I would recommend for any length of time- remember, cookies for dinner are OK.  (sometimes)