Grapefruit Rose Marmalade

My neighbor has a grapefruit tree, one that fills our backyard with the most beautiful smell.  I often just step outside only to get a sample of the intoxicating perfumed air. I’m not sure if this tree’s aroma is the rule or an exception, in any case the scent is profound.  I really don’t care for grapefruit, it’s too bitter for me, but since becoming captivated with the trees aromatics, I have tried and tried to become a fan of the ruby colored balls.  

DSC_0040a

I’ve found that while I don’t enjoy eating a grapefruit out of its skin, I do love it’s flavor for cooking and baking.  Our neighbor leaves a sack filled with grapefruit on our front door a few times each year, which I then return to them in form of a cake or a cocktail.  This year I took inspiration from my love of marmalades and the hope of spring flowers popping up soon. 

DSC_0081a

This recipe came from Desert Candy.  The amount of rose water seems extreme, as a few drops go a very long way when dealing with rose water, but I promise it is perfect.  The most important thing to remember is to keep the pot on a very slow simmer so it caramelizes perfectly, without burning. 

Ingrediants

  • 3 large ruby red grapefruits
  • 3 cups water
  • 4 cups sugar
  • 1 vanilla bean, seeds scraped
  • 2 tablespoons rose water

 Directions

1. Set a large pot of water to boil. Cut off the peel of the grapefruits, working to get good thick slices, but leaving the inner white pith closest to the fruit still attached to the fruit. Cut the peels into strips. Blanch the peels by submersing them in boiling water for about three minutes. Drain in a colander and rinse under running water. Bring a fresh pot of water to a boil and repeat the blanching process again, this removes any bitterness. Drain and rinse again.

DSC_0001a

2. Place the peels in a large pot. Cut off all the white pith from the remaining fruits then, working over the pot, cut between the grapefruit membranes so that the fruit sections fall into the pot. Squeeze juice from the membranes and discard them. repeat with remaining fruits.

3. Add the water and sugar to the pot and bring to a boil, stirring to combine. Lower the heat to a very low simmer. Simmer until the marmalade is thick and translucent, about 90 minutes. The marmalade may still appear a touch watery- keep in mind it will thicken as it cools.

4. Add the vanilla bean seeds and simmer another five minutes. Remove from the heat, stir in the rose water (or lemon) and set aside to cool. You could can this and process in a hot water bath or simply store in jars in the fridge.

DSC_0056a

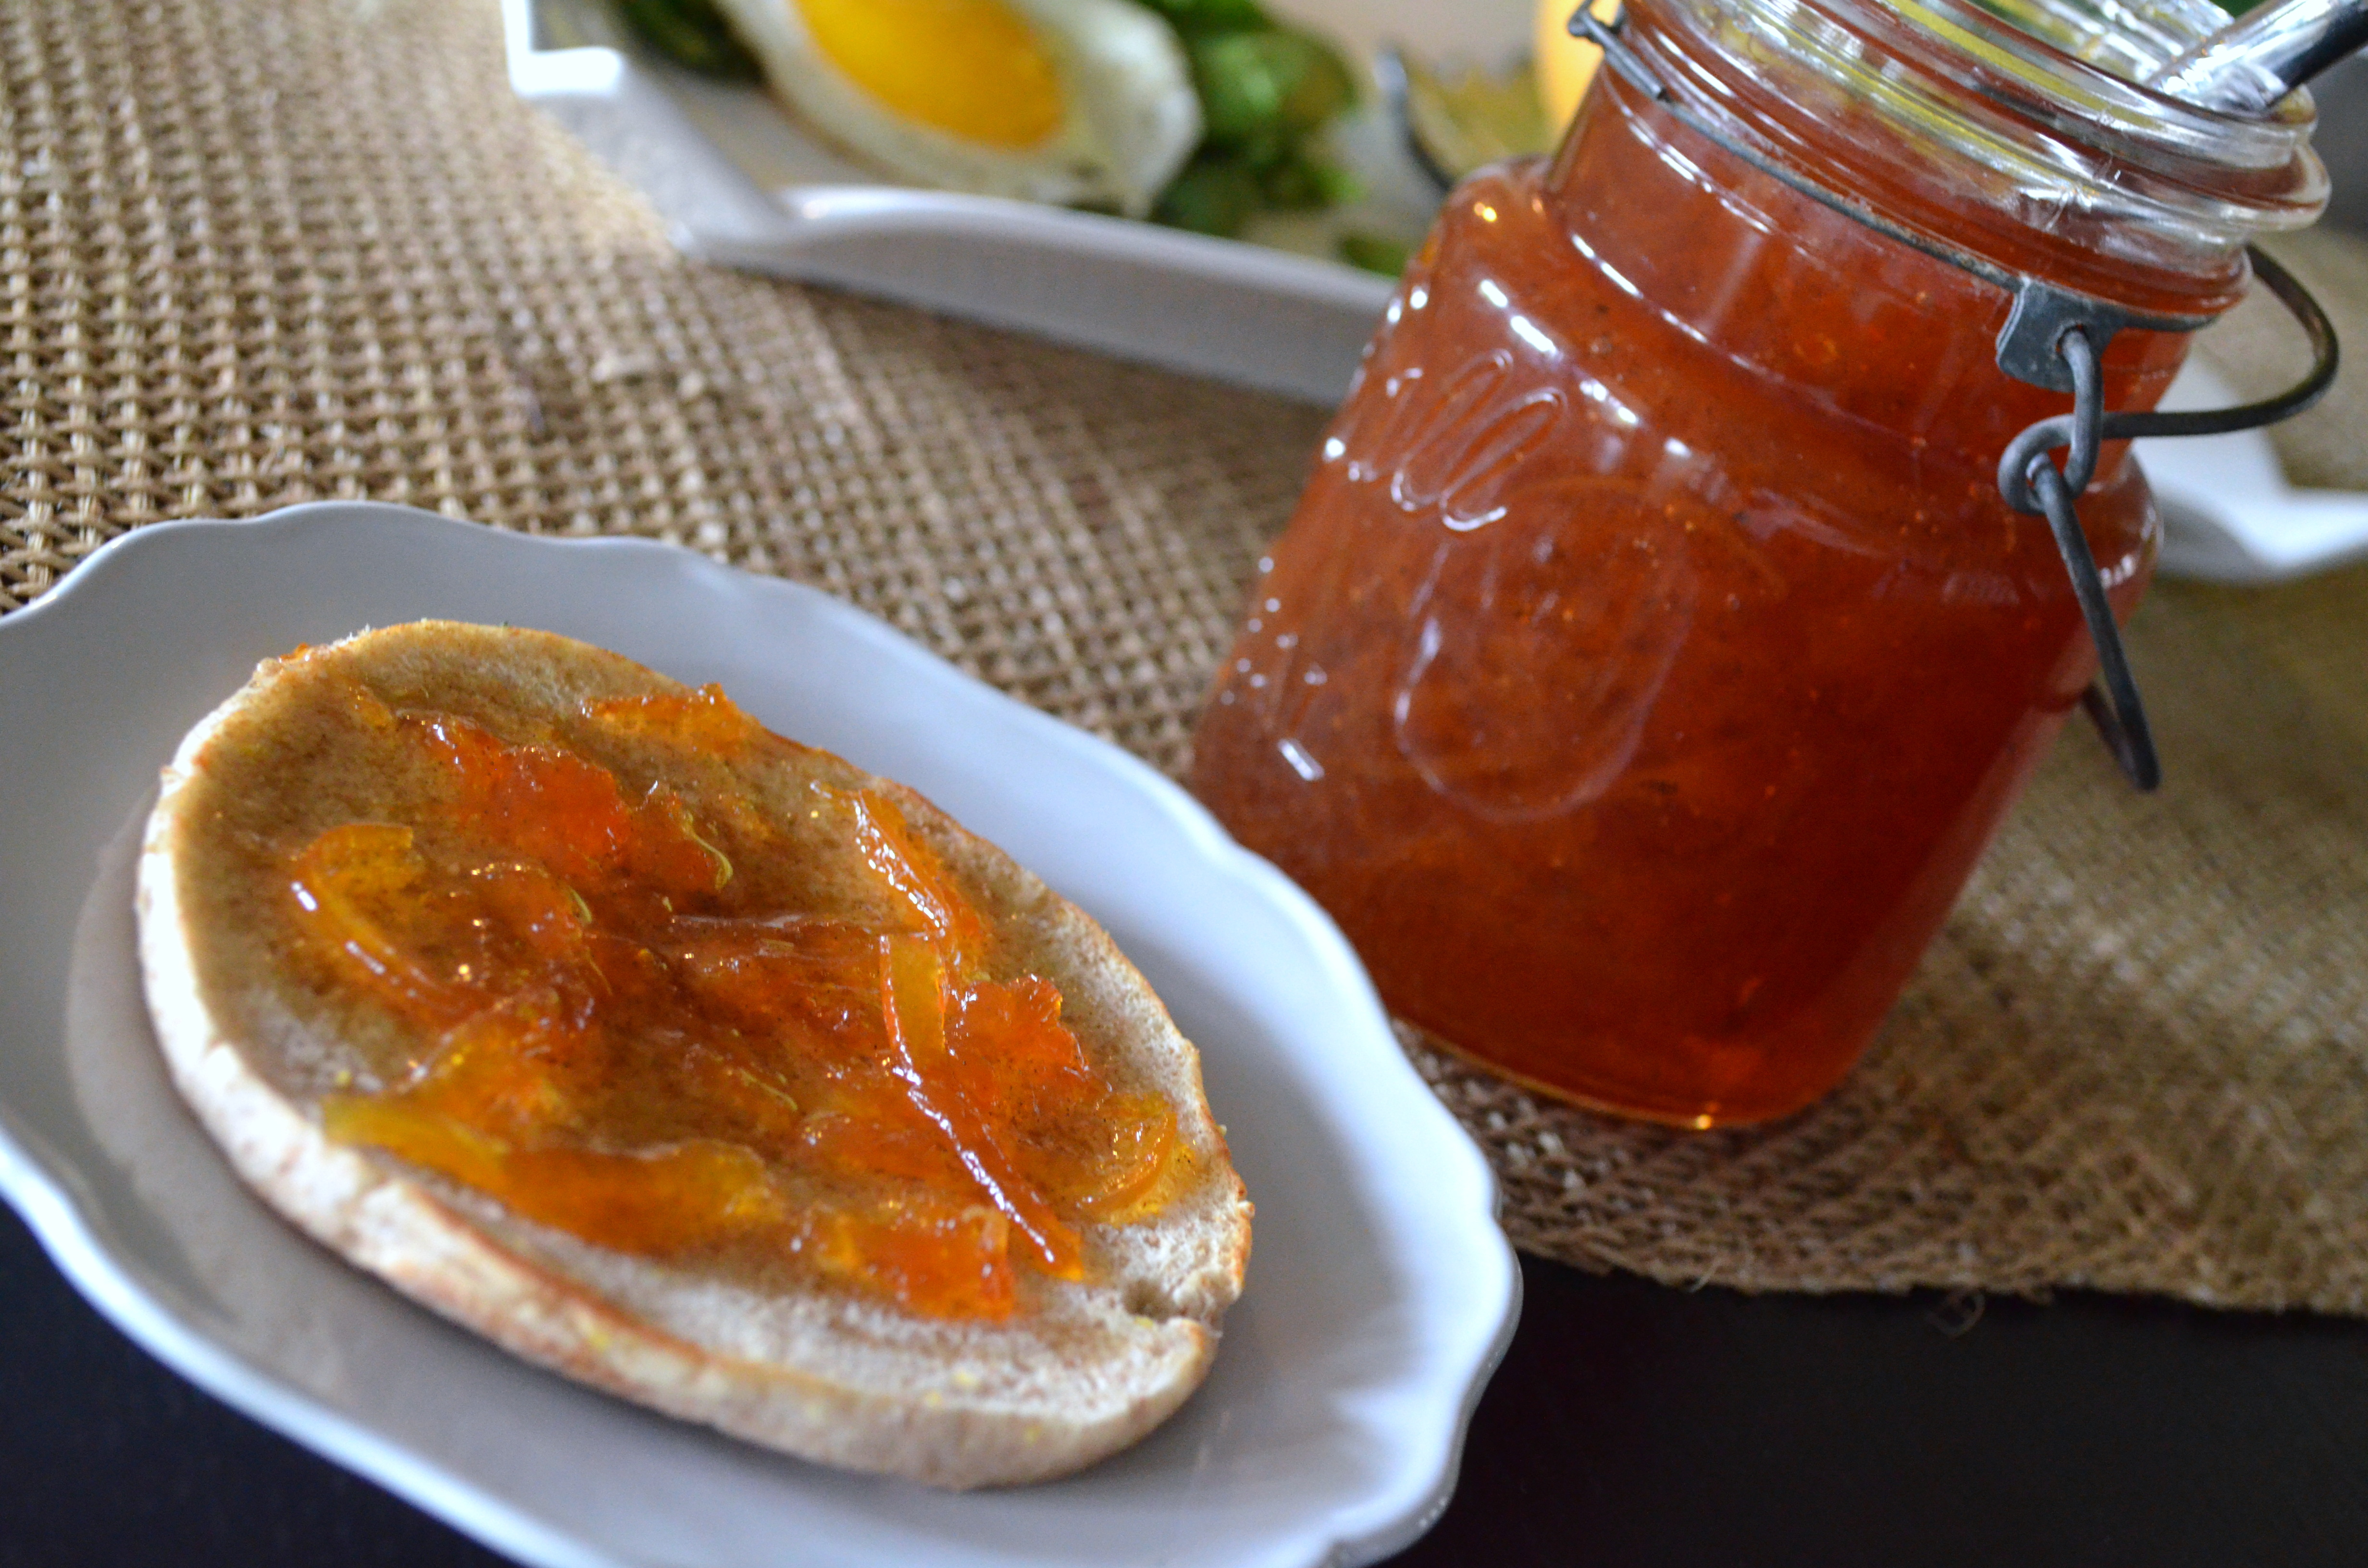
The marmalades combination of citrus and floral captures the beauty of spring; vibrant colors, lingering floral smells and balanced sweetness spell out spring on your plate.

DSC_0030a

Spread it on your toast, drape it over grilled fish or chicken, make vinaigrette for the garden greens, and even cover a scoop of vanilla ice cream with it. Then add some fresh flowers from Flowers Cork to the table and everything is complete. Spring is in the air! 

Advertisement

Preserved Lemons- Week 3

Half way thru on the lemon preservation process- thinking about all the ways to use them up- 

Week 3 of Lemon Preservation

 
I have been stirring them once a week since I started the process-  You can read how to get started here!

Gooey and Juicy! Half way there!

Patience is key with preserving lemons, as well as planning ahead! 

Preserved Lemons

Anyone else on a healthy eating kick?  I don’t like to think of it as a diet- but in the end, I guess that’s what I am doing.  Admittedly, my pants are tight-all those darn cookies got me 🙂.  So, like many others across the country, I am back on the wagon again.  Exercising more, eating healthier, drinking less frequently and waiting for my pants to loosen up!

Over the holidays I took a trip to Alabama to see my In-laws, and happily returned with a large bag of lemons from their tree.  Faced with a busy start to the year at work and fearing the lemons might end up in the garbage, I have decided to preserve them.  Preserved lemons are a popular condiment in Indian cuisine but can be used in endless dishes- stews, spreads, as condiments to fish and chicken, even in Bloody Mary’s!  They are wonderful to have in your refrigerator when you are faced with another night of vegetables for dinner.  As long as our dinners aren’t boring and bland I can eat healthy every night!

Backyard Alabama Lemons

My husband brought this recipe home a few years ago and it never fails!  They do take six weeks to prepare so get started early- by the time you get sick of the same salad you’ve been eating every week they will be ready.  

Sir Duke likes some zest to his kibble too!

 Ingredients

  • 10 Lemons, wedged and seeds removed
  • 1 cup kosher salt
  • 1 cup olive oil
  • 3 cinnamon sticks, broken
  • 1 tbsp whole cardamom

    Lemon Wedges


Preserved Lemon Mise en Place

Method

Place lemon wedges in a plastic container and sprinkle kosher salt evenly over wedges.  Pour olive oil into container and mix well.  Add cinnamon and cardamom and toss together.  Cover the lemons with a piece of parchment paper and place a second container on top to weigh it down. 

Week One of Preserving Lemons

Refrigerate for 6 weeks, stirring once a week.  After 6 weeks, lemons will be preserved and ready to use.  Cut lemon wedges into small pieces and use with fish, chicken, vegetables, flat breads, stews, ect. 

Use cans, jars, or anything else to apply some weight!

Yield is about a gallon or 20 servings.

Preserved Lemons- Week One

I’ll check back in a few weeks with a glimpse of the lemon preservation progress, until then, get yours going too!  Perhaps Bloody Mary’s at Easter brunch?

Brown Turkey “Figgy” Jam

Another creation from my Alabama mother-in-law’s backyard!  As always, my eyes are bigger and badder than my stomach; therefore, I insisted on traveling home to Florida with the remaining bounty of my backyard farming.  (No surprise when I realized the life of these beauties was nearing an end.) 

I did the best thing I knew and made jam!  Images of fig jam creations danced thru my head: croissants, Greek yogurt parfaits, chicken marinates, pork belly glazes, salad dressings…etc. –  You get the idea!

Alabama Brown Turkey Figs- Roll Tide!!!!

Fresh figs are in season beginning in July in the south, and a bit later in the summer as you travel north.  Many people we ask have never tried a fresh fig, and only refer to the almighty “Newton” or a dried figs as something they’ve tried.  Well there is more to figs than the “Newton” – the flavor is night and day. A fresh ripe fig has the texture of a ripe peach, and a juicy sweetness.

This is another really easy recipe that will provide endless results.  The shelf-life is great, so no need to feel like you have to use it up right away.  It is also perfect for canning.  **Mental note to myself -must learn how to can soon!!

Figgy Jam

  • 2 ½ cups Fresh Brown Turkey Figs, quartered
  • Zest of ½ a lemon
  • Juice of ½ a lemon
  • 1 tablespoon sugar (depending how sweet your figs are you may adjust)
  • 2 tablespoon light brown sugar
  • 2/3 cup water (depending how plump and juicy your figs are you may adjust)

Figs cooking -Simmer slowly, let the sugars carmelize

This is super simple – just put the figs, lemon zest, lemon juice, and sugars into a heavy 2 quart pot and slowly simmer.  The sugars and juices from the figs will slowly release and start to caramelize.  My figs did not release enough juice so I helped it along, with a couple of tablespoons of water at a time.  When the figs had cooked down and a nice golden brown color appeared, I removed from the pot from the stove and ran the chunky jam thru a food processor, giving a smooth spread.  Allow it to cool and keep refrigerated for 3 months.

Cooked down figs- nice caramel color!!

Fig Jam! Spreads, sauces, marintates, dressings, and even homemade poptarts!!!!!!!

Happy cooking!!

Carroll