Green Onion and Cheddar Tater Tots

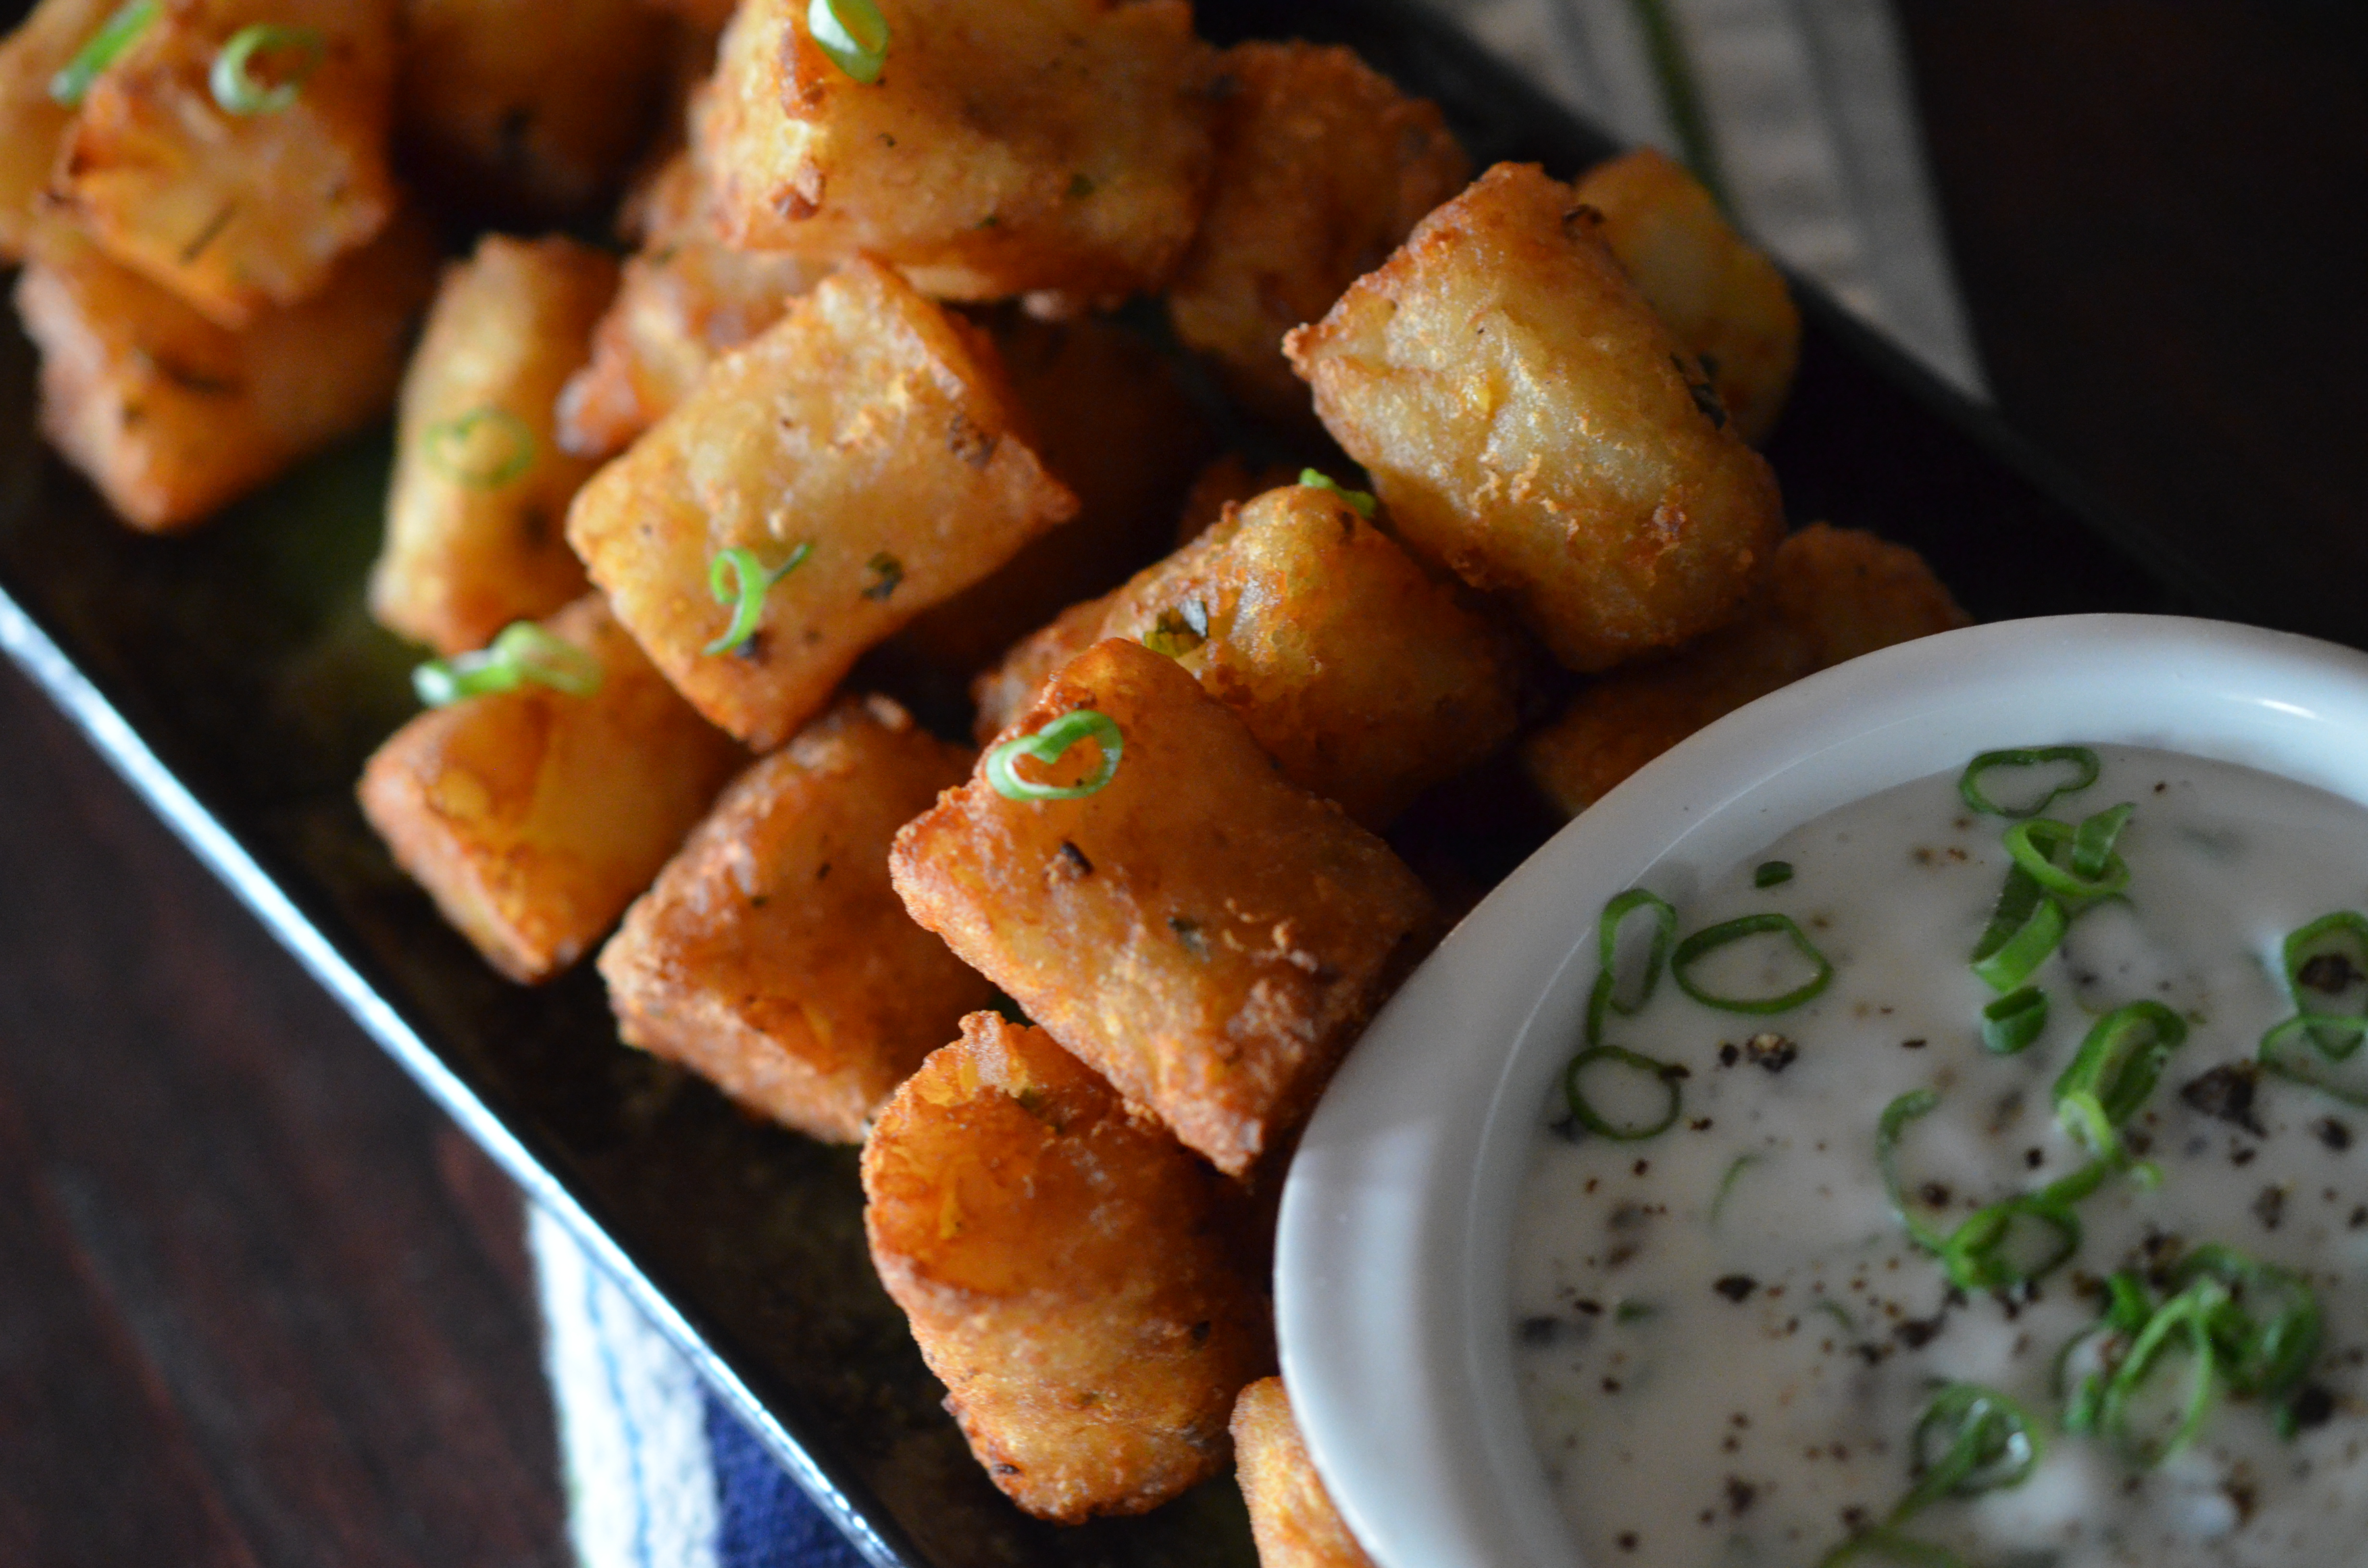
Tater Tots are always tempting and delicious, but when you are lucky enough to encounter homemade, from scratch tots it is truly time to pull out the stretchy pants. Pig out especially when you run into a flavor of tot that excites you!!!

DSC_0744

My first time out of the tater tot gate was reserved, I found this recipe and played around with the flavor profile just a bit, as I wanted to master the basics first and then move on to the extraordinary adventurous tots.

DSC_0759

This recipe came from Serious Eats, I just slightly modified it.

Ingredients
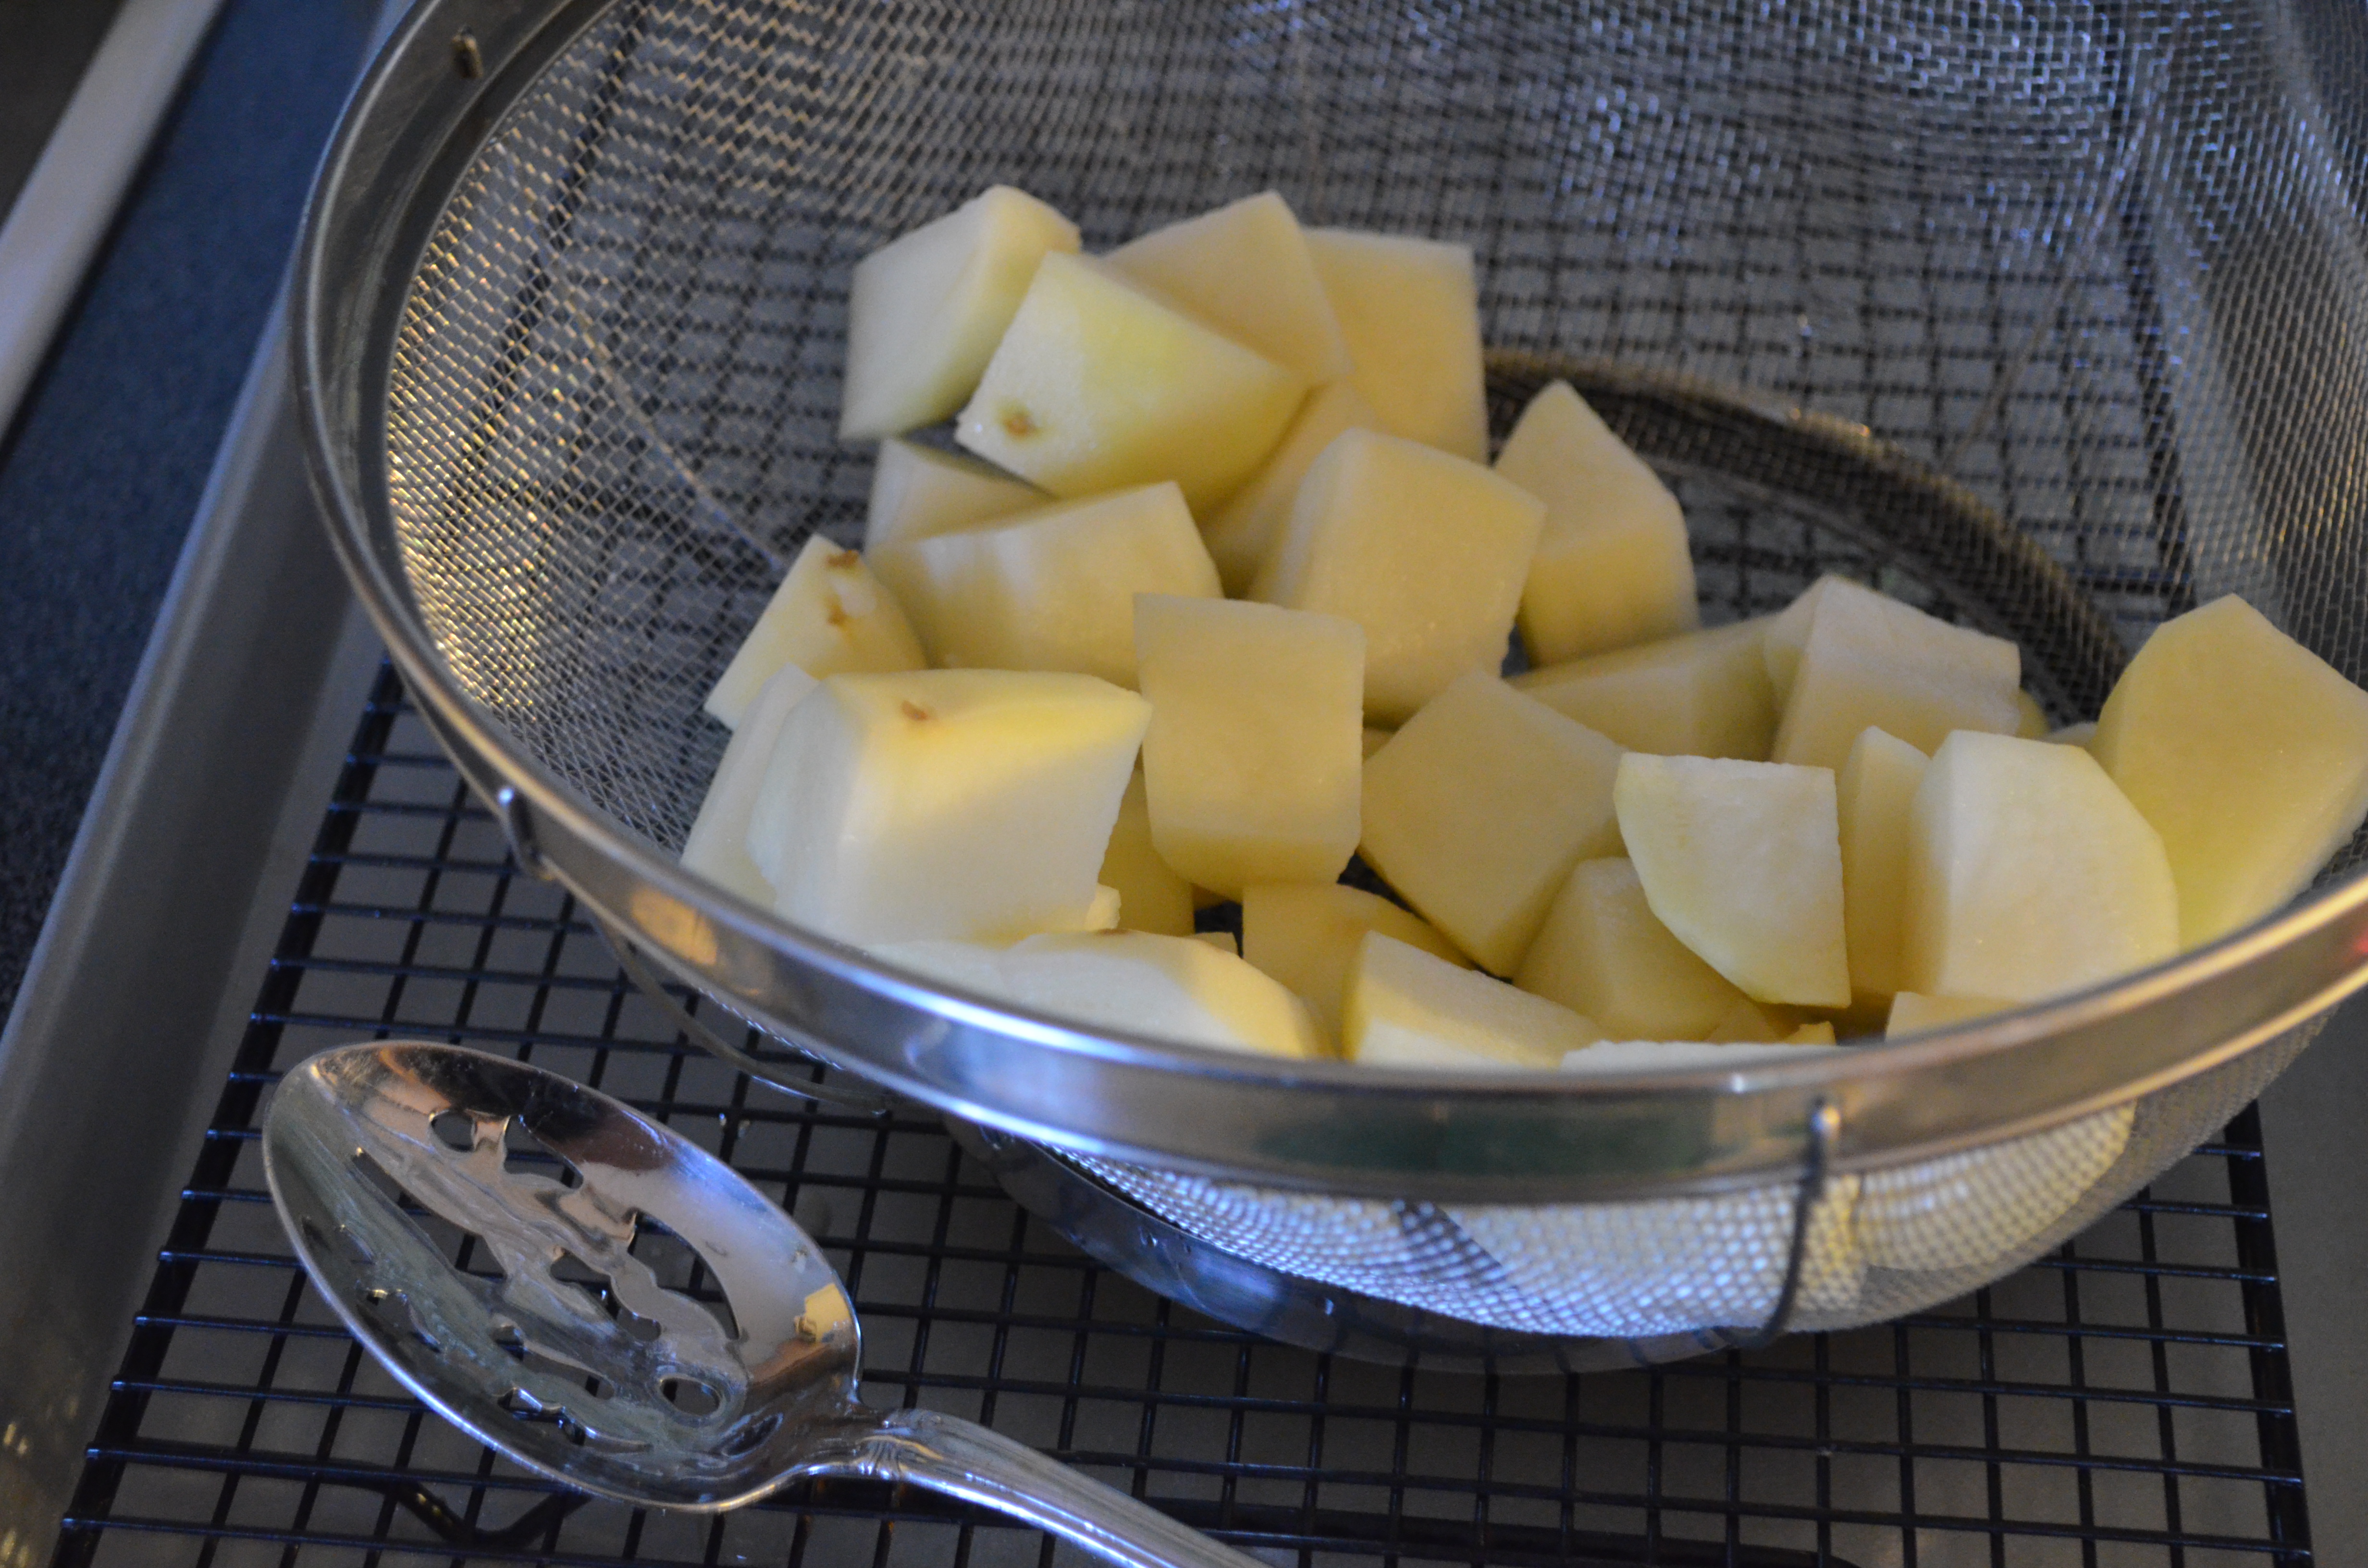
2 pounds russet potatoes, peeled and diced 1 inch pieces
1 quart vegetable oil
½ tablespoon green onion, sliced thin
½ teaspoon onion powder
¼ cup shredded cheddar
2 teaspoons kosher salt
1 tablespoon cornstarch
½ teaspoon granulated sugar
Freshly ground black pepper

Procedures
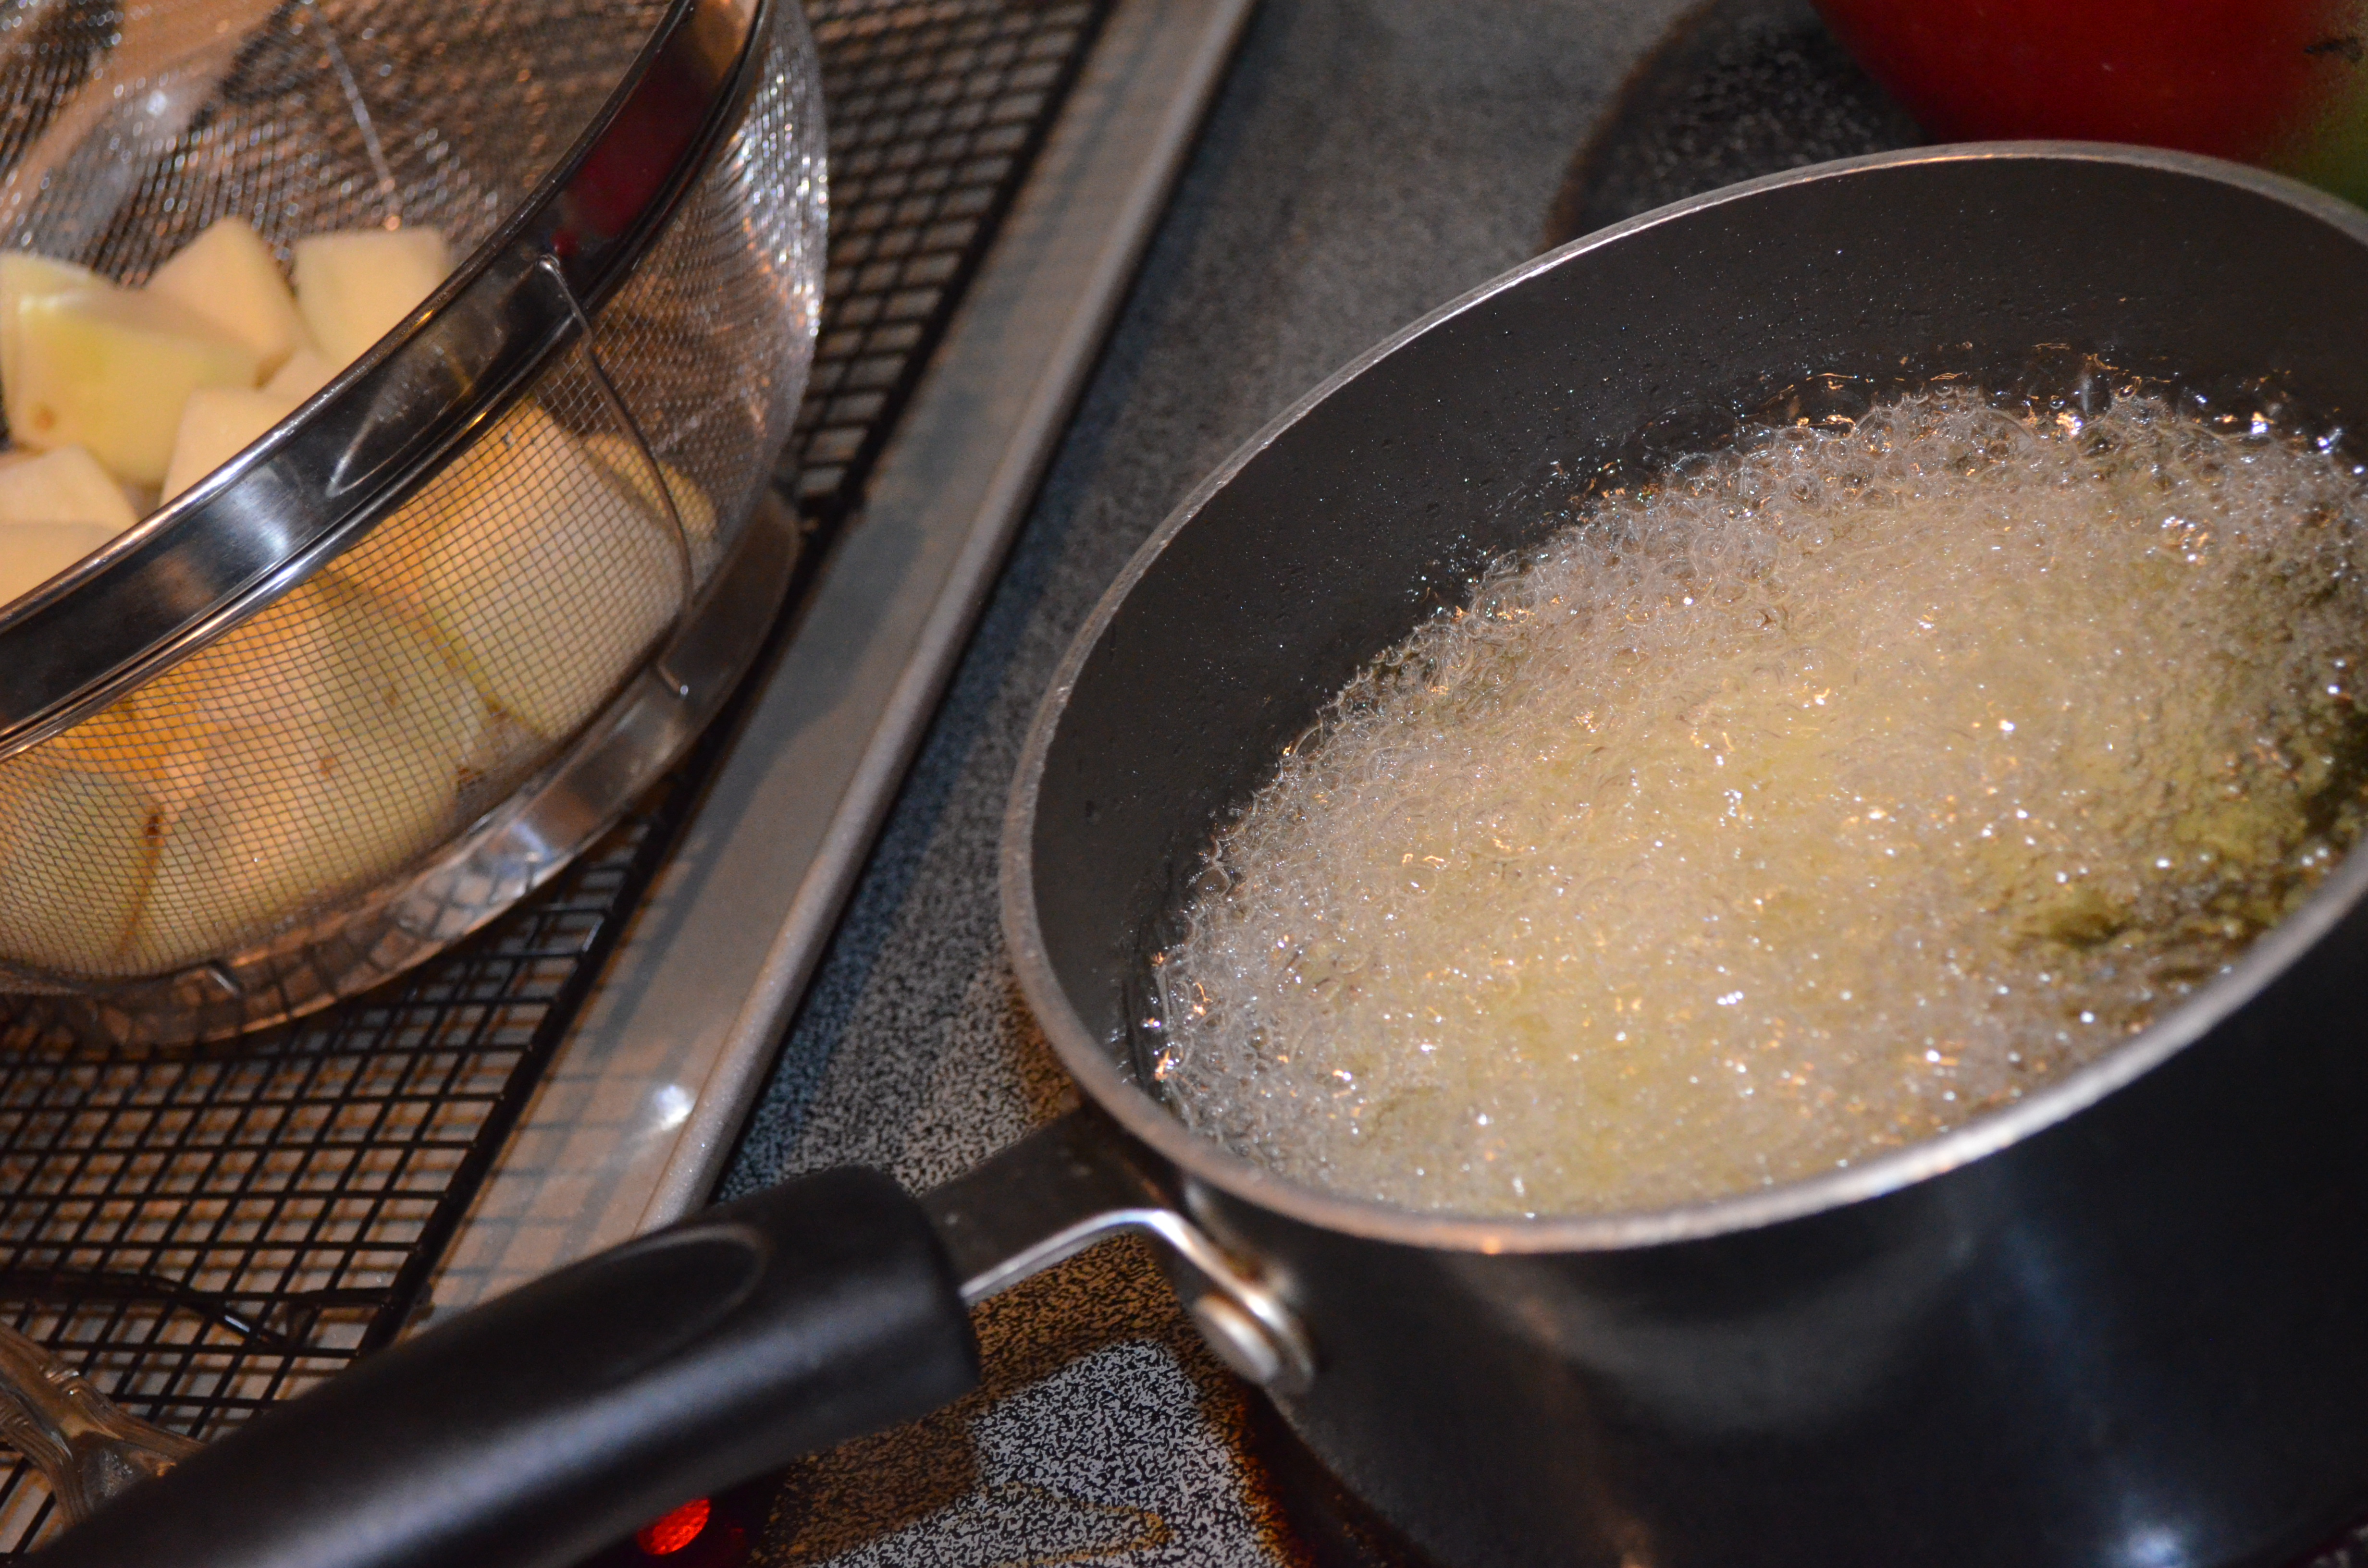
Place potatoes in a bowl of cold water and agitate for 10 seconds. Transfer to fine mesh strainer and allow to drain for 5 minutes. Meanwhile, heat oil in large wok or Dutch oven over high heat to 350°F. Fry potatoes, stirring them with a wire spider until light golden brown and tender, about 4 minutes, adjusting flame to maintain oil temperature. Transfer to a paper towel-lined bowl and allow to cool for 10 minutes. Reduce heat to low.

DSC_0613DSC_0621DSC_0632

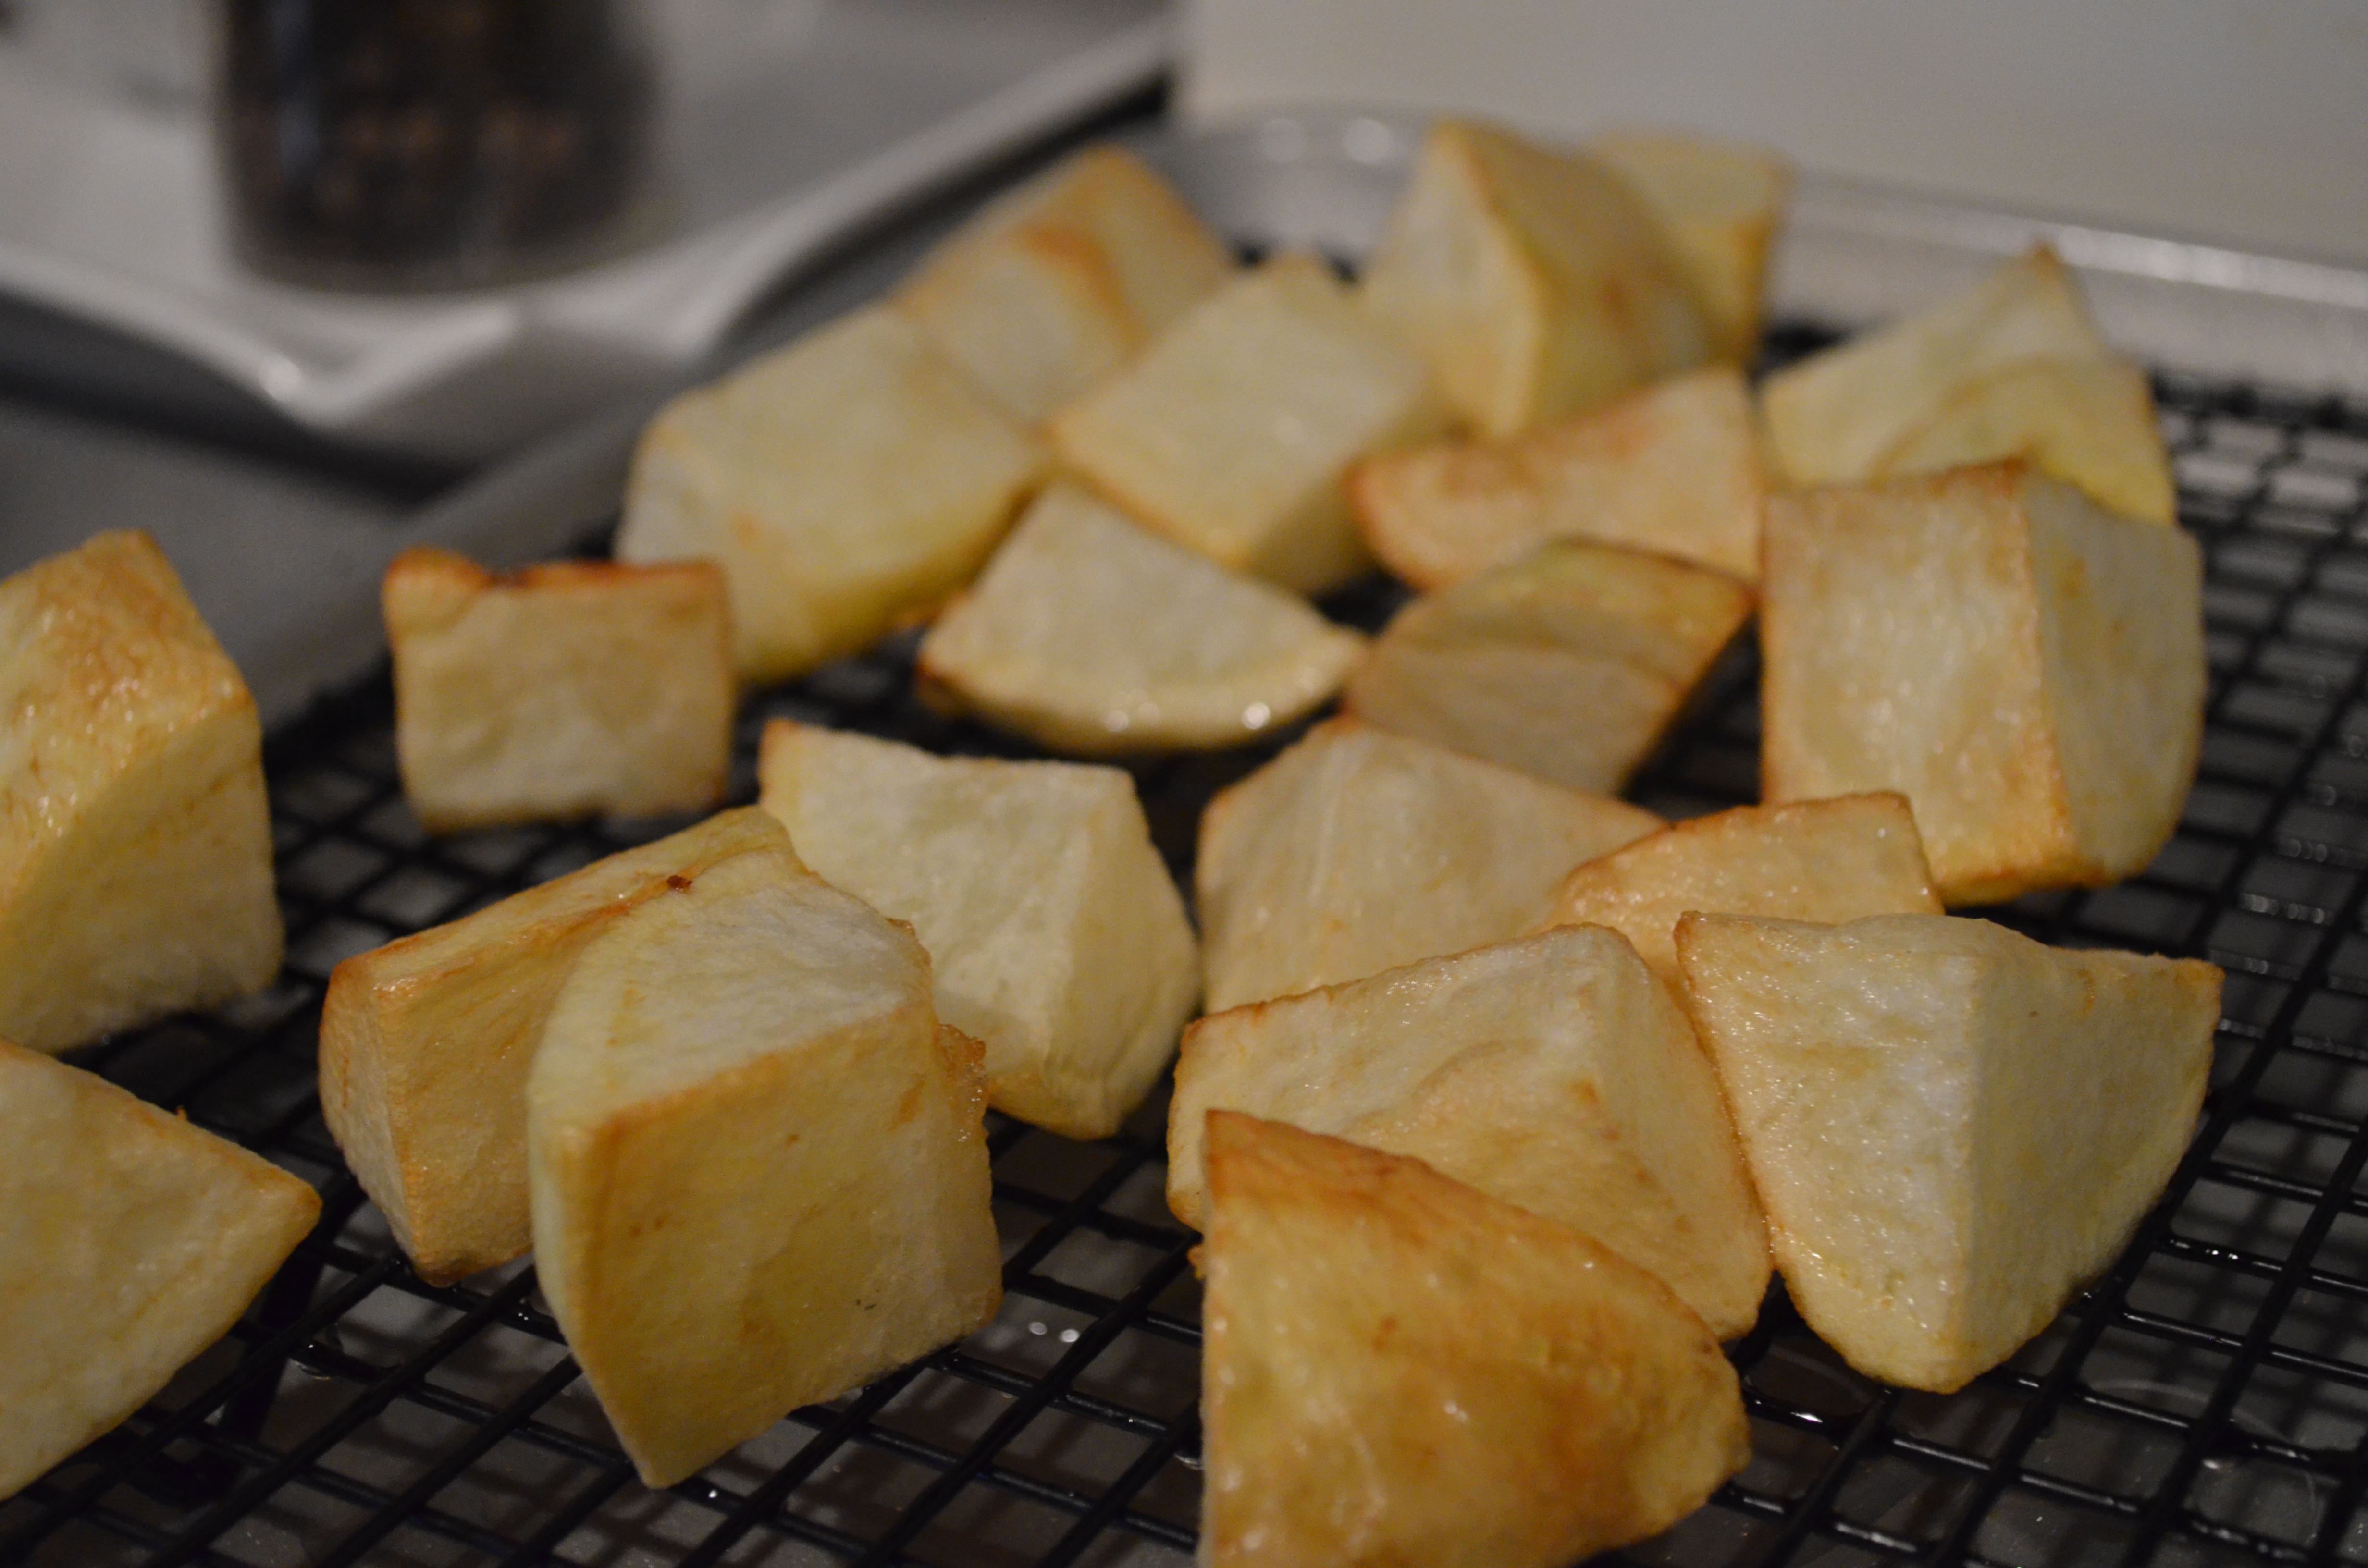
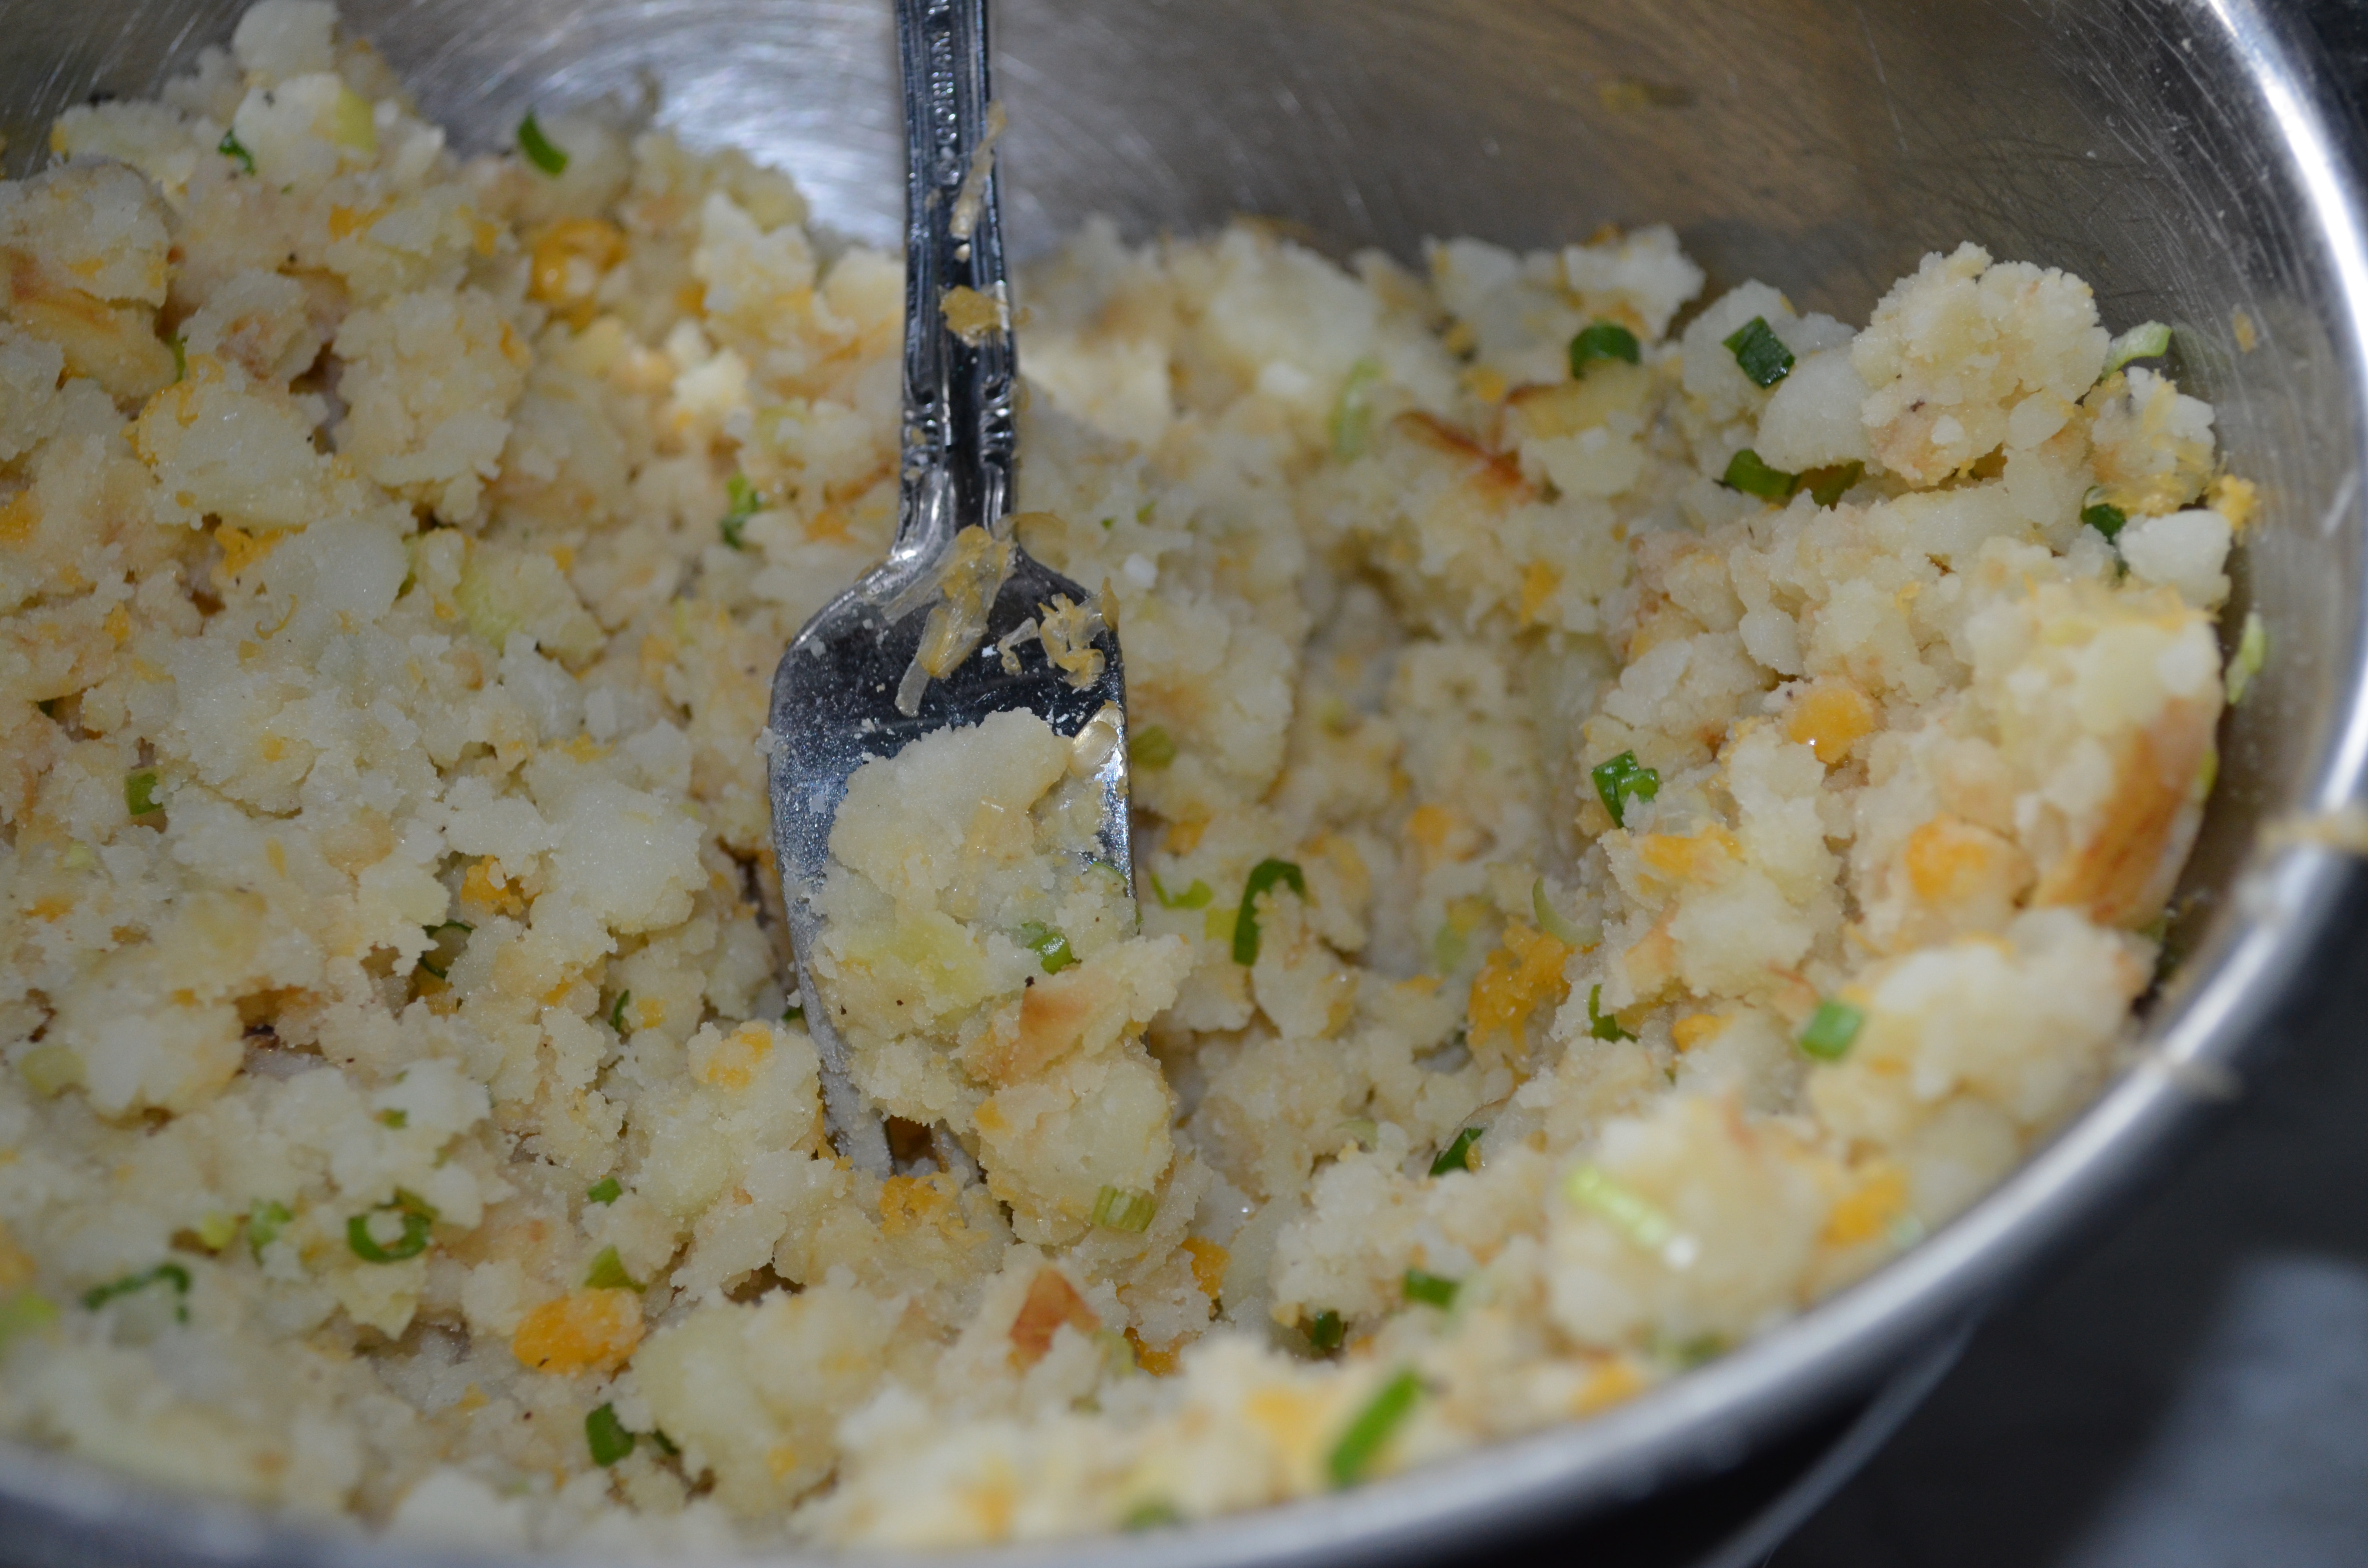
Transfer 1/4 of the potatoes to the bowl of a food processor and pulse until broken down into rough 1/4 to 1/8th inch pieces, about eight 1-second pulses. Transfer to a mixing bowl and repeat with the remaining potatoes, working in three more batches.

Add sliced green onions, onion powder, shredded cheddar, salt, starch, sugar and black pepper to taste, and any flavorings if desired. Gently mix with your hands to combine. Shape into cylinders about 3/4-inch wide and 1-inch long.

DSC_0647DSC_0657DSC_0665

Reheat oil to 350°F and add Tater Tots. Allow to fry for 1 minute, then gently agitate with a metal spider to separate them. Continue to cook, adjusting flame to maintain heat, until golden brown and crisp, about 4 minutes longer. Transfer to a paper towel-lined plate to drain. Season immediately with salt. Serve hot.

DSC_0746

Artisan Tater Tots- what more can you want….. These are a great way to involve the family, the kids will love to help out and play with the “playdough”. Anytime kids hands have fun in the kitchen is a win for their future!

Advertisement

Food Blog Forum 2013, Being a Guest at Walt Disney World

I had the great fortune this last weekend to attend the Food Blog Forum again.  The conference is kept small in amount of  attendees to keep in more intimate and really provide an educational, networking conference.  In fact, the registration was full and wait listing bloggers within 10 minutes of the start time.  The fact that the event was being hosted at Walt Disney World made it even more valuable to me.  The technical and creative tips that came from such a talented group and the friendships that were made and deepened, made the Food Blog Forum were a huge payoff to my blog, but the excellent guest service provided by Walt Disney World gave back tenfold to my professional work.  Very reaffirming to be a guest experiencing the magic you try to provide daily.

485560_349276668528720_776941240_n

The conference was produced by Food Blog Forum with Jaden & Scott Hair of Steamy Kitchen, Todd & Diane of White On Rice Couple, Julie Deily of The Little Kitchen and Lindsay Landis of Love & Olive Oil and sponsored by Walt Disney World, Florida Milk, KitchenAid, and OXO.  Without these organizers and sponsors the community would not exist- Thank you to all!!

DSC_0245DSC_0247

The opening reception was held at the Grand Floridian Convention Center- I knew it would be top notch- with the Grand Difference! My husband, who works at this convention center was super excited for us to see the creativity and mouth watering dishes being offered at the reception.  Chef Larry and his team did an amazing job, presentations were gorgeous.  If only there was more time to try it all.

DSC_0248DSC_0250

I love the detail of these spheres- truly represent the detail that the Grand Floridian offers!  The next morning started off with a light continental, light enough the lobby was glowing with the fruit! Elegance upon arrival!

DSC_0252

The lunch was a combination of decadence and Mickey Check items- a great idea to showcase the well balance offerings of the Walt Disney World Resorts.  The chefs were all great, happy to engage and discuss the items they were showcasing, as well as the idea and development behind them.

DSC_0280DSC_0279

Here is what the Disney Parks Blog says about the new Mickey Check Initiative-

Part of the Disney Magic of Healthy Living initiative, the tool was created to make it easier to identify nutritious choices that address family needs.   In order to receive the Mickey Check, kids’ meals and other items must meet Disney Nutrition Guidelines. The Disney Nutrition Guidelines align to the  U. S. Dietary Guidelines for Americans and focus on contributing to a nutritious diet,  encouraging kid appropriate portions (with calorie criteria) and  limiting nutrients to avoid (e.g. sodium, sugar, saturated fat, trans fat).

DSC_0265

This definitely the way to make fish sticks! Fresh from Florida! And if you don’t want to make them, try the Flying Fish Café instead!

DSC_0269DSC_0267

DSC_0260

The Chefs were excited to be there, happy to talk about their offering.  The Walt Disney World Chefs I know and work with love engaging with guests, in particular the guests that love food as much as we do!  Never hesitate approaching a Disney Chef, we love to talk about our passion!

20130518_125927DSC_0266

The conference was full of inspirational speakers, and overloaded with tips and tricks to work on in our blogs and life.  Pam, Karen, Marisa and all the magical Cast Members were wonderful, providing an experience that makes dreams come true!

20130518_175024

The closing dessert reception was held at Disney’s Hollywood Studios, at overlooking the Fantasmic show.  The show is always a hit, but the food was what I was loving!  The team was exceptional- I loved being at this event, seeing our team showcase a well balanced, highly creative and impressively decadent dessert menu.

20130518_20425720130518_205931

20130518_204140

Was super proud to be on this team- from the collaboration of menu writing to the planning and execution the team out did themselves.

DSC_0329DSC_0331

The Nitro Smorespheres was an idea we took a chance on that came out fabulous and are just at the beginning of there journey.

20130518_210241

It was a weekend to go down on the books, filled with learning’s, friendships and great food, all defining the community that comes from this group!!

Thank you to all!

The Art of the Grill Master- Fresh Ground Chicken Burgers with Ginger Slaw

There are a few foods that could be considered an “Art Form”, sushi, bread, soups to mention a few.  There is one that seems to be in almost every household- The Almighty Burger….often the muse of the head Grill Master.  Not every family has a Grill Master, but I bet most do.  In our case, my husband Wes is definitely holding this position. As the Head Grill Master, he doesn’t take this title lightly; every meal that come off his grill is in fact a piece of art.

DSC_0494

Wes has recently taken to grinding his own meats, so he can consider the ratio of fat to meat, the toughness of the cut, freshness of product, and type of meat, be it farm raised, local or organic or even the best deal of the week.  For real… he is in knee deep with developing the “absolute” burger.  In the meantime, we are eating superbly!

DSC_0390DSC_0387

One of his recent expeditions I was able to capture a recipe, and even add to it with a fresh made bun and slaw.

Chicken Burgers

  • 1- 3 pound whole chicken, deboned and ground
  • or
  • 2 pounds ground chicken
  • 4 teaspoons fresh sliced jalapeño
  • 2 teaspoon worcestershire sauce
  • 4 teaspoon favorite all-purpose seasoning
  • 1 teaspoon fresh ground ginger
  • 4 tablespoon chopped cilantro
  • 1 teaspoon kosher salt
  • ¼ teaspoon fresh ground black pepper

Combine all of the ingredients and mix well.  Allow the mixture to sit for a few hours to allow the flavors to blend.  Preheat your grill or prepare your charcoal while scooping 8 -½ cup (4 oz) portions and form patties.  When your grill is hot, cook burgers until they reach the safe temperature of 165.   Serve and enjoy!

DSC_0439DSC_0455

The chicken burger was packed with flavor, and very juicy.  So often burgers made with poultry tend to be dry, but he balanced the breast meat, thigh meat and skin perfectly.

DSC_0476

While Wes was preparing his inspired burgers and the dough for my buns was rising, I took to creating a salad to top the patties.  I love the crunch of a slaw on sandwiches, the texture and acidity adds a great depth.

DSC_0350

Ginger Slaw

Dressing

  • Juice of ½ lime
  • 2 teaspoon orange juice
  • 2 tablespoon mayonnaise
  • 2 tablespoon chopped cilantro

Slaw

  • 2 cups sliced cabbage
  • 3 tablespoons julienned carrots
  • 3 tablespoon sliced celery
  • 1 teaspoon fresh ground ginger

In a small bowl, add the ingredients for the dressing and stir together until creamy.  Combine raw ingredients in a mixing bowl, add the dressing and toss well.

DSC_0488

As in most art forms, the artist is rarely satisfied, but his fans are often thrilled and overwhelmed.  So while Wes continues on his search to find the “absolute” burger, and carries his reign as Grill Master, I will sit back and enjoy his artwork!

DSC_0503

I’d say this Grill Master is truly an Artist!

White Chocolate Bread Pudding- Straight from DAK Catering Recipe Book

I mentioned that I started my culinary career at Disney’s Animal Kingdom (DAK) Catering department.  It was a super small team- at most 7 people.  We got to be very close, and have always remained like family.  We executed amazing events that we surprised ourselves with.  Hundreds and thousands of guests were fed out of a tiny little kitchen and with a pretty green bunch of cooks.   Luckily we had a few veterans that led us, and gave us all a great culinary foundation.  

Full of good memories and full of amazing food!  My favorite recipe that I took away from “DAK Catering” is the White Chocolate Bread Pudding.  I love this- so perfectly sweetened, lots of rum and deliciously rich.   Loved it enough that when Sir Wes and I got married (he was one of the seven that worked with me); we served it at our wedding as a nod to where we met.

After 7 years of happiness, Sir Wes and I are still celebrating with it!  Happy Anniversary to the guy, that drove me crazy every day; and who later became my best friend and partner in life.
Ingrediants

  • 12 oz. loaf butter pound cake, few days old is perfect as it absorbs nicely
  • 4 eggs
  • 1 cup heavy cream
  • 1 cup milk
  • ½ cup Myers Rum
  • ¾ cup sugar
  • 1 teaspoon ground cinnamon
  • 8- 1 oz. squares white chocolate, cut in large chunks
  • 8- 1 cup oven proof mini casserole dishes

Directions

Slice pound cake into 1 inch cubes and place evenly into mini casserole dishes.  In a mixing bowl, combine eggs, cream, milk, rum, sugar and cinnamon and blend well.  Pour even amounts into the casseroles, filling to almost the top.  Distribute the chocolate evenly around the casseroles, leaving a few pieces on the top of each dish.  Put the casseroles on a baking sheet in case they bubble over and bake for 45-50 minutes until center is set.   Best to serve right out of the oven as they soufflé up and look awesome with the rise.

Makes 8 servings. 

Putting the white chocolate on top lets it get nice and toasted- this is the best bite of the dish. 

I think to this day, we would all agree it was the best team we have worked with, and probably had the most pride in what was accomplished.  And this bread pudding is definitely the dish that has been most requested in my life. 

Cheers to a wonderful family born thru work, and a continued life time of happiness to my best friend.  Happy anniversary Sir Wes!

Preserved Lemons- Week 3

Half way thru on the lemon preservation process- thinking about all the ways to use them up- 

Week 3 of Lemon Preservation

 
I have been stirring them once a week since I started the process-  You can read how to get started here!

Gooey and Juicy! Half way there!

Patience is key with preserving lemons, as well as planning ahead! 

Chocolate Crackle Cookies

On the 8th Day of Christmas Cookies I remembered why I fell in love with Crackle Cookies a few years ago!  It is the season for Christmas cookies and at work many friends bring in plates of cookies to share.  It’s a great way to celebrate the holiday season and to try new types of cookies (and fall off the diet).  I fell for this cookie at first bite!

Good Things Come In Small Packages

There are a ton of recipes for the popular Crackle Cookie, some use dark chocolate, some semi-sweet chocolate, and some even add nuts- hazelnuts or pecans.  My favorite is simple with semi-sweet chocolate as these cookies are so rich. If you are a dark chocolate fan, you can just substitute bittersweet chips in place of the semi-sweet chips.

Of the many recipes for Crackle Cookies I have tried, the recipe below from Culinate is my favorite.

Ingredients

  • 6 oz. semisweet or bittersweet chocolate, chopped
  •  ½ cup (1 stick) butter
  •  ⅔ cup granulated sugar
  •  3 large eggs
  •  1½ tsp. vanilla extract
  •  2 tsp. instant espresso powder
  •  1 ¾ cup unbleached all-purpose flour
  •  3 Tbsp. unsweetened cocoa powder
  •  ½ tsp. baking powder
  •  ½ tsp. kosher salt
  •  ¾ cup powdered sugar

Crunchy on the outside and chewy on the inside!

Steps

1. In a large saucepan, melt the chocolate and butter, stirring frequently, until evenly melted. Set aside to cool down to warm, about 10 minutes. Stir in the sugar and then, one at a time, the eggs. Stir in the vanilla extract and the espresso powder.

2. In a medium bowl, stir together the flour, cocoa powder, baking powder, and salt. Stir the dry ingredients into the wet ingredients. The batter will have the sticky consistency of brownie batter.

3. Scrape the batter onto a sheet of plastic wrap and wrap the dough into a large ball. Place in the fridge for at least two hours (up to eight hours) or in the freezer for 30 minutes, to firm up the dough.

4. When ready to bake, preheat the oven to 350 degrees. Place parchment paper or silicone baking mats on cookie sheets.

5. Put the powdered sugar into a small bowl. Roll chunks of the chilled cookie dough into 1-inch balls, and then roll the balls in the powdered sugar until evenly coated. Arrange the balls about 1½ inch apart on the cookie sheets.

6. Bake for 8 to 12 minutes (the baking time will vary, depending on how cold the cookie dough is), until puffed and cracked on top. Remove from the oven and let cool for a few minutes before removing the cookies with a spatula to wire racks to finish cooling.

7. Serve warm or at room temperature. Keep in an airtight container for a few days. (Do not freeze, as freezing makes the powdered-sugar coating soggy.)

Makes about 4 dozen cookies

Chocolate Crackle Cookies

I can’t believe I went so long in life without meeting this cookie! 

Chocolate Ginger Cookies- The Great Food Blogger Cookie Swap

The Great Food Blogger Cookie Swap

I was so excited to participate in the first ever Great Food Blogger Cookie Swap, hosted by Love and Olive Oil and The Little Kitchen.  It was fairly simple, I made and sent a dozen cookies to three participants and three other food bloggers sent a dozen to me!  Pretty easy, once I was finally able to decide on which cookies to send!!   Convinced by Sir Wes, I picked his favorite, Martha Stewart’s Chewy Chocolate Ginger Cookie, these little guys have a lot of punch and are delicious! 

The kick in these cookies warm you up!

 They don’t last long in our house!!  If you prefer a lighter ginger flavor, you can cut the fresh ginger by half!

Chocolate Ginger Cookies Mise En Place!

Ingredients

  • 7 ounces best-quality semisweet chocolate chunks
  • 1 1/2 cups plus 1 tablespoon all-purpose flour
  • 1 1/4 teaspoons ground ginger
  • 1 teaspoon ground cinnamon
  • 1/4 teaspoon ground cloves
  • 1/4 teaspoon ground nutmeg
  • 1 tablespoon unsweetened Dutch-process cocoa powder
  • 8 tablespoons (1 stick) unsalted butter
  • 1 tablespoon freshly grated ginger (cut by half if you want a mild ginger kick)
  • 1/2 cup dark-brown sugar, packed
  • 1/4 cup unsulfured molasses
  • 1 teaspoon baking soda
  • 1/4 cup granulated sugar

    Little Balls of Dough, dropped in sugar before baking.

Directions

  1. Line two baking sheets with parchment. Chop chocolate into 1/4-inch chunks; set aside. In a medium bowl, sift together flour, ground ginger, cinnamon, cloves, nutmeg, and cocoa.
  2. In the bowl of an electric mixer, fitted with the paddle attachment, beat butter and grated ginger until whitened, about 4 minutes. Add brown sugar; beat until combined. Add molasses; beat until combined.
  3. In a small bowl, dissolve baking soda in 1 1/2 teaspoons boiling water. Beat half of flour mixture into butter mixture. Beat in baking-soda mixture, then remaining half of flour mixture. Mix in chocolate; turn out onto a piece of plastic wrap. Pat dough out to about 1 inch thick; seal with wrap; refrigerate until firm, 2 hours or more.
  4. Heat oven to 325 degrees. Roll dough into 1 1/2- inch balls; place 2 inches apart on baking sheets. Refrigerate 20 minutes. Roll in granulated sugar. Bake until the surfaces crack slightly, 10 to 12 minutes. Let cool 5 minutes; transfer to a wire rack to cool completely.

    Warm and Decadent! Packed with Punch!

We look forward to these cookies all year! 

Sir Wes says these cookies "Have moves like Jagger!"

To ship cookies, check out this link, which offers great tips to keep your little gems safe and sound.  I packed up my cookies with plenty of cushion, using tissue paper and filler from the paper shredder. 

Ready to be shipped across the country!

Many thanks to Lindsay and Julie, the hosts of The Great Food Blogger Cookie Swap, who spent many hours orchestrating  food bloggers across the world!!!  I hope  Also, the cookies I received from Kate, Eleana and Mackenzie were sinfully delicious, just amazing!!  If you would like to partipate next year in the swap, sign up for notifications here!

Let the 12 Days of Christmas Cookies begin!!!!

Maple Bacon Chocolate Cupcakes

We had a breakfast a few months ago at work and served these decadent bakery treats!  I was so impressed I brought the idea home to Sir Wes, with the help of a recipe from The Novice Chef.    I have to confess, I am not a bacon eater, which is just a personal preference but my taste testers all agree- they soooo good!  They are kind of ridiculous, the kind of breakfast that stays with you all day.

Just a "little" sinful!

Here is the how the Novice Chef told me to make them-

Chocolate Bacon Cupcakes with Maple Frosting

Recipe Notes: There are two important ingredients for this cupcake. First being the bacon, of course. Don’t cheat yourself by using turkey bacon…or worse…pre-cooked bacon! Use good, quality bacon. Trust me, it is worth it. And also spend the money and buy the pure maple syrup. I promise you that Aunt Jemima just ain’t gonna cut it in this recipe!

Ingredients:

For cake:
3/4 cup unsweetened Dutch-process cocoa powder
3/4 cup hot water
3 cups all-purpose flour
1 teaspoon baking soda
1 teaspoon baking powder
1 1/4 teaspoons coarse salt
1 1/2 cups (3 sticks) unsalted butter
2 1/4 cups sugar
4 large eggs, room temperature
1 tablespoon plus 1 teaspoon pure vanilla extract
1 cup sour cream, room temperature
3/4 cup bacon, cooked and chopped

For Maple frosting:
2 sticks unsalted butter; room temperature
2 teaspoons pure vanilla extract
1 pound confectioners’ sugar
1/3 cup pure maple syrup; plus more for drizzling
1 teaspoon salt

As Sir Wes says- "Bacon Makes Everything Better"

Directions:

For the cake:
Preheat oven to 350 degrees. Line standard muffin tins with paper liners. Whisk together cocoa and hot water until smooth. In another bowl, whisk together flour, baking soda, baking powder, and salt.

Melt butter with sugar in a saucepan over medium-low heat, stirring to combine. Remove from heat, and pour into a mixing bowl. With an electric mixer on medium-low speed, beat until mixture is cooled, 4 to 5 minutes. Add eggs, one at a time, beating until each is incorporated, scraping down sides of bowl as needed. Add vanilla, then cocoa mixture, and beat until combined. Reduce speed to low. Add flour mixture in two batches, alternating with the sour cream, and beating until just combined after each. Remove from stand mixer and gently fold in bacon.

Divide batter evenly among lined cups, filling each three- quarters full. Bake, rotating tins halfway through, until a cake tester inserted in centers comes out clean, about 20 minutes. Transfer tins to wire racks to cool 15 minutes; turn out cupcakes onto racks and let cool completely. Frost as desired.

For the frosting:
Cream the butter in the bowl of an electric or stand mixer. Add the vanilla extract, salt and pure maple syrup and combine well.

Begin adding in the sugar and mixing thoroughly after each addition. After all of the sugar has been added and mixed thoroughly, give it a taste and decide if you want to add in more maple syrup. For thicker frosting you can gradually add in a little more sugar.

Garnish with chopped bacon and a drizzle of pure maple syrup if you wish.

Maple Bacon Chocolate Cupcakes

Pretzel Bread Pudding – A Ballpark in Your Oven!

Not to long ago I posted a bread pudding made with eggplant, and explained that we are loving savory bread puddings at work this year.  A few years ago I made Caraway and Shallot Pretzel Bread Pudding Kebabs with a Honey Porter Cheddar Sauce for a Tail Gate themed event and they were fabulous!   We switched it up a bit recently at work and brought the Ballpark to the Bread Pudding , which has become a house favorite! Apparently there are a lot of pretzel bread fans at work. 

Ball Park Bread Pudding


Mustard, Onion and Pretzel Bread Pudding

  • 26 oz frozen soft pretzels
  • 1 large yellow onions, sliced and caramelized
  • 5 whole eggs
  • 1 1/4 cup heavy cream
  • 2 tablespoon yellow mustard
  • 2 tablespoon spicy brown mustard
  • 2 teaspoon kosher salt
  • 1/2 teaspoon fresh ground black pepper

    Frozen Unbaked Soft Pretzels, cut into large bites

Preheat oven to 350.  Cut unbaked pretzels into large bites and put into a cooking spray coated 9×12 baking dish.  Spread caramelized onion evenly over pretzel pieces.  In a mixing bowl combine remaining ingredients and mix well.  Pour over pretzels and onions and gently stir so all is coated.  Bake in oven for about 45 minutes, until center is done.

Cream, egg and mustard whipped up, ready to pour in!

The best part is how simple and very little prep it takes to prepare this fun dish!

Ummm, it's going to be good!!!!

I think this would be a perfect dish for cookouts, it will feed about 8 friends, depending on what else you have on the menu.

Pour it evenly and then follow up with a good stir, making sure all the bread is coated!

The smell that fills the house is kind of amazing, definitely got my stomach growling!

Mustard, Onion, and Pretzel Bread Pudding!

Honestly, I’ll take anything pretzel bread, because my love of it, but this dish goes way beyond being delicious! Enjoy!


Pumpkin Waffles with Homemade Pecan Butter

Anyone else waiting for Turkey?  Anyone else wondering what to do with the leftover pumpkin from your pumpkin pie recipe?  Anyone else wishing they had more room in the refrigerator?  I was!

I made more room in the refrigerator by getting rid of a Tupperware and a crate of eggs with decision to make breakfast this morning and that alone makes it a win! Not to mention the smell in the air! 

Pumpkin Waffles with Home Made Pecan Butter

I found this quick recipe for Pumpkin Waffles at Taste of Home and adapted it as I didn’t have a ton of pumpkin left.  Then I glanced over at the bag of nuts and decided to dress up the waffles with Pecan Butter.  Easier than you think- took me 15 minutes! Just in time to start on the Black Friday Ads!

Pumpkin Waffles

  • 1 cup all-purpose flour
  • 1 tablespoon brown sugar
  • 2 tablespoon granulated sugar
  • 1 teaspoon baking powder
  • 1/4 teaspoon salt
  • 1/8 teaspoon ground nutmeg
  • 1/8 teaspoon ground cloves
  • 1/8 teaspoon ground ginger
  • 1 teaspoon ground cinnamon
  • 1 egg, lightly beaten
  • 1-1/4 cups milk
  • 1/2 cup canned pumpkin
  • 4-1/2 teaspoons butter, melted

In a large bowl, combine the flour, brown sugar, sugar, baking powder, seasonings and salt. Whisk the egg, milk, pumpkin and butter; stir into dry ingredients until well blended.  Follow the directions on your waffles maker- Should serve about 4 pp!

Pecan Butter

  • 1 cup fresh pecan (toast them if you think they are stale)
  • 1 tablespoon soft butter
  • 1 tablespoon light brown sugar
  • pinch of salt

    Chopped Pecans

     Grind all ingredients in a food processor until blended.

Pecan Butter

 
Doesn’t that look good??

Want a bite?


Turkey is on, got the paper in front of me, parade is getting ready to start, the family is gathered around the table and have a delicious waffle in front on me!  What a great Thanksgiving!!  I hope everyone’s day is just as special!  Happy Thanksgiving to all!