Butter Chicken For The First Day Of Fall!

When we went to Atlanta a few weeks ago we went to the Dekalb Farmers Market on the recommendation of a friend at work.   She told me I could find anything I wanted and more, and when we pulled into the parking lot and saw the size of the market I knew were in for a treat!  I wish I had some pictures to share, especially of the fish mongers, but the market does not allow pictures.  It was a food lover’s mecca, for real.  I felt like a kid in the candyshop with wavering self-control.  Fortunately I knew I had to limit my haul to shelf stable items as we were traveling so I went straight for the spices!  I grimace when I have to purchase a $4-5 small bottle of a spice I am missing, when I saw these 1 cup containers filled with all kinds of flavors for under a buck and a half I could not resist.

DSC_0796

I took a way quite a few Indian spices to add to our cabinet.  With the first day of autumn upon us, I knew plenty of soups and stews would be on the horizon.  Fall into Indian Cuisine!  Sir Wes hadn’t ever had Butter Chicken also called Chicken Makhani, nor had I ever made it, so I thought it was a perfect dish to kick off the new season.

DSC_0824

Ingredients:

  • 1 tablespoon vegetable oil
  • 1/4 white onion, chopped
  • 2 tablespoons butter
  • 2 teaspoons lemon juice
  • ½ tablespoon chopped ginger
  • ½ tablespoon chopped garlic
  • 1 teaspoon garam masala
  • 1 teaspoon chili powder
  • 1 teaspoon ground cumin
  • 1 teaspoon ground coriander
  • 1 bay leaf
  • 1/4 cup plain Greek yogurt
  • 1 cup milk
  • 1 cup tomato puree
  • 1/4 teaspoon cayenne pepper
  • ½ teaspoon kosher salt
  • ¼ teaspoon ground black pepper
  • 1 tablespoon vegetable oil
  • 1 pound boneless, skinless chicken thighs, julienned into 1 inch strips
  • 1 teaspoon garam masala
  • 1 pinch cayenne pepper
  • Chopped cilantro

Directions:

Pour 1 tablespoon oil in a 2 quart saucepan over medium high heat.  Add the onion and sauté until soft and translucent. Add in butter, lemon juice, ginger, garlic, 1 teaspoon garam masala, chili powder, cumin, coriander and bay leaf.  Stir the spices as they cook, drawing out their peak flavor for a minute.   Mix in the tomato sauce, and continue cooking for 2 minutes, stirring frequently.  Pour in milk and the yogurt and reduce the heat to low. Allow to simmer for 10 minutes, stirring frequently before seasoning with salt and pepper to taste.  Remove the sauce from heat and set aside.

Place a heavy bottom large skillet over medium high heat and add 1 tablespoon oil.  Add in the chicken strips and cook chicken until lightly browned, about 10 minutes. Turn the heat to medium low, and add in teaspoon garam masala and cayenne. Feel free to eliminate the cayenne or add more based on you heat preferences.  Add the sauce into the skillet and simmer over medium low heat.   The sauce will reduce and thicken as the chicken finishes cooking.   When ready to serve stir in chopped cilantro as garnish.

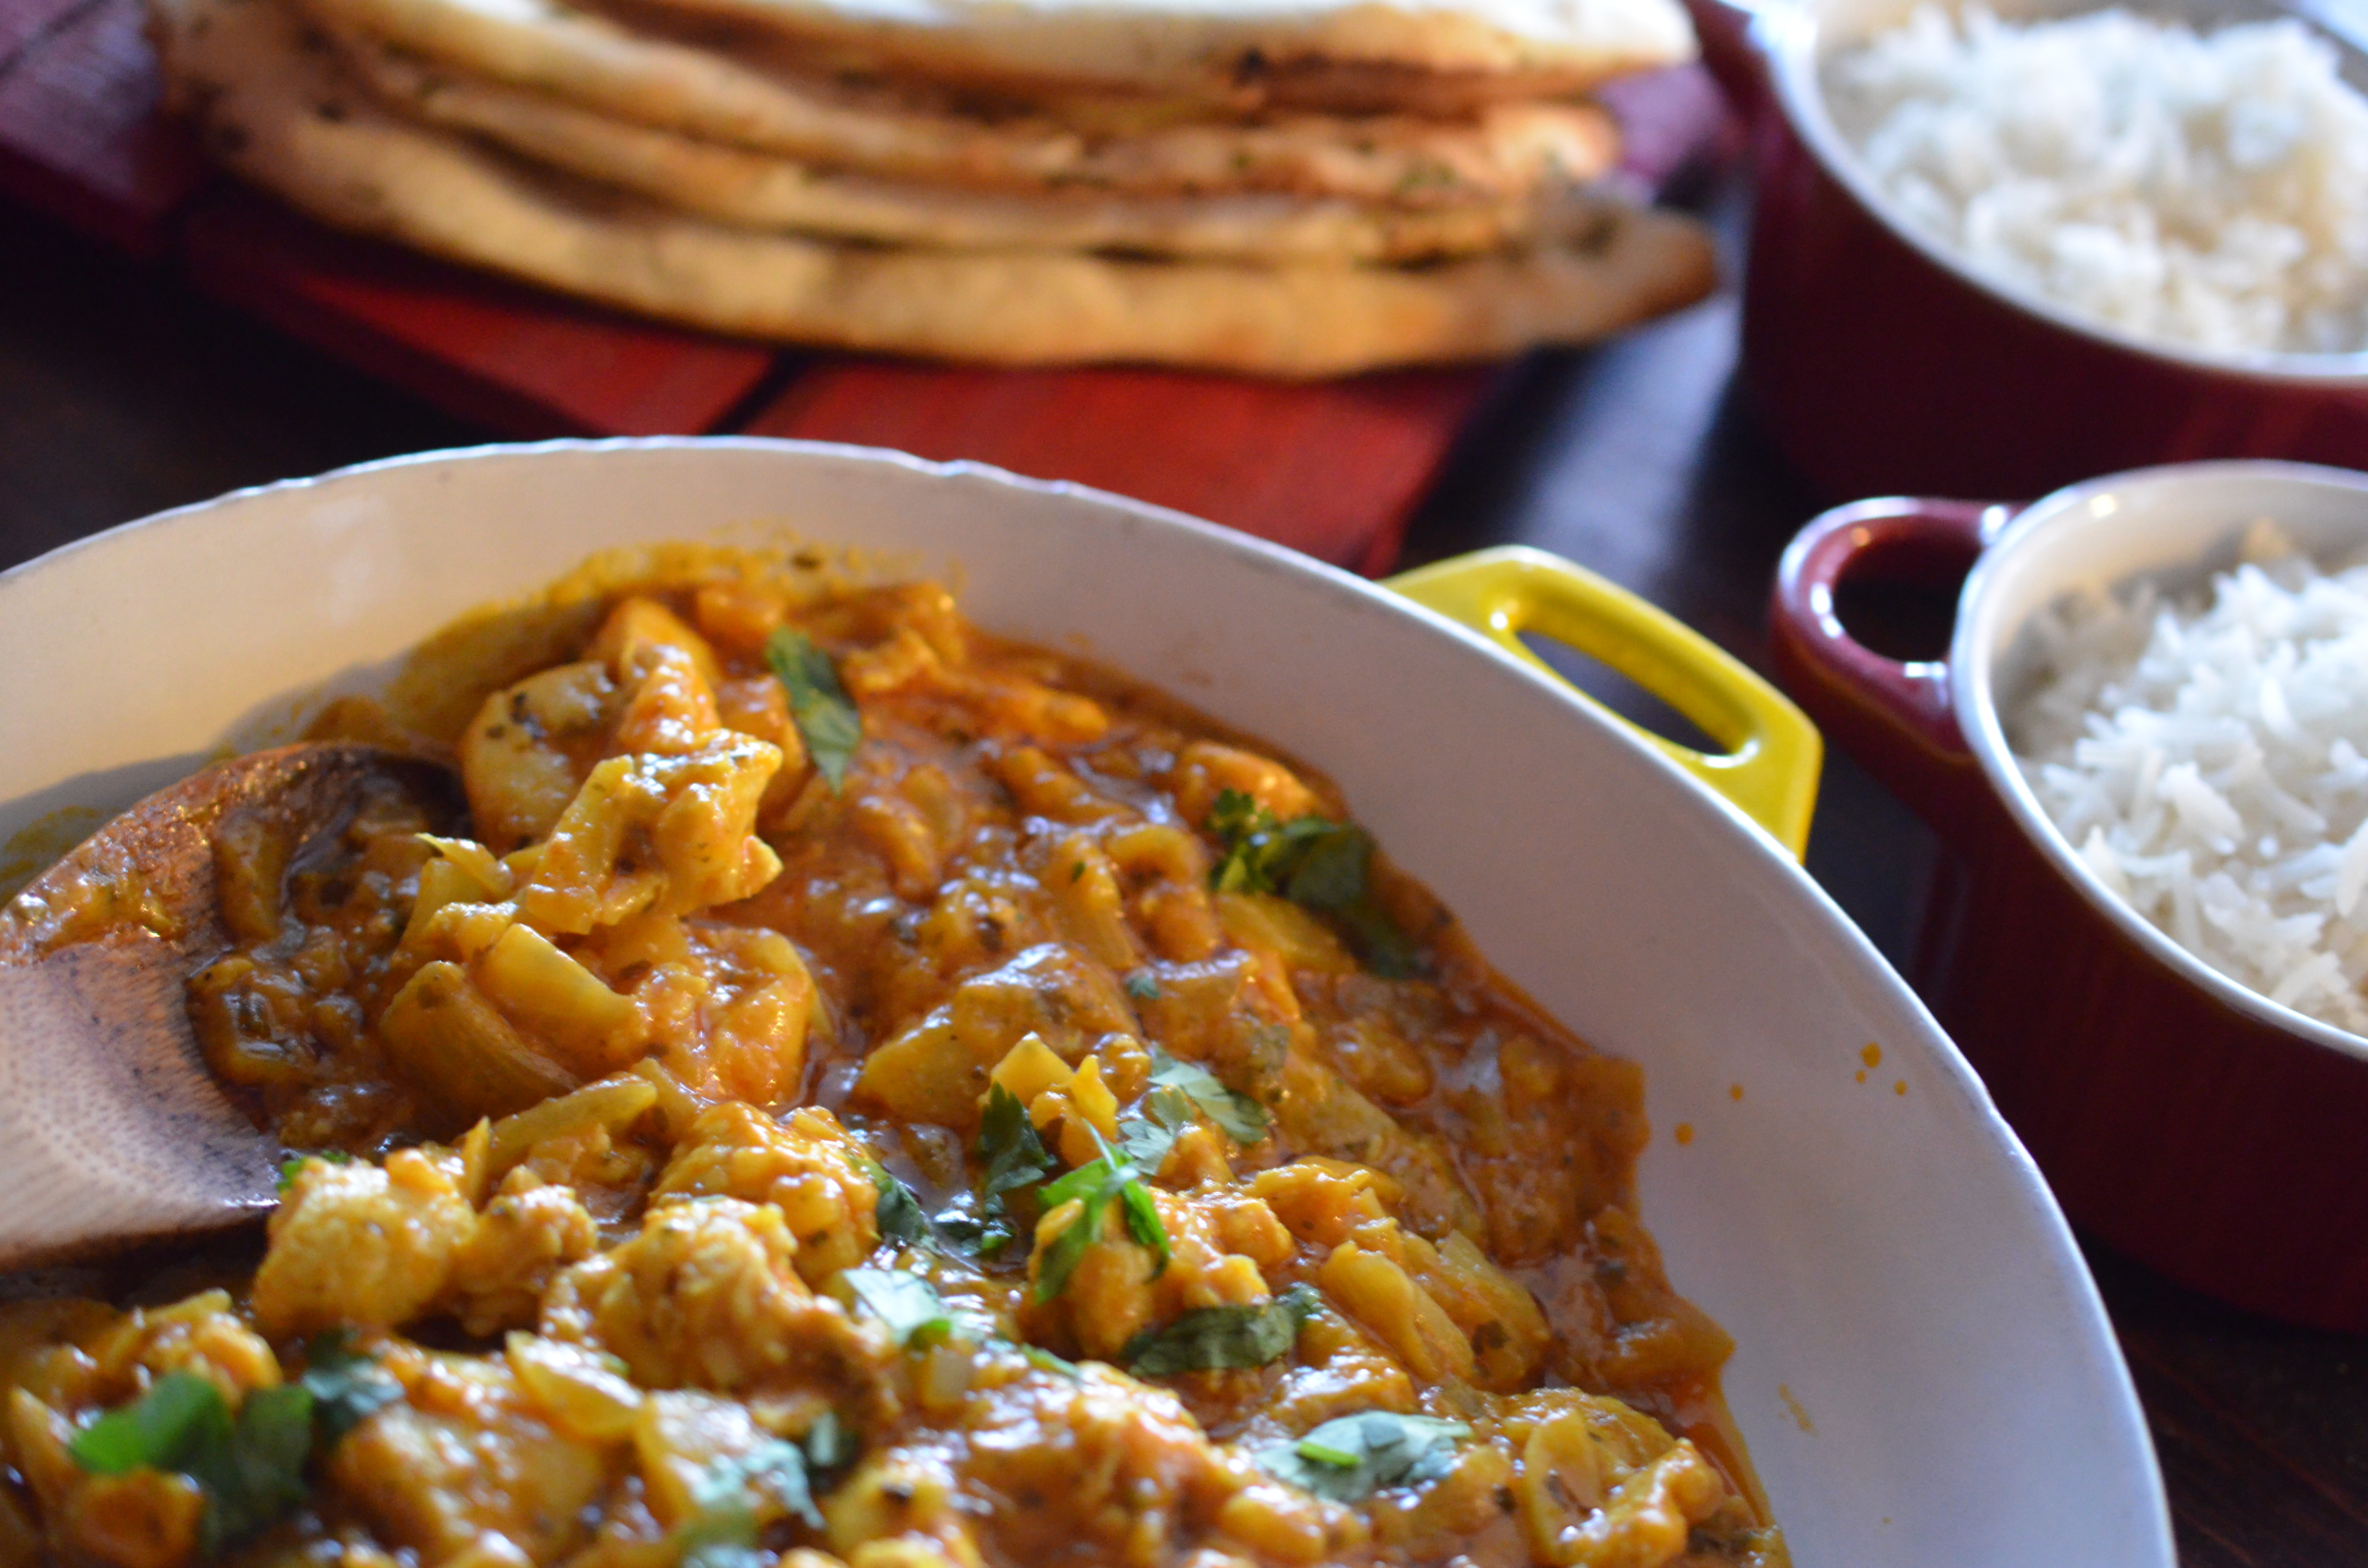
This recipe will serve 4 guests. Serve with basmati rice or fresh naan bread.

DSC_0825

If you ever get the chance to get to the Dekalb Farmer’s Market you must go for it.  Take advantage of the lower prices and branch out of your everyday cooking style.  Try something new, you might just find a new favorite!

Happy first day of autumn and may all your leaves fall in the right place!!

Gooey Pumpkin Cheesecake- A Happy Mistake of a Non Baker!

My friend Jenny brought in her hometown favorite last year to a work pot luck, St. Louis Gooey Butter Cake. It was only one small bite that I took, which was all I needed to know that I would add this to my “must make list”.  I had no idea what it was; I didn’t recognize it as anything I have tried before, just rich, buttery, and gooey goodness.  When Gooey Butter Cake made it to the top of my must make list, I spent some time looking for a recipe, recalling Jenny telling me she uses Paula Deen’s version. I found the one, but ran upon Paula Deen’s Pumpkin Gooey Cake and could not resist trying this version.  I just wanted to make a small tweek…

DSC_0864

Pumpkin desserts need graham crusts.  Some pies, cakes, bars just do not reach their potential without graham bottoms.  I shun any key lime pie made with a plain butter crust, same is true for pumpkin and sweet potato.  So I knew right away that I needed to modify the great Paula Deen’s recipe to make it better, how could she not know this?

DSC_0843

Here’s what I did-

Crust:

  • 18 graham crackers, finely ground
  • 10 tablespoons unsalted butter, melted
  • ¼ cup sugar
  • ½ teaspoon ground cinnamon
  • 1/8 teaspoon kosher salt

Filling:

  • 1 (8-ounce) package cream cheese, softened
  • 1 (15-ounce) can pumpkin
  • 3 eggs
  • 1 teaspoon vanilla
  • 8 tablespoons butter, melted
  • 1 (16-ounce) box powdered sugar
  • 1 teaspoon cinnamon
  • 1 teaspoon nutmeg

Preheat the oven to 350.  Add all the ingredients to a food processors and pulse until well combined.  You may need to do in two batches depending on the size of your processor.  If you are without a food processor try crumbling the crackers by putting them into a large Ziploc bag and then use a rolling pin to crush them.

Press the crumbs into the springform pan and bake for 10 minutes.

To make the filling:

In a large bowl, beat the cream cheese and pumpkin until smooth. Add the eggs, vanilla, and butter, and beat together. Next, add the powdered sugar, cinnamon, nutmeg, and mix well. Spread pumpkin mixture over graham crust and bake for 75 minutes until the center has a soft jiggle and a pick comes out clean.

DSC_0849

When I took it out of the oven, I couldn’t help but think this is not right; it looked just like cheesecake.  Crap.  This is not what I was hoping for.  All this time thinking about that bite of Jenny’s Gooey Butter Cake and this is what I get- cheesecake.  I cursed myself, first for using the pumpkin version instead of the traditional Paula Deen recipe, and then for changing it, thinking I knew better as if I was professional baker.  Crap.

DSC_0874

Wes came in from working in the yard and smelled the house, proclaimed it smelled like heaven.  I gave him a quick sigh of frustration and told him how stupid this cake was, that I was pissed. (Excuse my language, but I was super mad).  He didn’t really seem to connect with my frustration; all he saw was a perfect looking and smelling cake sitting on the counter.

When the cake had cooled completely I sliced into it, and saw that I was right, it had a cheesecake consistency.  This was not Gooey Butter Cake.  But I plated up the slice and took my photographs, just in case it came out tasty.  When I was done shooting, I took the bite off the fork and smiled with relief.  Deliciousness.

DSC_0919

The cake certainly was not what I planned for, Pumpkin Gooey Butter Cake, but was one of the best pumpkin cheesecakes I’ve had.  Rich but not heavy and the pumpkin flavor was sweet but not like candy.  There was stronger pumpkin taste then in typical cheesecakes which I love.

I took a chance in the kitchen, which is not unusual for me to do, but I don’t typically mess around with baking recipes.  In this case I was lucky; my chance had a happy ending.  Jenny’s Gooey Butter Cake is still on my must make list, and this Pumpkin Gooey Cheesecake is now on the repeat list!

Here We Go! Here We Go! Steeler’s Peach Salsa

Sir Wes is lighting up the grill this weekend to get his wings on.  As you must know it is the long awaited NFL Kick-Off Weekend.  With coals already burning, I thought I would cut line and grill some peaches before the wings hit the grill for a quick salsa.

DSC_0216

I do enjoy watching football, but tend to get distracted easily.  I sometimes find that  can watch all four quarters and not be able to tell you what happened.  Not all games, but some…

DSC_0190DSC_0184

Steeler’s Grilled Peach Salsa

  • 1 1/4 pounds ripe peaches, (3-4 medium), pitted and sliced in wedges
  • 1 teaspoon canola oil
  • 2 tablespoons finely chopped onion
  • 2 tablespoons red bell pepper
  • 1 small jalapeño pepper, seeded and finely chopped
  • Zest and juice of 1 lime
  • 1/4 cup chopped fresh cilantro

Prepare grill, charcoal or gas, to medium heat. Brush the peaches sections lightly with oil.  Place the peaches directly on the grill and cook until charred and softened, 3 to 5 minutes per side. Remove from the grill and cool in refrigerator.  Meanwhile mix the onions, peppers, lime juice, cilantro and a touch of salt.  When cooled, chop the peaches into 1/4-inch pieces and add to the mixture, tossing delicately.

This salsa works will with chips as well as grilled fish, chicken, pork and anything else that might be on your game day table!

DSC_0214

About half way thru the football season I will start to focus more about what is on the table then what is on the TV.   By 3/4 thru the season the only thing that keeps me tuning in is the Steelers and my fantasy teams.  I am a tough competitor (I like to think anyway) in 2 Pigskinner Pick ‘Em Leagues, the owner of one fantasy football team, and assistant coach to another.  By this late into the season I have started planning the Superbowl Menu and tuning into Real Housewives in lieu of the 8:00 game.

DSC_0209

That’s pretty much my football season, but for this weekend I am all in!

By the way- did you notice how shiny and pretty the Notre Dame Gold helmets are?  Here we go! Here we go!!

The Art of the Pizza Roll, Tailgate Chefs- Game On!

Game Day, Game Day, Game Day!!  College Football is Kicking Off!!  I believe in the Football/Tailgate Cuisine Movement, support it 100%!  I love the playfulness of the food, the comradery it inspires between guys and their grills, the artisanal care that nonchefs are putting towards the pop up tailgate table.  The craft direction is strong within this mouthwatering cuisine.  It is downright hard to find someone that does not have fond memories of tailgate food.

DSC_0713

Thank you Emily for the deliciousness, for the loving tenderness you put towards this football food recipe.

DSC_0671

Perfect Pizza Crust (if you’re in a jam, buy the premade dough in your grocery store)

  • 2 cups bread flour
  • 1 1/2 tsp. instant yeast
  • 1 tbsp. extra-virgin olive oil
  • 3/4 tsp. salt
  • 1 cup hot tap water

In a stand mixer with a dough hook attachment place the flour, yeast, and salt. Quickly mix together the dry ingredients.  Pour in the oil and hot tap water and stir for about 10 seconds. The dough should be wet enough to leave a little residue on the side of the bowl at this point but not so wet that it’s gooey. Adjust if needed with a little flour or tiny bit warm water. Knead for about 5 minutes until the dough is smooth and elastic. Dough should be tacky to the touch. Do not add any flour or water after the dough is done mixing.

In a deep oiled mixing bowl, place the dough ball and place plastic wrap or damp towel directly over the dough.  Allow to rise until doubled in size, I set mine outside in the warm air, but near a window, or even a warm oven will do. Once risen, punch dough to deflate it.

  • 1 cup Pizza Sauce
  • 1 ½ cup mozzarella cheese
  • 4 Tbsp. melted butter
  • 3/4 Tbsp. garlic bread seasoning

Make pizza crust according to directions and let raise once. After it has risen, turn it onto a counter sprayed with cooking spray and roll it out thin, in the shape of a rectangle. Spread sauce; you may only need 1/2-3/4 cup but you can use the rest for dipping after the rolls are cooked. Add cheese and start rolling the dough tightly in a neat line. When there’s about an inch of dough left, stop rolling and pull the edge up and over, pinching it closed.

DSC_0632

With a serrated knife, gently slice about 1-inch thick. Lay the rolls in a 13×9-inch baking pan, sprayed with cooking spray. You should get about 12 rolls out of the dough. Cover lightly and let the dough rise again until about doubled.

DSC_0652

Preheat oven to 375 degrees. Combine melted butter and garlic bread seasoning and brush over the tops of the rolls. Bake for about 17-20 minutes.

DSC_0680

Serve warm either plain or with extra pizza sauce for dipping.  Reheat any leftovers in the same fashion you would with leftover pizzas. Or if you are taking to the tailgate party, wrap them in a sheet of foil and warm them on a low heat grill.

DSC_0702

We are heading out to the Alabama and Virginia Tech game today and can’t wait to see what we find at the lot full of tailgate parties!! Roll Tide!

Chewy Toffee Bars- An Answer To A Long Distance Toffee Love Affair

Grocery store rituals. Everyone has them, from when they shop, to which stores they prefer, reusable bags or always forgetting them, do you browse or go straight for the items on your list, if you even made a list.  And I would guess that we are all pretty consistent with these habits. One of my rituals is stopping at grocery stores I haven’t shopped at before, so I can search items on my “Can I Find” list, which contains about 10 items I am on the prowl for. Some of the items are things I grew up with in Philly, some that my mom, Queenie, swears by, and some that I have had while traveling and I’m hoping to find again.

DSC_0221

One of the things on my list is Heath Bar Cookies at Publix, which are by far the best store made cookie on the shelves.  Queenie has spoiled my husband with them, every visit she is sure to bring him a package.  He has a long distance love affair with this toffee cookie.  In between visits I try to find ways to satisfy his toffee tooth.

DSC_0178

These bars came out pillow soft and chewy, very similar to the beloved Publix cookie.  The amount of salt is perfect complement to the sweet toffee.  Salt and toffee should never be separated from each other.   The nuts can stay or go, pending if you are a nut fan or not.

DSC_0174DSC_0190

I just barely modified Jamie Deen’s recipe

Ingredients

  • Cooking spray
  • 1 1/2 sticks (12 tablespoons) unsalted butter
  • 2 1/4 cups packed light brown sugar
  • 2 cups all-purpose flour
  • 2 teaspoons baking powder
  • Pinch of salt
  • 3/4 cup walnuts, chopped
  • 2 large eggs
  • 2 teaspoons vanilla extract
  • 1 cup toffee pieces

Directions

Preheat the oven to 350 degrees F. Spray an 8-inch-square baking dish with cooking spray and place a piece of parchment paper over the pan.  Give the parchment another spray coating it evenly.

In a medium saucepan melt the butter over medium heat; stir in the brown sugar until smoothly melted.  Remove from heat and let stand 5 minutes.

Now in a medium bowl, whisk together the flour, baking powder and salt.  Freshen the walnuts by toasting them in a medium skillet over medium heat, 6 to 8 minutes until fragrant; remove from hot pan to cool.

Beat in the eggs, one at a time, into the cooled butter-sugar mixture, next whip in the vanilla.  Stir in the flour mixture and mix until combined.  Gently fold in the toffee pieces and toasted walnuts into the thick batter.

Spread the batter in the parchment lined pan. Bake until golden brown and a toothpick inserted into the center comes out clean, about 45 minutes. Let cool 15 minutes, lift out of the pan and cut into 1 inch pieces.

DSC_0240

Makes about 16 chewy, gooey, salty, sweet treats.

I don’t think I will ever be able to walk into a Publix without looking in the bakery for the Heathbar cookies, they are a permanent item on the “Can I Find” list.  I know we can buy them in South Carolina when we visit Queenie’s, or get them when she visits us, but the hunt is fun, the idea that one day I’ll find an item on my list is great!

DSC_0232

In the meantime these Chewy Toffee  Bars are a welcomed substitute!   Queenie, this does not mean you don’t need to continue supplying Sir Wes’ love affair.

Late Summer Peach and Mint Bulgur Salad

We still have peaches filling the produce section of our grocery store with juicy, sweet smelling nectar.  I found this summer that I am definitely a peach person.  They just translate so well with other foods.  I love them with desserts and savory dishes, herbs, wines, fish, pork, chicken, vegetables, grilled, poached, raw, sautéed, flambéed.   It’s hard for a peach not to make anything better.

DSC_0412

Quick and easy, fresh and tasty.  All words that matter when we think about school kicking back in.   With peaches still hanging on to the season, I saw this salad and knew it would make a perfect cookout side, a last day of summer picnic lunch, or even an on the go salad.

DSC_0394

Thanks to Cooking Light

Ingredients

  • 2 cups water
  • 1 cup uncooked bulgur
  • 2 tablespoons champagne vinegar
  • 2 tablespoons extra-virgin olive oil
  • 2 teaspoons brown sugar
  • ¼ teaspoon salt
  • ¼ teaspoon fresh ground black pepper
  • 1 cup diced fresh peaches
  • ½ cup chopped hazelnuts, toasted
  • ¼ cup small fresh mint leaves

DSC_0416

Preparation

In a small sauce pot bring 2 cups water and bulgur to a boil. Place cover on the pot, reduce heat to medium, and cook about 10-12 minutes until tender.

While bulgur is cooking combine vinegar, oil, sugar, salt and pepper in a large bowl.

Drain the bulgur from the sauce pot and give a quick rinse of cold water.  Add warm bulgur to the vinegar and oil mix and toss.  Allow to cool to room temperature and add the peaches and mint to the salad.  Refrigerate until ready to serve.

Serves 4-6

DSC_0455

Hold on tight to these last moments of summer; enjoy the longer days, the warm evening sunsets, and the family time.  Also- hold on to the peaches, as the perfect fruit will be gone soon.

Cilantro Jalapeño Corn Cakes

Maybe you can tell I like Southwest/Mexican food- Mexican Shrimp Ceviche, Mexican Corn and Poblano Chowder, Texas Caviar, Spanish Turkey Meatball Stew or even Peanut Butter Stuffed Jalapeños.  Pretty much, if it has cilantro I am guaranteed to love it.  My husband knows that after a bad day for me, chips and salsa are the best Band-Aid.  The good kind of salsa, fresh loaded with cilantro with warm thin salted corn tortilla chips.   So admittedly, I am a sucker when I see dishes with cilantro or Mexican/Latin flavor profiles.  Enter these irresistible southwest spiced corn cakes.

DSC_0331

We were smoking a few chickens and needed a side, both of us agreed that a corn cake would be perfect side for the summer cookout.  And absolutely, lets add cilantro.

DSC_0347

Ingredients

  • ¾ cup flour
  • ¾ cup cornmeal
  • 2 teaspoon sugar
  • ½ teaspoon baking soda
  • ½ teaspoon kosher salt
  • 4 ears or 2 cups fresh corn kernels, separated
  • 1 egg
  • 1 jalapeño pepper, seeds removed
  • 1 clove garlic
  • ½ cup cilantro
  • ½ small red onion
  • ½ cup low fat buttermilk
  • 2 tablespoon butter
  • 1 ½ teaspoon fresh lime juice

DSC_0321

Instructions

1. Mix the flour, cornmeal, sugar, baking soda, and salt in a medium mixing bowl.

2. Using a food processor, combine only 1 cup corn, egg, onion, jalapeño pepper, garlic, cilantro, buttermilk, and butter and pulse until finely chopped but not smooth.

3. Fold the pulsed corn mixture into the flour mixing bowl and mix in the remaining cup of corn kernels and lime juice.

4. Heat a heavy bottom skillet over medium high heat. Spray with pan spray or use a touch of olive oil and scoop ½ cup cakes into the pan.  Brown on first side and flip to other, each should take about 3 minutes.

This will make about 8 small pancakes.

DSC_0370

Garnish with a simple avocado salad, fresh tomatoes and sour cream, smoked pork or chicken, even a seafood ceviche.  Try making them with a ¼ cup measure and use as a canapé.

DSC_0316

If you happen to have leftovers, they freeze great- just wrap them tightly to avoid freezer burn.  Reheat the thawed cakes in an oven set at 350, for 10-15 minutes.

DSC_0319

These are perfect for the end of summer, into fall get together.  Even reheating on a tailgate grill on a piece of aluminum foil, anyone ready for football?

Green Tomato and Fig Cakes- Taking Chances In The Kitchen

I saw these a few weeks ago and they have not left my head, my curiosity was peaked, I had to know.  The flavor combination in a dessert  was too strange to let go, but after thinking about it I realized green tomatoes don’t have a ton of flavor and would likely pick up the flavor you pair with it.  I was right.

DSC_0275

Not a lot of tomato flavor, but still super tasty, they had a comparable flavor to carrot cake, but less sweet, without as much sugar.  The petite cakes are moist even a few days later.  Overall I give them an A (skipping the plus as I really wanted to taste the tomato more) but certainly good enough to eat for breakfast, which is of course the international sign of good desserts.

DSC_0289

Modified from Cooking Light 2013

Ingredients 

  • 8 ounces green tomato, cored and quartered 
  • 7.6 ounces cake flour, sifted (2 cups) 
  • 1 teaspoon baking powder 
  • 1/2 teaspoon baking soda 
  • 1/2 teaspoon ground cinnamon 
  • 1/4 teaspoon salt 
  • 1 cup granulated sugar 
  • 1/2 cup canola oil 
  • 2  large eggs
  • 4 ounces dried figs
  • 6 ounces orange juice 
  • 2/3 cup chopped walnuts 
  • Cooking spray
  • 2 ounces 1/3-less-fat cream cheese
  • 3/4 cups powdered sugar 
  • 1/2 teaspoon vanilla extract 
  •  Dash of salt 
  •  Sliced figs garnishes

DSC_0292

Preparation

Preheat the oven to 350°.

Place tomato in a blender; blend until smooth.

Weigh or lightly spoon flour into dry measuring cups; level with a knife. Combine flour, baking powder, baking soda, cinnamon, and 1/4 teaspoon salt in a bowl. Place sugar, oil, and eggs in a large bowl; beat with a mixer at high speed until blended. Stir in tomato puree and orange rind. Add flour mixture to egg mixture; beat at low speed just until combined.

In a small sauce pan add the orange juice and dried figs.  Bring to a simmer and cover for 5 minutes.  Remove from the stove and take out the figs of the juice.  Allow to cool to room temperature before chopping into small ¼ inch pieces.  Stir in chopped figs and walnuts into the batter.

Place 18 muffin cup liners in muffin cups; coat liners with cooking spray. Spoon the batter into cups. Bake at 350° for 17 minutes or until a wooden pick inserted in center comes out with moist crumbs clinging. Cool in pans 5 minutes. Remove from pans; cool completely on wire racks.

Place cream cheese in a large bowl; beat with a mixer at high speed until smooth. Add powdered sugar, vanilla, and dash of salt; beat until smooth. Spread frosting over the top of each cake. Garnish with sliced figs, if desired.

DSC_0262DSC_0349

I cut the cream cheese icing in half, as I wanted to lighten them up more.  Feel free to double the icing ingredients if your looking for a heavy iced cupcake.

DSC_0334

When you see something that you can’t let go, you just have to go for it!  It might not be exactly as you hoped, but we all know not everything turns out the way you hope.

Green Tomato with dessert? I am a fan!

Breakfast Stuffed Biscuits- Alabama Biscuit King Copycat

Travel for our family often encompasses eating explorations, sure, history and local culture top the list too, but all of us can usually agree on getting to the locals only must eat store (eat-store, aka restaurant, coined by my nephew Sir Sully).  We recently dined our way thru a vacation in Lower Alabama.

PhotoGrid_1373727162049

Gi-Normous, ugly and heavenly filled mouthwatering, belly aching irresistible biscuits are not to be missed on your next trip to LA (lower Alabama).  And they are born and raised all within view of the curious diners.  We visited the home of these ugly treasures, called Biscuit King Cafe in Fairhope, Alabama felt like we stroke gold, and as mentioned above, a small belly ache from over indulgence.   This small family business has something going for sure.

PhotoGrid_1373727521206

After taking the first few bites the rest of meal was spent ogling what was going on in the kitchen.  When sheet pans went in the oven, how long until they came out.  What did the fillings look like, how did they stuff them.  We asked the ladies cooking a few questions, some of them laughing at us, in particular when we asked if any of the fillings were raw… “you caaan’t  put raw  food in a biscuit, thaaat’s just craaazy”.  Deep South stuffed biscuit etiquette explained…

DSC_0262

Happily we took enough away that I was able to recreate a similar recipe- Surely the Biscuit King reigns supreme, but until theirs and mine go head to head, I will stand by these are just as good!

DSC_0300

Ingredients Biscuit Filling

  • 6 ounces slice turkey or ham, julienned into strips
  • 6 eggs
  • ¼ cup milk
  • 1 tablespoon unsalted butter
  • 4 ounces shredded cheddar

Biscuit Dough

  • 4 cups all-purpose flour, plus more for dusting
  • 1 tablespoon plus 1 teaspoon baking powder
  • 1 teaspoon baking soda
  • 1 teaspoon salt
  • 1 teaspoon sugar
  • 2 sticks (1 cup) unsalted butter, cold, cut into small pieces
  • 1 3/4 cups buttermilk, plus more for brushing

Biscuit Topping

  • 2 tablespoons butter, melted
  • Sea salt

Directions

In a frying pan, over medium heat with a small amount of oil, sauté the meat until caramelized with golden color.  Remove the turkey from the pan and take the pan off the heat.  Whisk together the eggs and milk until frothy, and return the pan to the stove.  Over medium heat add the eggs to the sauté pan and cook until softly scrambled before removing from the heat.  Make sure not to overcook as there will be carry over cooking and reheat in the oven.  Add the tablespoon of butter to the eggs and mix until melted and incorporated.  Refrigerate until ready to assemble the biscuits.  Keep the eggs and the meat separate.  Be sure they are both cool before assembling as it will eliminate chance of overcooking the eggs.

DSC_0164DSC_0174

To make the biscuit dough:

In a large mixing bowl, whisk the flour, baking powder, baking soda, salt, and sugar together. Using a pastry blender or your hands, cut in the butter until the mixture resembles coarse crumbs with a few large clumps remaining.   The butter should be cold, and will leave some lumps.  If you prefer to use your hands be quick and make sure the butter is very cold so it doesn’t melt.  I like to use my hands so I can get the flour/butter mixture to crumb faster.

DSC_0178

Pour in the buttermilk and fold the flour until the liquid is incorporated.  The dough will stick together in a ball and be slightly tacky.  Do not overmix as this is when biscuits become rocks.  Allow the dough to sit for a few minutes before assembling the biscuits.

On a lightly floured surface, scoop out a half cup measure of dough and with floured fingers, gently pat the dough into a 6 inch circle.  The thickness should be about ¼ inch.  Repeat with another half cup portion of dough.

DSC_0211

To assemble and bake:

Preheat the oven to 375 degrees.

Spread a ½ cup of the chilled scrambled eggs over the surface of one biscuit disc.  Sprinkle a ¼ of the turkey/ham over the eggs and then follow with an ounce of shredded cheese.

DSC_0199

Gently lift the remaining disc and place on top of the egg and cheese filling.  Press the edges together and tuck the seam under the bottom of the disc.  Transfer the stuffed biscuit to a parchment lined baking sheet and brush with butter, followed with a sprinkle of sea salt.

DSC_0222

Repeat process three more times for a total of four stuffed biscuits.  Place each two inches apart, which may require using two baking sheets.  Bake at 375 for 40 minutes, rotating baking sheets half way.  The temperature of the center should reach 160 degrees.

DSC_0258

These can be held in a warming oven for about 30 minutes.  We had one leftover that we reheated in the microwave the following day which turned out was still pretty good.  Certainly best fresh from the oven, but I won’t be throwing out the one that doesn’t get eaten.

DSC_0282

It is a state that does many things right – Perfect color of Crimson, rows of pecan fields, perfectly drawn hounds tooth, National Championships, Silver Queen Corn, gardenia scented streets, and now… Stuffed biscuits.

DSC_0289

Roll tide, Roll Biscuits!

Farm Berry Southern Cobbler- #AlabamaBakingProblems

We took a trip last week to Alabama to visit Sir Wes’s family.  Very often when one goes home to the place they grew up, to a mom that cooked every Sunday thru Saturday for them thru their childhood, one would expect to get some of that home cooking.  In fact, we did get a belly full of a southern mother prepared feast, but did miss one key, controversial dessert- The Farm Berry Southern Cobbler.

DSC_0215

Thru our years of marriage, Sir Wes has talked and talked about the cobblers that were made every weekend by his Mom or one of her 4 sisters.  He stated,  “there is not a better dessert then the Farm Berry Southern Cobbler that my Mom and my Aunts made”.   And after these years of marriage, on our many trips to his mother’s home, I would have hoped to try it.  Turns out, it isn’t that simple.

DSC_0712

We go to the his Aunt Alice’s, the family farm as I call it, and pick the blueberries from the trees.  I am always sure to pick enough to bring back to Florida with us to put in the freezer.   Then either his mom or Sir Wes would get to making this family heirloom recipe.  And then we would sit and wonder what went wrong.  I think they are cursed.

DSC_0707DSC_0703

This last visit, I sat his mom down and asked her to tell me the recipe; she even consulted with her sister to double check.   I knew that Wes’s failure could be attributed to the fact that he ignores directions and amounts when following recipes and does what he wants, but his mom is such a fabulous cook so I wasn’t sure where her mishaps came from.

DSC_0726

Here are my notes:

Ingredients

  • ½ cup or 1 stick butter
  • 1 cup self-rising flour, make sure to use self rising- this might have been where Wes went wrong
  • 1 cup sugar, add a little more if you’re not going to serve any whip or ice cream with it.  Maybe a ¼ cup.
  • 1 cup milk, you can use any type, of course whole milk will taste the best with the higher fat content, but skim will work too.
  • 3 cups berries, preferably from Aunt Alice’s Farm

Directions

Preheat your oven to 350.  Melt the stick of butter in the baking dish over the stove, I used about a 10”cast iron skillet as any proper southerner would.  While the butter melts combine the flour, sugar and milk in a mixing bowl and whip until smooth.  Once the butter is melted pour the batter into the baking dish and gently whisk until the butter is mixed to the batter.  Spread the berries into the dish, over the batter.   Bake for 35-45 minutes, until the top is golden brown.

DSC_0170DSC_0175DSC_0183

Serves 8-10 friends.  Add a scoop of whip cream or vanilla ice cream, (Blue Bell of course is the best choice) to top it off.  You can substitute your favorite fruit, or whatever is in season also- peaches, pears, apples.

DSC_0252

As it turns out cobbler is controversial thru America, not just in Sir Wes’s family.  It’s one of those desserts that is so forgiving (minus our previously stated cobbler debacles), there came to be a ton of recipes and versions all with different names.

DSC_0225

The Huffington Post published an article last year that cleared it all up for us- they wrote, “There seems to be some confusion over our baked goods, everyone. Tell the truth: if we asked you to tell us the difference between a crumble, cobbler, crisp, grunt, slump, buckle or brown Betty (without Googling it), could you tell us? Until we started working on this article, we definitely wouldn’t have been able to swing it.”

DSC_0208

Honestly, I have never heard of a “grunt” or a “slump” before reading this.  And I feel like they missed the kind that I see the most- a batter based cobbler.

DSC_0260

After trying the recipe I jotted down from his mom, I still am left wondering what went wrong.  The recipe was perfectly told, easy to follow and simple to make.    However, I am happy to say in true southern form, that Farm Berry Cobbler was blessedly dee-licous!