WESitval and the Coca-Cola Float Cupcakes

Last week was my husband Sir Wes’ birthday or Birfday as he calls it.  It also happened to be my niece and nephews spring break, who were more than happy to come all the way from South Carolina to celebrate WEStival with us.   What kid wouldn’t want to go to a birthday party at Walt Disney World.  Forget the bowling alley/Putt Putt/Chucky Cheese parties, WEStival was where it was at. 

WEStival


Sir Wes had only made two requests for his birthday, first was to spend time with the family and the other was that he wanted Coca-Cola Cake for his birthday dessert; a child hood favorite of his.  Both of these requests were easy and fun to fulfill. 

DSC_0472

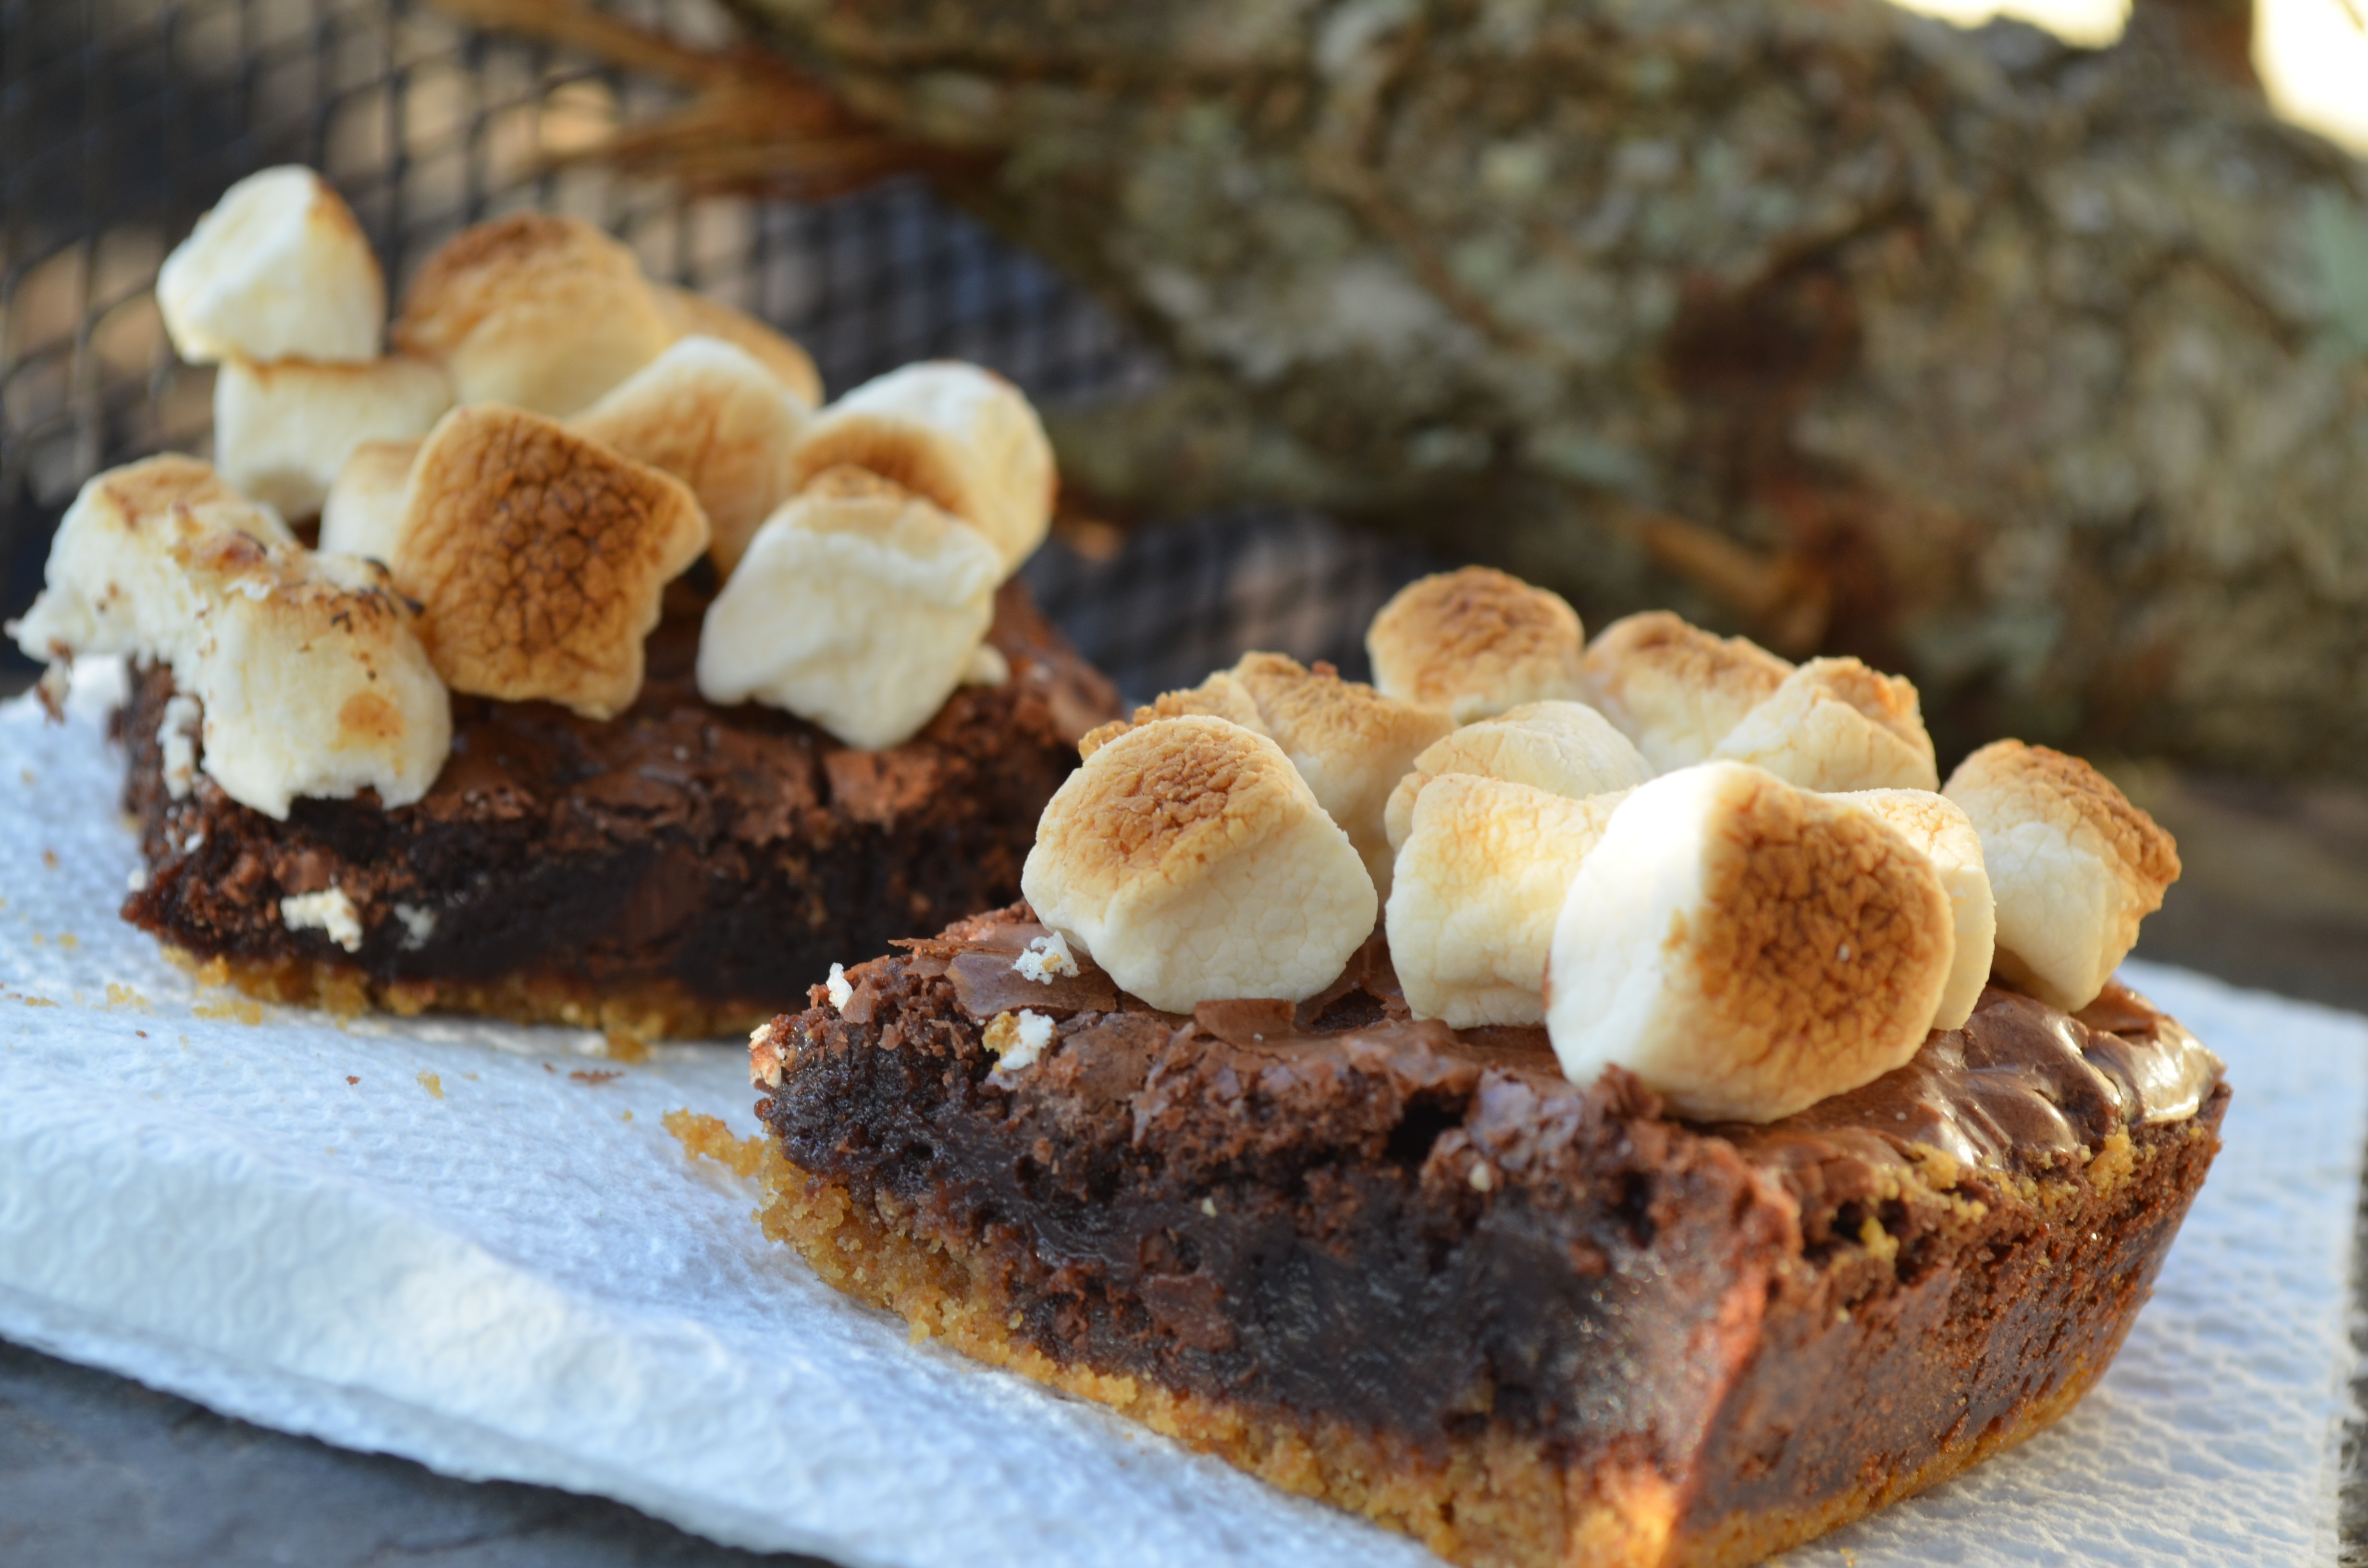
 We spent the few days hopping between the parks and the pools, kids and adults having a blast.  A little of this-

DSC_0054

 And a little of that-

521873_10200239215036251_2098764545_n[1]

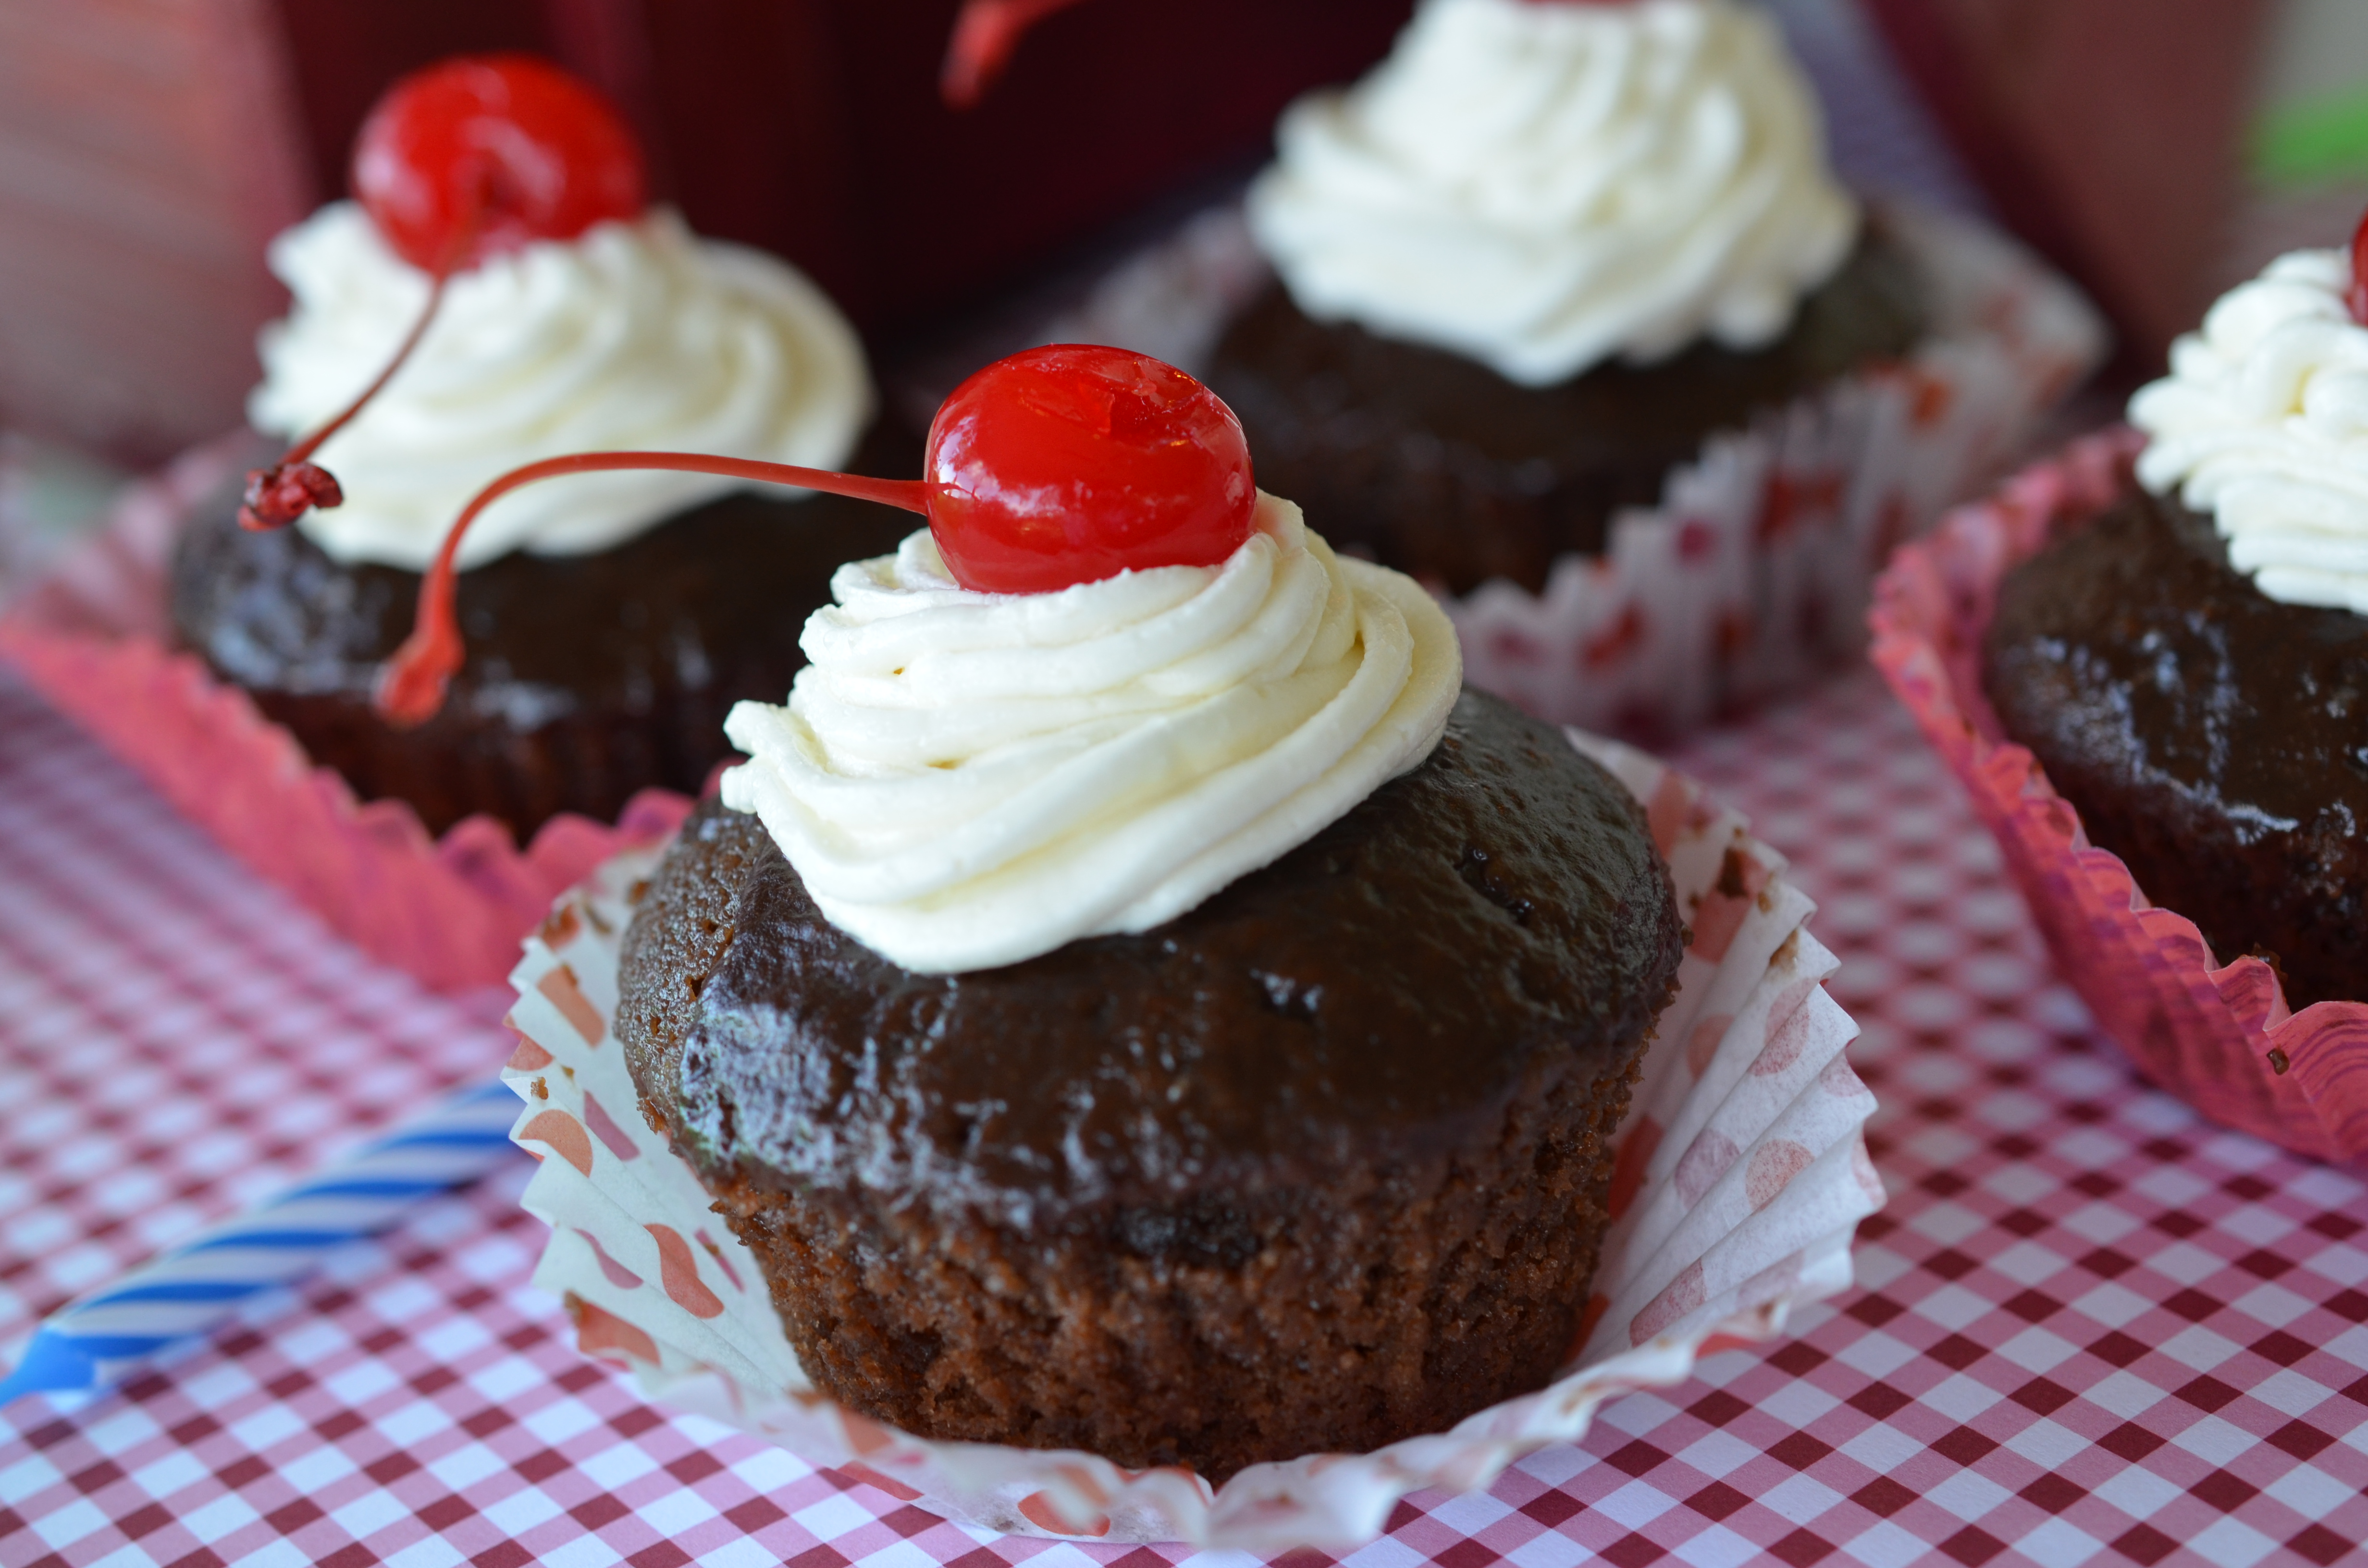
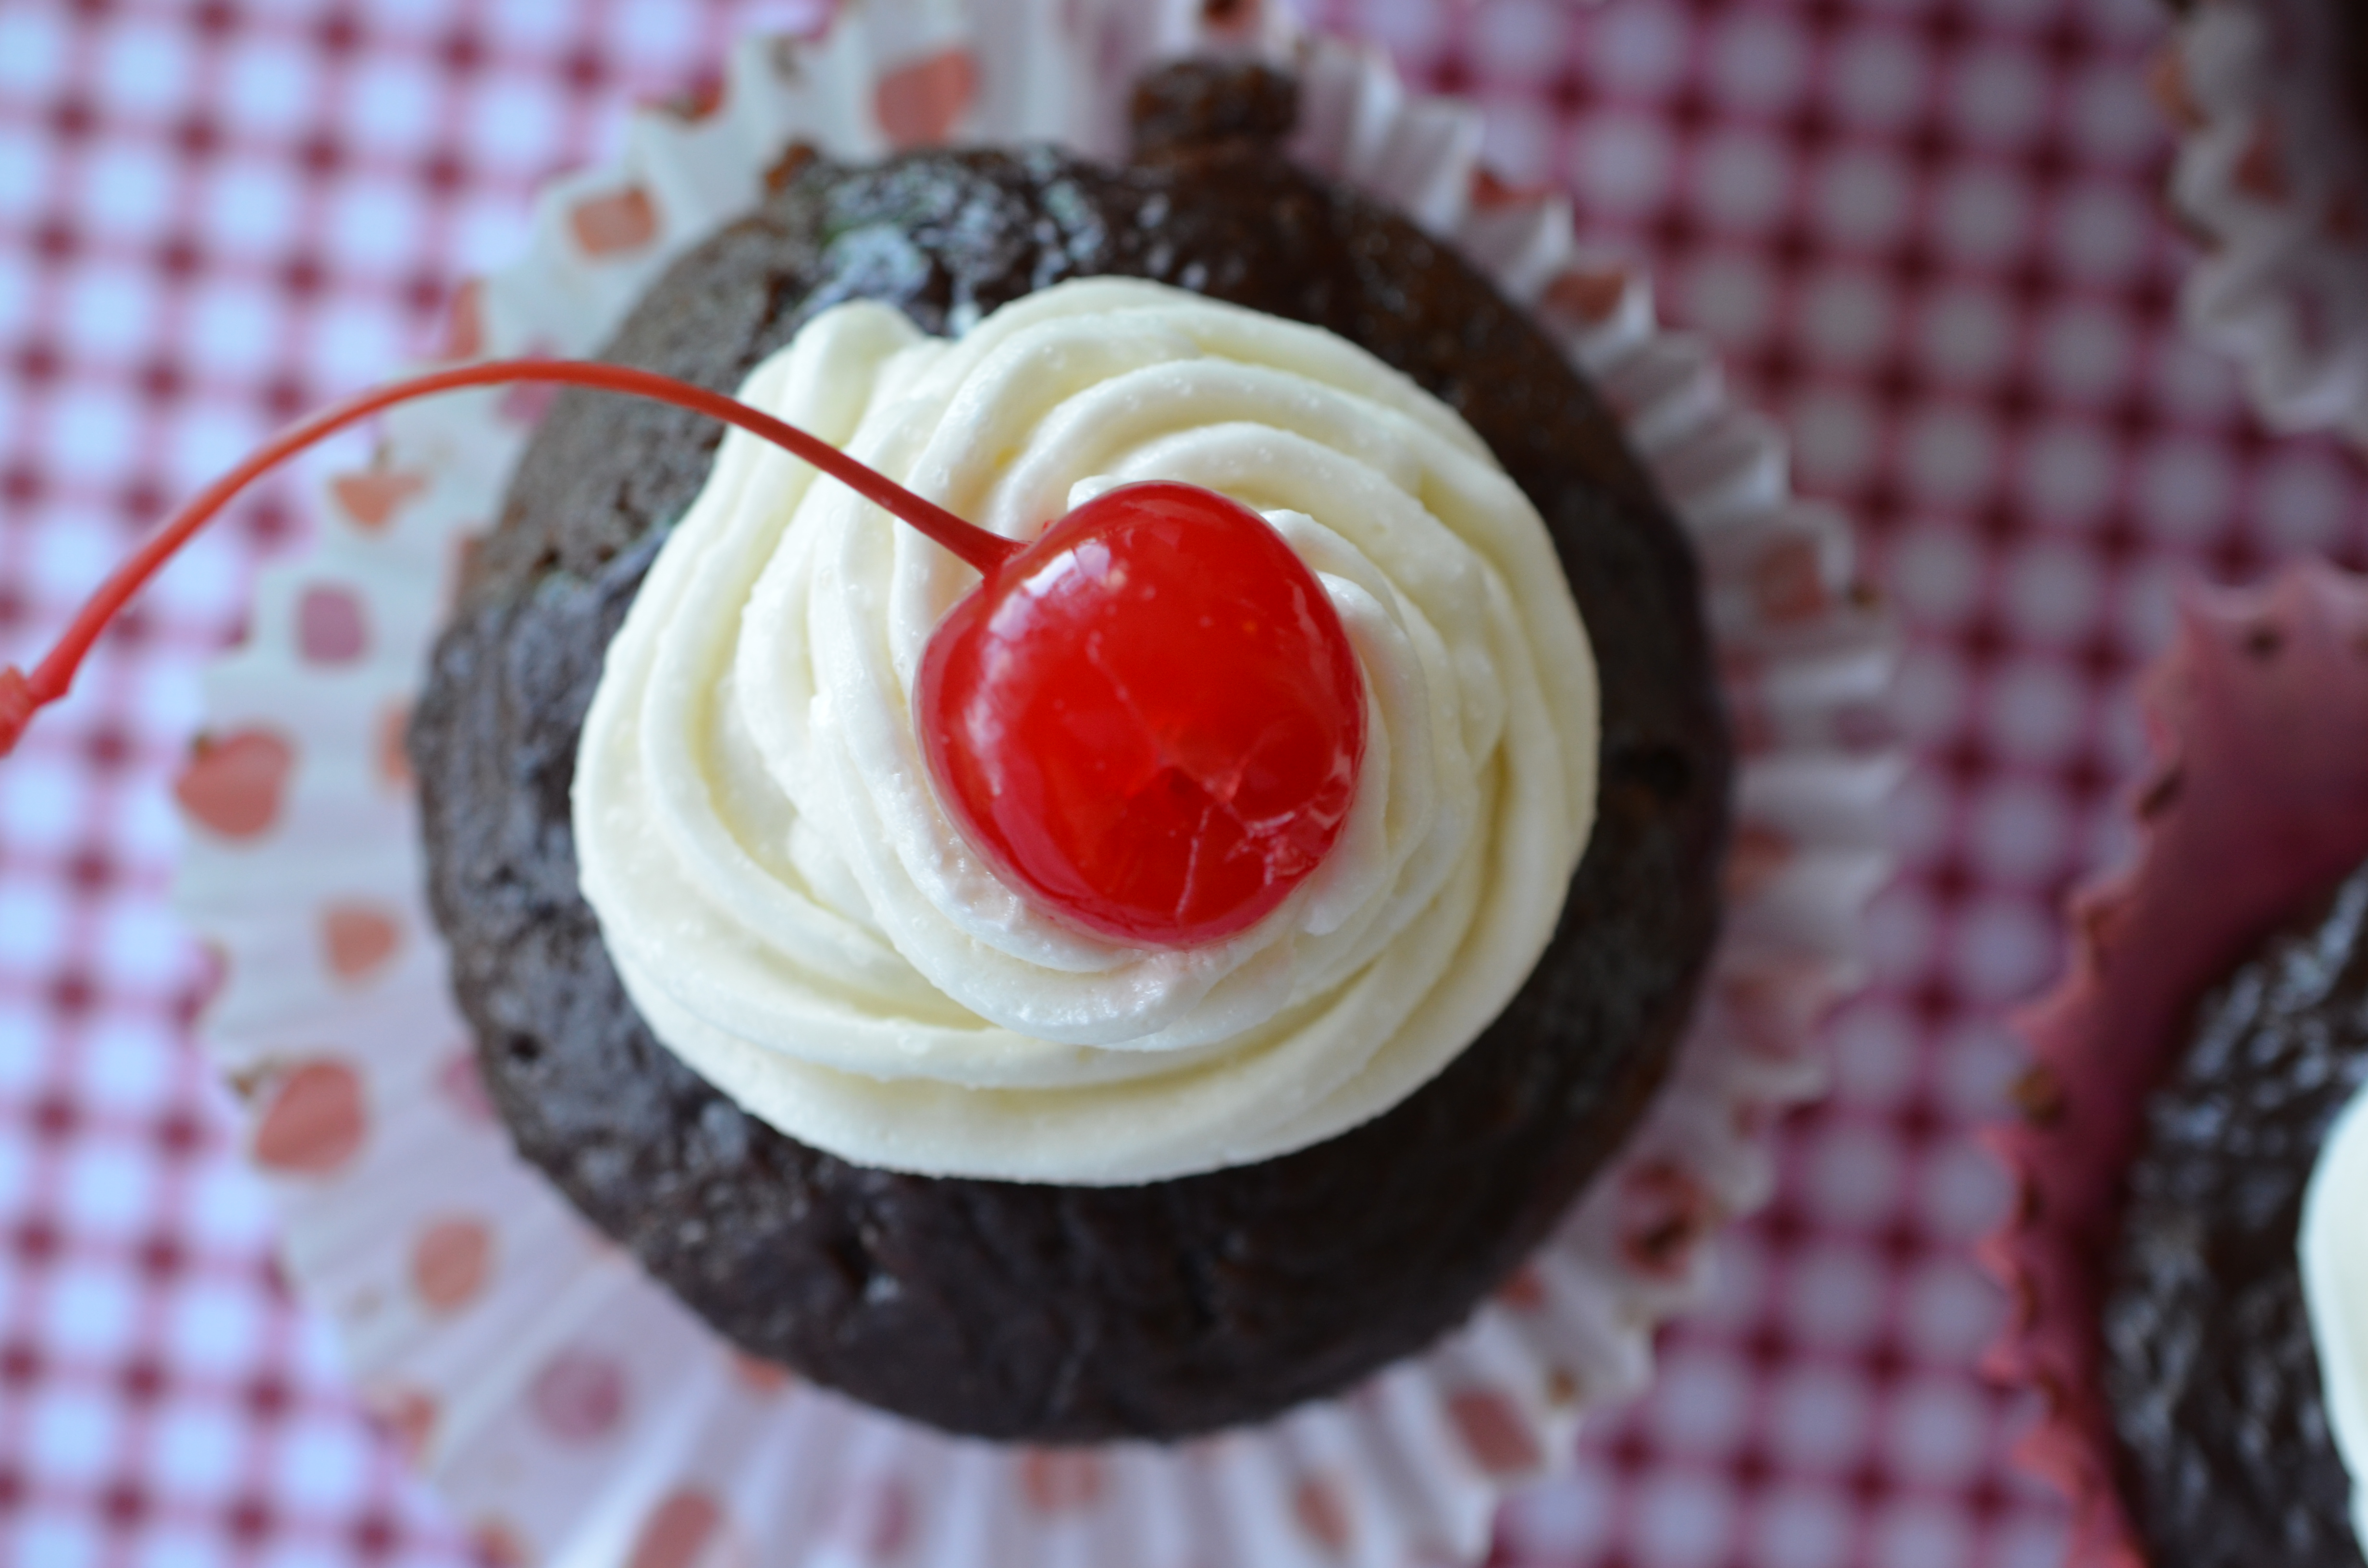
 Coca-Cola Float Cupcakes- recipe adapted from Nigella Lawson’s How To Be A Domestic Goddess

Coca-Cola Cupcakes:

  • 1 1/2 cups all-purpose flour
  • 1 cup + 2 Tbsp. granulated sugar
  • 1/2 tsp. baking soda
  • 1/4 tsp. salt
  • 1 large egg
  • 1/2 cup buttermilk
  • 1 tsp. vanilla
  • 1/2 cup (1 stick) unsalted butter
  • 2 Tbsp. cocoa
  • 1 cup mini marshmallows
  • 1 cup Coca-Cola

 Coca-Cola Glaze:

  • 1 1/2 cups confectioner sugar
  • 2 Tbsp. unsalted butter
  • 1 Tbsp. cocoa
  • 3 Tbsp. Coca-Cola
  • 1/2 tsp. vanilla

 Marshmallow Buttercream:

  • 7 Tbsp. unsalted butter
  • ¾ cup confectioner sugar, sifted
  • 1 Tbsp. milk
  • ½ tsp. vanilla extract
  • 2/3 cup mini marshmallows

DSC_0485

For the cake:

Preheat oven to 350.

In a large bowl, mix together the flour, sugar, baking soda and salt. In another bowl, beat the egg, buttermilk and vanilla. In a heavy-based saucepan, melt the butter, cocoa, marshmallows and Coca-Cola, heating it gently. Pour the warm butter mixture into the dry ingredients, stirring well, and then add the liquid ingredients mixing until the batter is well blended.

Pour into a muffin tin that has been greased or lined with papers filling each well ¾ quarters and bake for 20-25 minutes until a tester comes out clean.

For the glaze:

Sift the confectioner sugar into a bowl and set aside. In a heavy-based saucepan, combine the butter, Coca-Cola and cocoa and stir over a low heat until the butter has melted. Remove from the heat, add the vanilla, and spoon in the sieved icing sugar, whisking well, until you’ve got a smooth, spreadable, but still runny, icing.

Either dip the cupcake tops into the pot of glaze, or carefully pour a tablespoon of glaze over the cupcakes while they are still warm, and leave to cool

For the marshmallow buttercream:

Mix together the softened butter, confectioner sugar, vanilla and milk until the buttercream frosting is a smooth consistency.

Gently melt the marshmallows in a glass bowl in the microwave for 45 seconds on 50% power until they have slightly melted and started to rise up.   Add the melted marshmallows to the buttercream frosting, and whip until completely combined; the frosting should be thick and light.  Spoon the frosting into a piping bag with your favorite style tip and pipe over the cooled, glazed cupcakes.  Garnish with cherries, sprinkles, nuts or your favorite float topping.

DSC_0517

The Coca-Cola Cupcakes came out extrmely moist, and very suitable for travel.  Even a few days later the treats are still delectable.

DSC_0321

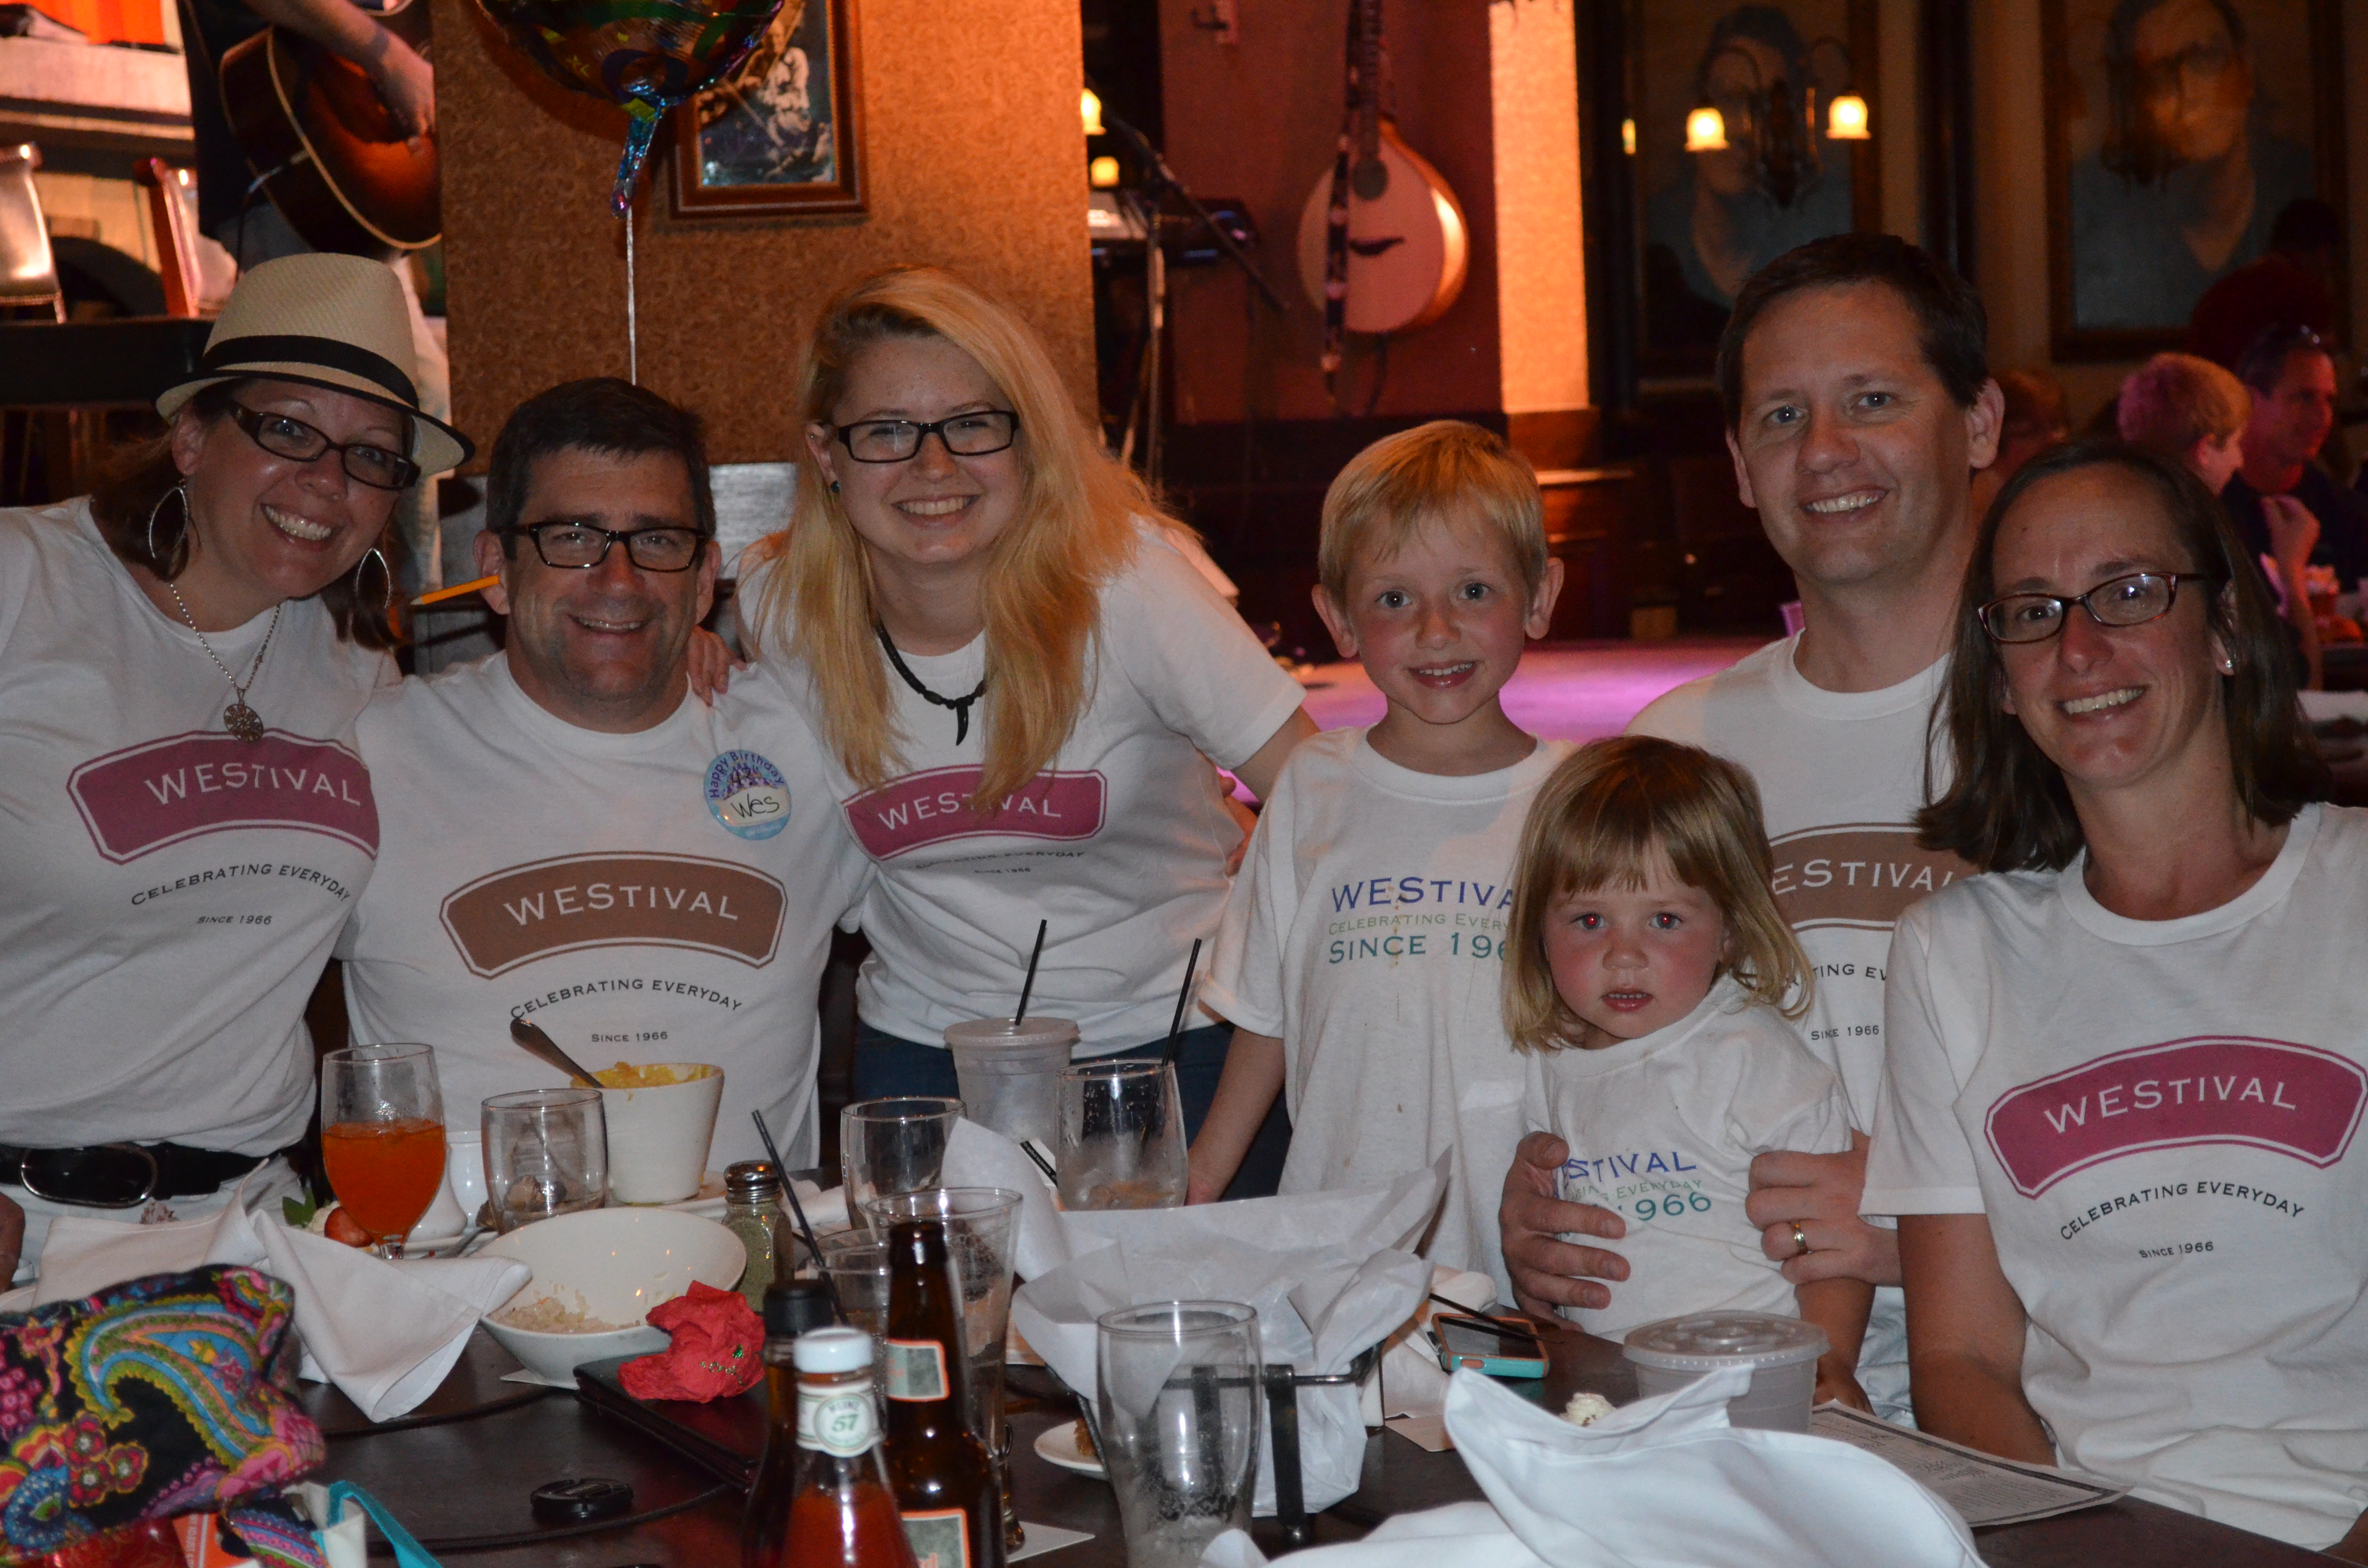
Needless to say, we had a great spring break, and a fabulous WEStival!  Hopefully Sir Sully and Lady Corree are not going to be disappointed in the next birthday party they attend.

Grapefruit Rose Marmalade

My neighbor has a grapefruit tree, one that fills our backyard with the most beautiful smell.  I often just step outside only to get a sample of the intoxicating perfumed air. I’m not sure if this tree’s aroma is the rule or an exception, in any case the scent is profound.  I really don’t care for grapefruit, it’s too bitter for me, but since becoming captivated with the trees aromatics, I have tried and tried to become a fan of the ruby colored balls.  

DSC_0040a

I’ve found that while I don’t enjoy eating a grapefruit out of its skin, I do love it’s flavor for cooking and baking.  Our neighbor leaves a sack filled with grapefruit on our front door a few times each year, which I then return to them in form of a cake or a cocktail.  This year I took inspiration from my love of marmalades and the hope of spring flowers popping up soon. 

DSC_0081a

This recipe came from Desert Candy.  The amount of rose water seems extreme, as a few drops go a very long way when dealing with rose water, but I promise it is perfect.  The most important thing to remember is to keep the pot on a very slow simmer so it caramelizes perfectly, without burning. 

Ingrediants

  • 3 large ruby red grapefruits
  • 3 cups water
  • 4 cups sugar
  • 1 vanilla bean, seeds scraped
  • 2 tablespoons rose water

 Directions

1. Set a large pot of water to boil. Cut off the peel of the grapefruits, working to get good thick slices, but leaving the inner white pith closest to the fruit still attached to the fruit. Cut the peels into strips. Blanch the peels by submersing them in boiling water for about three minutes. Drain in a colander and rinse under running water. Bring a fresh pot of water to a boil and repeat the blanching process again, this removes any bitterness. Drain and rinse again.

DSC_0001a

2. Place the peels in a large pot. Cut off all the white pith from the remaining fruits then, working over the pot, cut between the grapefruit membranes so that the fruit sections fall into the pot. Squeeze juice from the membranes and discard them. repeat with remaining fruits.

3. Add the water and sugar to the pot and bring to a boil, stirring to combine. Lower the heat to a very low simmer. Simmer until the marmalade is thick and translucent, about 90 minutes. The marmalade may still appear a touch watery- keep in mind it will thicken as it cools.

4. Add the vanilla bean seeds and simmer another five minutes. Remove from the heat, stir in the rose water (or lemon) and set aside to cool. You could can this and process in a hot water bath or simply store in jars in the fridge.

DSC_0056a

The marmalades combination of citrus and floral captures the beauty of spring; vibrant colors, lingering floral smells and balanced sweetness spell out spring on your plate.

DSC_0030a

Spread it on your toast, drape it over grilled fish or chicken, make vinaigrette for the garden greens, and even cover a scoop of vanilla ice cream with it. Then add some fresh flowers from Flowers Cork to the table and everything is complete. Spring is in the air! 

Corn Season Kick Off: Mexican Corn and Poblano Chowder

The start of all seasons is inspiring to chefs, but for me the spring and fall seasons really get me going.  Grilling and porch drinking are in full swing, taking advantage of the moderate temperature before the Florida  temperatures rise and push us indoors.   I especially love when the first crop of corn hits the market, as if it’s the symbol of all good summertime events.   Let the corn cooking begin.   

DSC_0020a

I saw this recipe in January using frozen corn and marked it for the start of corn season.  I also have recently fallen for Crema Mexican, thinner version of crème fraiche, sour cream.  The flavor is rich and provides an added depth to many dishes, with it slightly sour flavor, and resistance to breaking when heated.  It is now a stock item in our refrigerator.

DSC_0061a

Recipe has been slightly modified from Martha Stewart

Ingredients 

  • 3 scallions
  • 1 large white onion, quartered lengthwise, root end kept intact
  • 2 large fresh poblano chiles (8 ounces)
  • 3 1/3 cup corn kernels, 4 ears, divided
  • 1 tablespoon smoked sea salt
  • 4 cups plus 3 tablespoons water, divided
  • 2 tablespoons fine cornmeal or masa harina
  • Crema Mexican

20130309_184308a 

Directions 

  1. Cut dark-green tops off scallions, and finely chop. Preheat a large cast-iron skillet over medium-high heat. Place scallions, onion, and chiles in skillet, and cook, undisturbed, until charred on bottom, about 5 minutes. Turn vegetables with tongs, and cook, undisturbed, until charred on other side, about 5 minutes. (Vegetables can also be broiled on a baking sheet.) 
  2. Transfer scallions to a blender. Continue turning and charring chiles and onion until charred on all sides, 5 to 10 minutes more. Remove skillet from heat. Transfer onion to blender.
  3.  Transfer chiles to a bowl, cover immediately with plastic wrap, and let steam 15 minutes. Peel and discard charred skin from chiles, and remove stems and seeds. Halve chiles lengthwise, and slice crosswise into 1/4-inch-thick strips.
  4.  Add 2 1/2 cups corn, the salt, and 2 cups water to blender. Puree until smooth, about 1 minute. Transfer puree to skillet. Stir in remaining corn and 2 cups water. Bring to a boil over high heat, reduce heat, and simmer, stirring occasionally, until thickened slightly, about 8 minutes.
  5.  Whisk together cornmeal and remaining 3 tablespoons water. Stir into soup along with chiles, and simmer until it has the consistency of porridge, about 2 minutes.
  6.  Divide soup among 6 bowls; garnish with chopped scallion greens, and add a scoop of crema mexican. Soup can be refrigerated 2 days; let cool completely before refrigerating. Gently reheat in a covered pot over medium heat, stirring occasionally.

DSC_0028a

Back yard gardens are growing, farmer markets are getting in new local goods, sun is setting later, charcoal grills are burning, sprinklers are being run thru, cookouts are the new social scene! Cheers to all things spring blossoming!

Buffalo Chicken Balls

March Madness is screaming for its own version of tailgate food.  What a better answer then some balls!  Let’s face it; wings go with sports, all sports, they’re almost a food group.  It’s a rite of passage, watch a game and eat wings (and of course drink beer).  As with all superior food groups, chefs strive for reinterpretations and tributes to the pedestaled dish.

DSC_0106

These are surely a way to a man’s heart, and completely loved by the fussy woman that dislikes gnawing on bones.  I do have a few girl friends that hate wings because of the tiny veins found in bones and detest the dirty finger result of eating wings.  My answer- Buffalo Chicken Meatballs.

DSC_0084

Ingredients

  • 1 pound ground chicken
  • 2 ½ teaspoon buffalo wing seasoning
  • ½ teaspoon kosher salt
  • 1 egg
  • 2 tablespoon breadcrumbs
  • ¼ cup blue cheese crumbles

 Seasoned Flour

  • ¼ cup all-purpose flour
  • ¼ teaspoon buffalo wing seasoning
  • ¼ teaspoon kosher salt
  • ¼ teaspoon onion powder
  •  ¼ cup favorite buffalo sauce

*Beer

Directions

Open a beer.

Combine ground chicken, seasoning, salt, egg and breadcrumbs thoroughly.  Place the mixture in the freezer for a few minutes so the mix becomes easier to work with.  Use a small scoop to make between 14- 16 balls, the size of a ping pong ball and place on a cookie sheet.  With the back of the scoop or a tip of a spoon form a well in each ball.   Fill the wells with roughly a ¼ teaspoon of blue cheese.  Drink your beer. Gently reform the chicken into a rounded sphere, focusing on keeping the blue cheese in the center.   Return the balls to the freezer for about 15 minutes to set the shape.

wells

Preheat the oven to 350.  Combine the seasoned flour ingredients in a small bowl and place a sauté pan on the stove over medium high heat.  If you have an Aebleskiver pan use this- I love using mine for meatballs as it gives a beautiful sear all around the meatball. Take a sip of beer.  Add a tablespoon of oil to the sauté pan, or a few drops of oil to the Aebleskiver wells, while oil heats roll the meatballs in the seasoned flour coating them completely.  Place the balls in a hot pan and sear the meatballs evenly until the outside is well browned.

DSC_0069DSC_0071

Swig your beer.  In another small bowl put 2 tablespoons of buffalo sauce.  Remove the meatballs from the sauté pan and place into the buffalo sauce, rolling them around to coat evenly.  Place the balls on a baking sheet and pop into the oven for 10-12 minutes until the internal temperature reaches 165 degrees.  Remove from oven and serve.   This makes enough for 2-5 friends, depending upon the size of the appetite and the other dishes on the table!

DSC_0097

Serve with blue cheese dressing, ranch, celery, carrots or whatever you love with wings (beer).

DSC_0087

March Madness, Buffalo Chicken Balls, Clean Fingers, Happy Wife and Beer- Husbands delight!!

DSC_0128

Happy St. Patricks Day, and Happy Selection Sunday- GO ACC & SEC!!!!!!

Texas Caviar

Not too long ago we had a town hall at work in which the team, or if you work at Walt Disney World, the Cast put together a menu based on their background and heritage.  With over 60 cooks participating, you can imagine how extravagant and flavorful this lunch was.  I took away a ton of idea’s and a full belly, not to mention a recipe or two.

DSC_0162

The recipe for Texas Caviar came from another part of the kitchen team, one of the most important parts- the receiving/ordering team.  They are not chefs, but let me tell you they have more food knowledge then many cooks, form cuts of meat, vegetables in season and which fish are swimming when and where.  Just a reminder to never judge a book by its cover, that everyone you encounter has something to offer.

DSC_0223

As all things in Texas, this “caviar’ offers big texture with big flavor.

DSC_0227

Ingredients

  • 1 each 15.25 ounce can reduced sodium black beans
  • 1 each 16 ounce can reduced sodium pinto beans
  • 7 ounce white corn kernels
  • 2 ounce chopped green chilies
  • 1 fresh jalapeño pepper, chopped
  • ½ each red and green bell pepper, small diced
  • ½ bunch cilantro, chopped
  • ¼ cup rice wine vinegar
  • ¼ cup olive oil
  • 2 tablespoons sugar
  • ¼ teaspoon garlic powder
  • ½ teaspoon kosher salt

Method

  • Drain and rinse beans and corn if using canned.  Combine the beans, corn and peppers in a mixing bowl.
  • Make the dressing by putting the vinegar, oil, sugar, garlic powder and salt in a small sauce pot and bring to a boil.   Immediately pour over the bean mixture and stir well.  Add the chopped cilantro and refrigerate until cool.  Serve with fresh cut veggies, tortilla chips, or over a bed of greens.

The flavors grow with time, mixing and mingling and become perfectly balanced between salty and sweet.

DSC_0194

This has moved to the top of my list for healthy reception dips/salsas.

DSC_0226

Kitchen talk has a wide range, from personal family stories, to tales of out of work shenanigans, to light to heavy teasing of one another, and of course food.  A team of over 60 can bring a lot of ideas and a ton of knowledge, and especially a lot of passion.  It’s easy to forget what a great resource is around you with all the beautiful cookbooks on the shelves and the ease of the internet in our hands or pockets.  More often than not the answers or ideas your search for is under your nose, or paperwork and order sheets in this case.

Chicken Chickpea Curry- Influenced by a Morning with Indian Cuisine Chefs

I took a quick trip to Chicago last year to learn about Indian food, it was an incredible learning experience and left me with a new favorite cuisine.  Not sure why I didn’t realize it before, it makes perfect sense- a lot of vegetarian dishes, no pork, cilantro and a ton of flavor, all things I love!

P1050577j

Being in the kitchen with 2 Indian Chefs for the morning, tasting and learning was a perfect way to understand the philosophy behind the cuisine.  Talk about using a lot of seasoning- there is no dusting or sprinkling in Indian cuisine, it is more like straight up dumping.  The more seasoning the better.   The chefs tasted and layered the flavorful stews and sauces for thru the morning, before lunch was served, adding more and more from the bags of spices.

P1050476P1050493n

I was really amazed at the exuberant amount of seasoning they added to all the food, it reminded me of a Chef I worked with when I first started cooking who didn’t believe in the “standard olive oil, salt, pepper and garlic” marinate, but more pushed us to use heavily seasoned marinates and highly flavorful sauces.  But these Indian chefs took that to a whole new level and I loved it- look at the amount of peppers prepped for one lunch- lol- crazy.

P1050457j

Needless to say, I have become a bit of a dabbler in Indian cuisine; recently I modified a Cooking Light recipe that caught my eye.  I suppose curries are equivalently comforting to me as a beef stew to someone else.

DSC_0007

Ingredients

  • 1 cup brown basmati rice, aka, Popcorn Rice (you can also use standard basmati rice)
  • 1 tablespoon canola oil
  • 1 large onion, diced
  • ¼ cup diced green pepper
  • 1 cup ground chicken
  • 2 teaspoons medium curry powder
  • 1 teaspoon ground cumin
  • 2 (15-ounce) cans chickpeas, rinsed and drained
  • 1 (28-ounce) can unsalted crushed tomatoes
  • 1 (6-ounce) package fresh baby spinach
  • 1 cup plain 2% Greek yogurt
  • 1/2 teaspoon salt
  • 1/4 cup chopped fresh cilantro

DSC_0063 

Preparation

1. Cook rice according to package directions; drain.

2. While rice cooks, heat a Dutch oven over medium-high heat. Add oil to pan; swirl to coat. Add onion, peppers and ground chicken; sauté 5 minutes or until tender, stirring frequently. Stir in curry and cumin; cook 30 seconds, stirring constantly. Add chickpeas, tomatoes, and spinach; cook 2 minutes or until spinach wilts, stirring occasionally. Remove from heat; stir in yogurt and salt. Sprinkle with cilantro. Serve over rice.

DSC_0024

We did manage to have some fun, tried a lot of great restaurants, local food, native micro brews and met a lot of friendly people!  I even had one of my lifetime goals fulfilled… (see evidence below).

P1050611jh

Oh, and one other thing I learned was Chicken Tikka Masala is commonly thought of as being from the Indian culture, but it was derived in England, where Indian food is very popular.  I suppose it is similar to Southwest United States did to Mexican food- Tex Mex…

Being able to learn from expert chefs priceless, if you get the chance be sure to soak it in!

The Art of the Grill Master- Fresh Ground Chicken Burgers with Ginger Slaw

There are a few foods that could be considered an “Art Form”, sushi, bread, soups to mention a few.  There is one that seems to be in almost every household- The Almighty Burger….often the muse of the head Grill Master.  Not every family has a Grill Master, but I bet most do.  In our case, my husband Wes is definitely holding this position. As the Head Grill Master, he doesn’t take this title lightly; every meal that come off his grill is in fact a piece of art.

DSC_0494

Wes has recently taken to grinding his own meats, so he can consider the ratio of fat to meat, the toughness of the cut, freshness of product, and type of meat, be it farm raised, local or organic or even the best deal of the week.  For real… he is in knee deep with developing the “absolute” burger.  In the meantime, we are eating superbly!

DSC_0390DSC_0387

One of his recent expeditions I was able to capture a recipe, and even add to it with a fresh made bun and slaw.

Chicken Burgers

  • 1- 3 pound whole chicken, deboned and ground
  • or
  • 2 pounds ground chicken
  • 4 teaspoons fresh sliced jalapeño
  • 2 teaspoon worcestershire sauce
  • 4 teaspoon favorite all-purpose seasoning
  • 1 teaspoon fresh ground ginger
  • 4 tablespoon chopped cilantro
  • 1 teaspoon kosher salt
  • ¼ teaspoon fresh ground black pepper

Combine all of the ingredients and mix well.  Allow the mixture to sit for a few hours to allow the flavors to blend.  Preheat your grill or prepare your charcoal while scooping 8 -½ cup (4 oz) portions and form patties.  When your grill is hot, cook burgers until they reach the safe temperature of 165.   Serve and enjoy!

DSC_0439DSC_0455

The chicken burger was packed with flavor, and very juicy.  So often burgers made with poultry tend to be dry, but he balanced the breast meat, thigh meat and skin perfectly.

DSC_0476

While Wes was preparing his inspired burgers and the dough for my buns was rising, I took to creating a salad to top the patties.  I love the crunch of a slaw on sandwiches, the texture and acidity adds a great depth.

DSC_0350

Ginger Slaw

Dressing

  • Juice of ½ lime
  • 2 teaspoon orange juice
  • 2 tablespoon mayonnaise
  • 2 tablespoon chopped cilantro

Slaw

  • 2 cups sliced cabbage
  • 3 tablespoons julienned carrots
  • 3 tablespoon sliced celery
  • 1 teaspoon fresh ground ginger

In a small bowl, add the ingredients for the dressing and stir together until creamy.  Combine raw ingredients in a mixing bowl, add the dressing and toss well.

DSC_0488

As in most art forms, the artist is rarely satisfied, but his fans are often thrilled and overwhelmed.  So while Wes continues on his search to find the “absolute” burger, and carries his reign as Grill Master, I will sit back and enjoy his artwork!

DSC_0503

I’d say this Grill Master is truly an Artist!

Everyone loves Buns- Homemade Onion Buns

Buns are often in the spotlight, gawked at and either praised or criticized!  Who doesn’t appreciate a great bun. All kinds of well made buns have their place, firm, soft, big and small included!

Sir Wes particularly loves good buns, especially when there is a burger in the middle.  I love when we fix burgers for dinner as Wes usually takes over this meal; my only responsibility is shopping for the mise en place, when I try to pick out the best looking buns in the bakery.  I recently gave Wes a grinder attachment for the Kitchen Aid, (which by the way, he loves) so when he wanted to use it for the first time to make burgers, I felt a little extra inspired to make my part more notable.  What better way than by making them fresh.

DSC_0415

I tried this recipe from King Arthur Flour a few times, and slightly adapted it to make it work a little better for a bread making novice.

Dough

  • 3/4 cup to 1 cup lukewarm water*
  • 2 tablespoons butter
  • 1 large egg
  • 3 1/2 cups King Arthur Unbleached All-Purpose Flour
  • 1/4 cup sugar
  • 1 1/4 teaspoons salt
  • 1 teaspoon onion powder
  • 1 tablespoon instant yeast

*Use the lesser amount in summer (or in a humid environment), the greater amount in winter (or in a dry climate), and somewhere in between the rest of the year, or if your house is climate controlled.

Topping

  • 3 tablespoons minced dried onion
  • 1 egg white beaten with 1 tablespoon water
  • Topping seeds: sesame, poppy, etc., optional

Directions

  • To make the dough: In a small container, combine the yeast with 3 tablespoons of warm water and allow to bloom for a few minutes.
  • Combine all of the dough ingredients, and mix and knead them—by hand, mixer, or bread machine—to make a soft, somewhat tacky dough.
  • Place the dough in a lightly greased bowl or other container large enough to allow it to at least double in bulk, cover, and let it rise for about 60 to 70 minutes, till it’s just about doubled.  Try a sunny window, or close to a heat source if you struggle with dough rising.

DSC_0283DSC_0294

  • Transfer the dough to a lightly greased work surface, and pat/roll it into a 12″ x 17″ rectangle
  • Sprinkle the dough with the minced onion, and press/roll it into the surface gently. Reserve a small amount of onion to sprinkle on top of the buns.

DSC_0310DSC_0316

  • Starting with a short (12″) end, roll the dough into a log, sealing the ends and side seam.
  • Cut the log into eight slices. A pair of scissors works very well here.
  • Place the buns on a lightly greased or parchment-lined baking sheet, flattening them to about 3″ wide. Cover them, and allow them to rise till they’re very puffy, about 1 hour. Towards the end of the rising time, preheat the oven to 375°F.

DSC_0319

  • Uncover the buns, brush them with the beaten egg white/water, and sprinkle with seeds, if desired.
  • Bake the buns for 20 to 25 minutes, until they’re golden brown and feel set when you poke them.
  • Remove them from the oven, and cool on a rack. When completely cool, wrap in plastic, and store at room temperature.

DSC_0377

It’s fun to take a favorite family meal and make it a bit more special by making something fresh.  Maybe it’s grinding the meat, or making the buns, fresh tortillas or pasta, or even just making a new marinade.  Taking chances in the kitchen is what makes it fun, and also how you grow into a better chef.

DSC_0432

Cheers to each and every one finding the perfect bun!!

Valentine’s Bacon Cake Pops- Tabitha’s Tasty Temptations

Love is in the air or is that chocolate? …or bacon grease?   I hope everyone found some sweetness today, someone to gaze at or a warmth of the heart!   I took this oppurtunity to try out a small local business and gave Sir Wes something I knew he would love- Bacon Cake Pops!

DSC_0085

The greatest part of this confectioner was their custumization- I was ballsy enough to request a special order at the last moment and was lucky enough for it to be granted.

DSC_0087

I have tasted several flavors from Tabitha’s Tasty Temptations– all delicious and unique.  You can tell there is a chef involved with the flavor combinations.  If you are in Central Florida- give them a try.

DSC_0098

So happy I get to spend another Valentine’s Day with my best friend- everyday I know how lucky I am- Love you Sir Wes!!

Smores Brownies

Ahhhh, the Florida winter weather.  Let me pick out what shorts to put on today, ones that match my favorite tan flip flops.  All while I am watching the news reports of the snow storm that has struck the northeast United States.  Piles of snow, city transportation suspended, flights cancelled, tired commuters sleeping on the airport floor- how many Facebook snow related pictures are on your news feed?   Admittedly, I am super jealous- would love to take a sled ride down the hill I grew up with in my Philadelphia back yard.

DSC_0114

Camping season, fire pit season, or even just soft blanket season come unexpectedly in Florida, and is gone before you know it.  I love cool nights that justify buying leather boots or a great looking jacket.  Sitting outside by our fire pit that has only been used a handful of times is a great way to end the day.  When there is a chance of winter visiting Florida, I grab on tight-  boots, fires, blankets, comfort dinners and how could Smores be ignored.

DSC_0124

Generally there is a box of brownie mix in our cabinet, stemming from my inability to resist 2 for 1 at the grocery.  Pastry Chefs may balk, but honestly, I have yet to meet a bad brownie.  Bad Cookies, cakes, ect- yes, I have tasted several that I put down with displeasure, but not the brownie.  Brownies are simply never bad.    With a cool night upon us, I pulled out the box mix and grabbed the smores components that I keep for in hopes of an impromptu fire pit evening.  They came out delicious!  A tall glass of ice cold milk and every bite was a treat.

DSC_0157

Ingredients

  • ½ stick butter, melted
  • 1 cup graham crumbs, about 6 crackers
  • ¼ cup brown sugar
  • 1 box favorite brownie mix, or make your favorite recipe
  • 2 cups mini marshmallows

Directions

Preheat oven to 325.  Combine the melted butter, graham crumbs and brown sugar in a bowl and blend well.  Coat 9×9 brownie pan with cooking spray and spread graham crust evenly on the bottom of the pan.  Prepare brownies as directed on the box or in the recipe and pour on top of graham crust.  Bake  33-36 minutes or as directed.  Remove from oven when the center of the brownies is cooked, try sticking a toothpick in to see if it comes out clean.  Turn the oven to broil and sprinkle the marshmallows around the pan.  Place the pan back in the oven and watch until the marshmallows are evenly toasted.  Remove from oven and allow to cool.  Cut into squares as small or big as you like and enjoy!

DSC_0130

There may not be any sleds or even firepits in my plans for the weekend but the memories of multiple snow suit changes, mugs of hot cocoa and races down the hill will bring a smile when I see the 100th picture of snow in my Facebook feed.

May you enoy the snow or escape the snow this weekend- either way, stay warm in the heart!